Low Cost Diy Playground Ideas
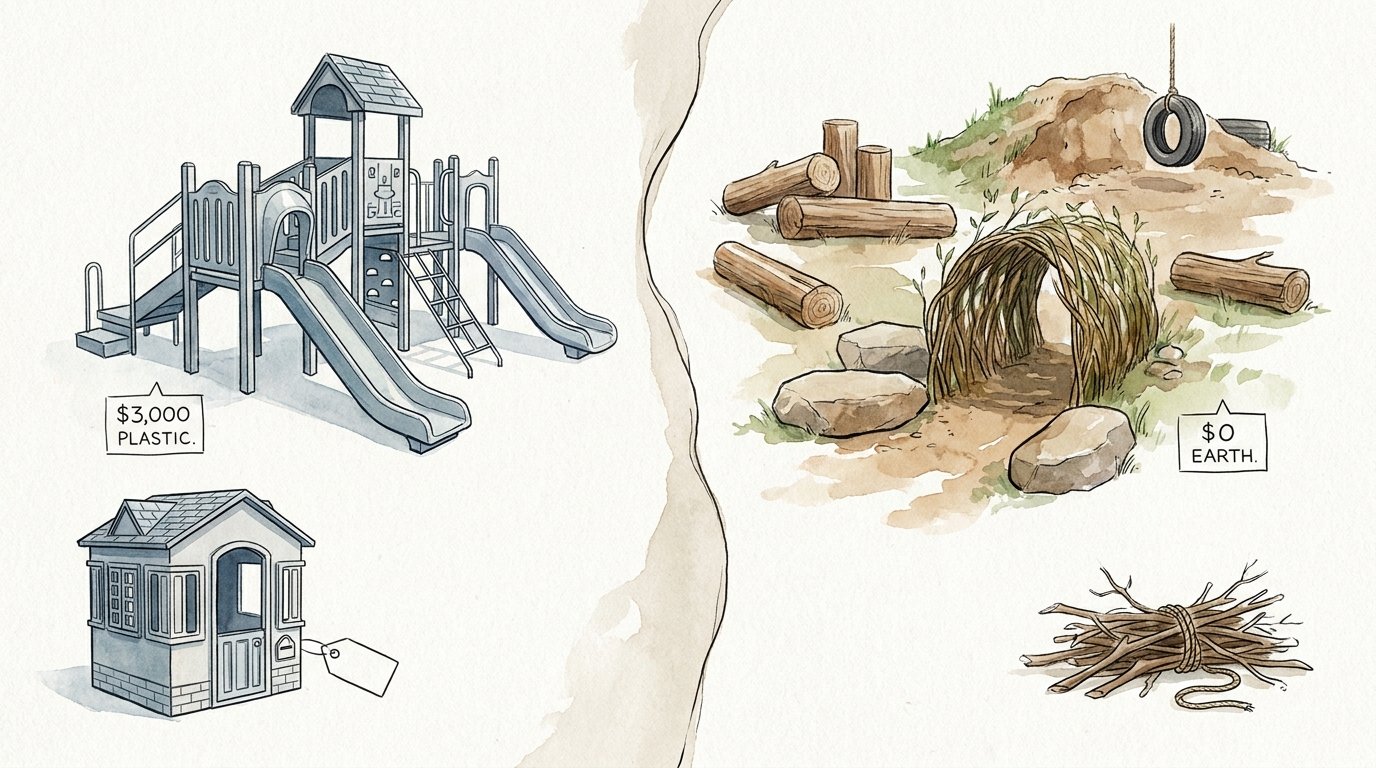
Why are we paying thousands for plastic structures when the earth provides a better foundation for free? We were about to drop 3 grand on a plastic playset that would fade in two summers. Instead, we spent a weekend moving dirt and planting grass. The ‘hill slide’ is now the neighborhood legend, and it cost us nothing but a few hours of sweat equity. Real play doesn’t come in a box.

Most parents think a “playground” requires a truckload of cedar and a degree in structural engineering. It doesn’t. We’ve been conditioned to believe that play is something you buy, assemble, and place on top of your lawn. In reality, the most engaging play spaces are the ones that integrate directly into the landscape. We are talking about $3,000 PLASTIC vs $0 EARTH, and the earth wins every single time.
This guide isn’t just about saving money. It is about reclaiming your backyard from the sea of primary-colored plastic. We are going to explore how to use dirt, logs, tires, and scrap wood to build an environment that challenges your kids and grows with them. If you can handle a shovel and a drill, you can build a play space that outlasts any commercial kit.
Low Cost Diy Playground Ideas
Low cost DIY playground ideas focus on “natural play” or “landscaping for play.” This philosophy moves away from static, fixed equipment like a single swing set and toward dynamic environments. Instead of a plastic tower, you build an earth mound. Instead of a plastic kitchen, you build a mud station from reclaimed pallets. These ideas exist because kids don’t actually need expensive gadgets; they need “loose parts” and varied terrain to stimulate their imaginations.
In the real world, these concepts are used in “forest schools” and “adventure playgrounds” across Europe and are gaining massive traction in the U.S. These spaces use topographical changes—like hills and pits—to create physical challenges. A simple log isn’t just a piece of wood; it’s a balance beam, a pirate ship, or a seat for a meeting. By using raw materials, you create a “Yes” yard where kids are encouraged to move, build, and even take calculated risks.

Think of it as the difference between a movie and a book. A plastic playset is like a movie; it tells the child exactly how to play. A natural, low-cost DIY playground is like a book; the child provides the imagination to fill in the gaps. We are going to use things like old tires, tree stumps from local arborists, and even the dirt already sitting under your grass to create something legendary.
How to Build Your Own Natural Playground
Building a playground from scratch starts with a site analysis. Look at your yard. Where does the water go? Where is the shade? You don’t want to build a mud kitchen in the only dry spot of the yard, and you definitely don’t want a metal slide in the direct, unshaded sun. Once you have a spot, you can begin the transformation using these core techniques.
The Legendary Hill Slide
If you have even a slight slope in your yard, you have the foundation for a hill slide. If you don’t have a hill, you can make one by ordering a few yards of “clean fill” dirt. Moving dirt is the ultimate budget hack. Once you have a mound, you pack it down firmly. You can source a second-hand slide from Craigslist or Facebook Marketplace for next to nothing—often people give them away if you are willing to disassemble the rest of the old wooden set.
Installation is simple. You dig a “channel” into the side of the hill so the slide sits flush with the earth. This eliminates the “fall height” danger associated with ladders. Screw the top of the slide into a pressure-treated 4×4 post buried deep in the hill to keep it from shifting. Finish the sides with grass or “no-mow” clover to keep the dirt in place. This setup is safer, cheaper, and looks like it belongs in a professional park.
The Pallet Mud Kitchen
Mud kitchens are the gold standard of sensory play. You can build a five-star “resort” version using two or three heat-treated pallets (look for the “HT” stamp). One pallet forms the back wall, and another, cut in half, forms the base and the countertop. Use a jigsaw to cut a hole in the countertop that fits a standard stainless steel mixing bowl. This bowl becomes the “sink.”
Sand the wood thoroughly to prevent splinters. Since this is an outdoor toy, you don’t need expensive finishes. A simple coat of linseed oil or even just leaving it raw to weather naturally works fine. Hang old ladles, pots, and pans from the back pallet using simple S-hooks. Total cost? Usually $0 if you have some leftover screws and a neighbor with a pallet they don’t want.
Tire Obstacle Courses
Tires are the ultimate recycled building material. Local tire shops often have to pay to dispose of them, so they are usually thrilled to give them to you for free. You can bury tires halfway into the ground in a row to create a “tire bridge” or a balance challenge. For a more advanced build, bolt tires together in a “tipi” shape using heavy-duty galvanized bolts and washers.
Crucial tip: Drill large drainage holes in the bottom of every tire. If you don’t, they will collect rainwater and become a breeding ground for mosquitoes. You can also paint them with exterior-grade paint to turn a “junkyard” look into a vibrant, intentional play zone.
Benefits of a Natural DIY Approach
Choosing a DIY natural playground over a commercial plastic set offers more than just financial relief. The benefits touch on child development, environmental impact, and long-term property value. When you move away from “boxed” play, you open up a world of benefits that a $3,000 plastic set simply cannot provide.
- Increased Physical Challenge: Earth mounds and log beams require more core strength and balance than standard stairs and plastic handles.
- Endless Versatility: A plastic slide is always a slide. A pile of logs can be a fort today and a shop tomorrow. This is known as “loose parts” play, which is proven to keep children engaged for longer periods.
- Aesthetic Integration: A natural playground blends into your landscaping. Instead of a giant eyesore, you have a beautiful, “naturescaped” backyard that can actually add to your home’s appeal.
- Sustainability: You are diverting tires and pallets from landfills and avoiding the carbon footprint of manufacturing and shipping a massive plastic kit.
- Durability: Plastic becomes brittle in the sun and cracks in the cold. Earth, stone, and heavy timber weather naturally and can last for decades with minimal maintenance.
Challenges and Common Mistakes
The biggest challenge with low-cost DIY playground ideas is the “sweat equity” required. It is physically demanding to move dirt and anchor logs. Many parents start with grand plans but realize halfway through that digging a hole for a 100-pound stump is harder than it looks. You need to be realistic about your physical limits and the tools you have available.
A common mistake is ignoring the “entrapment” rules. In the playground world, there is a “danger zone” for openings between 3.5 inches and 9 inches. This is because a child’s body might fit through, but their head could get stuck. When you are bolting tires together or building a pallet fort, always ensure your gaps are either smaller than 3.5 inches or larger than 9 inches. Another frequent error is using “treated” wood that contains older, toxic chemicals like CCA (Chromated Copper Arsenate). Always check that any reclaimed wood is modern, pressure-treated (ACQ or copper-based) or naturally rot-resistant like cedar.
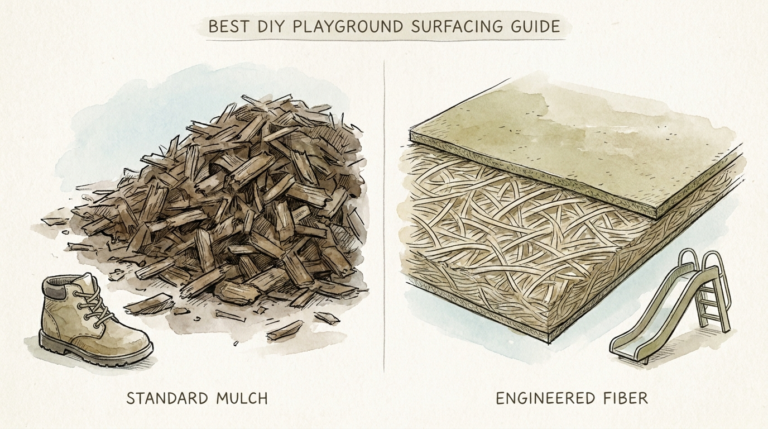
Finally, don’t forget the “fall zone.” Even if your equipment is low to the ground, kids will fall. Packing dirt is great for the structure, but you need a soft landing spot at the bottom of slides or under balance beams. Failing to provide 9 to 12 inches of loose-fill material like wood chips or pea gravel is a shortcut you will regret the first time a kid takes a tumble.
Limitations of DIY Natural Playgrounds
While we love the $0 earth approach, it isn’t perfect for every situation. Environmental limitations play a huge role. If you live in an area with extremely poor drainage or heavy clay soil, a “mud kitchen” might turn into a “swamp kitchen” that never dries out. In these cases, you might actually need to spend money on professional drainage or elevated wooden platforms, which pushes the cost up.
Another limitation is the “HOA” factor. Many Homeowners Associations have strict rules about “temporary structures” or what they perceive as “clutter.” A pile of tires and logs might be a child’s paradise, but to a strict HOA board, it looks like a junk pile. You may need to invest more in “beautifying” the structures—such as high-end stains for your wood and professional-grade mulch—to stay within their guidelines.
Space is the final boundary. A natural playground often takes up a larger “footprint” than a compact vertical plastic tower. If you have a tiny urban backyard, you might not have the room for a sprawling earth mound and a tire bridge. You have to balance your desire for natural play with the reality of your square footage.
Comparison: Plastic Kits vs. Natural DIY
| Feature | Commercial Plastic Kit | Natural DIY Playground |
|---|---|---|
| Initial Cost | $1,500 – $5,000+ | $0 – $500 |
| Lifespan | 5–8 years (Fades/Cracks) | 15+ years (Natural weathering) |
| Play Value | Fixed / Repetitive | Dynamic / Open-ended |
| Setup Time | 1–2 Days (Assembly) | 1–3 Weekends (Construction) |
| Safety | Safety Standard Certified | User-Dependent (Must follow guides) |
| Aesthetics | Bright/Artificial | Organic/Landscaped |
Practical Tips and Best Practices
To succeed with these low cost DIY playground ideas, you need to work smarter, not harder. Start by making friends with a local arborist. They often have to pay to dump “rounds” (large slices of tree trunks). If you ask nicely, they might drop a dozen of them at your house for free. These make perfect “stump jumps” or stepping stones.
When building with logs or stumps, always bury at least one-third of the height into the ground. This provides the stability needed to prevent the log from rolling or tipping when a child jumps on it. For extra security, pour a little “dry-pack” concrete into the hole before you backfill it with dirt. The moisture from the ground will set the concrete over time, creating a rock-solid anchor.
Use “loose parts” to your advantage. A sandbox doesn’t need to be a plastic turtle. Use an old rowboat, a large tractor tire, or even just a ring of large smooth stones. Fill it with “play sand” from a hardware store, which is washed and screened for safety. Then, add real-world tools: metal trowels, old colanders, and heavy-duty buckets. This beats flimsy plastic sand toys every day of the week.
Advanced Considerations: The Physics of Play
Serious practitioners of natural play design focus on “graduated risk.” This means creating structures that allow children to choose their own level of difficulty. For example, if you build a log bridge, one end should be nearly flush with the ground, while the other end is elevated 18 inches. This allows a toddler to practice at the low end while an older child takes the “high road.”
Think about the “sensory diet” of your playground. A truly great space includes different textures and sounds. You can build a “sound wall” by hanging old pots, pans, and even lengths of PVC pipe from a fence. When struck with a wooden mallet, they produce different pitches. You can also plant “sensory gardens” with lamb’s ear (fuzzy), lavender (scent), and tall ornamental grasses (sound in the wind). This turns a simple playground into an immersive developmental environment.
Scaling is another factor. As your kids grow, they will need more height and complexity. If you build with earth and wood, it is easy to add a “second story” to a fort or a longer slide to a hill. You aren’t locked into a pre-manufactured footprint. This “modular” nature of natural playgrounds is what makes them a better long-term investment for families.
Example Scenario: The $150 Backyard Transformation
Let’s look at a real-world transformation. A family with two kids (ages 4 and 7) had a flat, boring backyard and a $200 budget. They spent $50 on a used slide from a neighbor. They spent $60 on five yards of “clean fill” dirt delivered by a local landscaping company. The remaining $40 went toward heavy-duty lag bolts and a few bags of wood chips.
They spent Saturday morning moving the dirt into a large mound. They used the 4-year-old’s “help” to stomp the dirt down, making it a game. They dug the slide into the side of the mound and anchored it to a scrap 4×4 post they found in their garage. By Sunday, they had added a “stump path” leading up to the hill, using logs they got for free from a tree crew working on their street. They finished the “fall zone” at the bottom of the slide with the wood chips. For $150 and a weekend of work, they created a play space that was the envy of the neighborhood, while the neighbors were still paying off their $2,500 financing plan for a plastic tower.
Final Thoughts
The transition from “buying” a playground to “building” one is a shift in mindset. It is an acknowledgment that the best childhood memories aren’t made on a pristine, assembly-line swing set, but in the dirt, among the trees, and through imaginative play. By using low cost DIY playground ideas, you are providing your children with a richer, more varied environment that respects their developmental needs and your bank account.
Start small. You don’t need to landscape the entire yard in a weekend. Start with a mud kitchen or a simple stump path. Observe how your children use the space, and then expand. The beauty of the $0 Earth approach is that it is never finished—it evolves as your children grow, constantly offering new challenges and new adventures. Now, put down the catalog, grab a shovel, and go make some legends in the dirt.
Sources
1 mosquitojoe.com | 2 earthhaulers.com | 3 parent.com | 4 swingsets.com | 5 buildwithrise.com | 6 starswingsets.com | 7 hometalk.com | 8 willygoat.com | 9 motherearthnews.com | 10 playgroundideas.org | 11 playgroundideas.org | 12 cpsc.gov | 13 woodplaycharlotte.com | 14 youtube.com | 15 youtube.com