Durable Dressing Boards For Toddlers
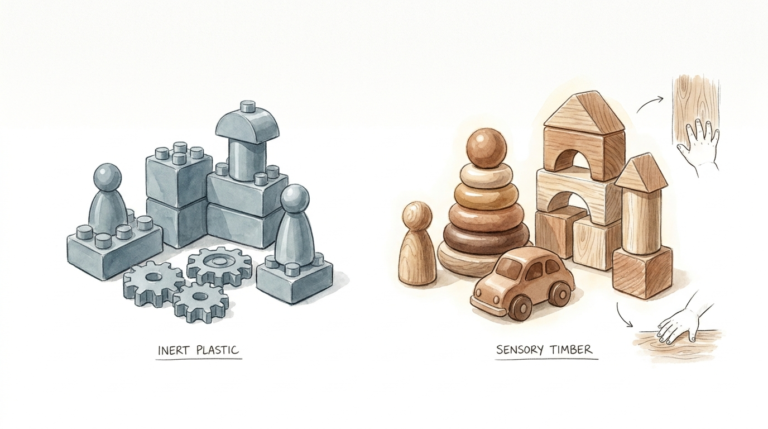
If the tool doesn’t command respect, the child won’t give it any. Trade disposable plastic for the tactile legacy of real hardware. Modern toddler ‘dressing boards’ use thin plastic that offers zero sensory feedback. Our ancestors learned on leather, brass, and wood—materials that required deliberate strength and offered a satisfying, permanent ‘click.’
Walking through a modern toy aisle is a lesson in planned obsolescence. You see neon-colored boards made of flimsy polymers that flex under the slightest pressure. These items are designed to entertain, not to educate. Real learning happens when a child meets resistance. It happens when the weight of a brass latch feels substantial in their small palm. It happens when they realize that a leather strap won’t buckle unless they apply exactly the right amount of tension. This is the world of durable dressing boards.
Think of these boards as a bridge. On one side, you have the chaotic energy of a toddler struggling with a winter coat. On the other, you have a confident child who views every button and zipper as a solvable puzzle. By moving away from “toy” versions and toward industrial-grade materials, you provide a sensory-rich environment that respects the child’s intelligence. You aren’t just teaching them to zip a jacket; you are training their nervous system to navigate the physical world with precision and intent.
Durable Dressing Boards For Toddlers
A durable dressing board is a specialized educational tool designed to help young children master the mechanics of clothing fasteners. Unlike a standard toy, these boards prioritize structural integrity and realistic feedback. They typically feature a solid wooden base—often oak, maple, or high-grade plywood—with various sections of fabric or leather attached. These sections house the “work”: the buttons, zippers, snaps, and buckles that comprise a child’s daily wardrobe.
The concept is deeply rooted in the Montessori method. Maria Montessori observed that children have a natural “sensitive period” for order and independence between the ages of two and six. She created the original dressing frames to isolate the difficulty of a task. If a child tries to learn how to button a shirt while they are actually wearing it, they are battling several obstacles at once: the shirt is flopping around, they can’t see the buttons clearly, and they might be feeling the pressure of needing to leave the house. A dressing board brings that task to eye level, allowing the child to focus entirely on the mechanics of the fastener.
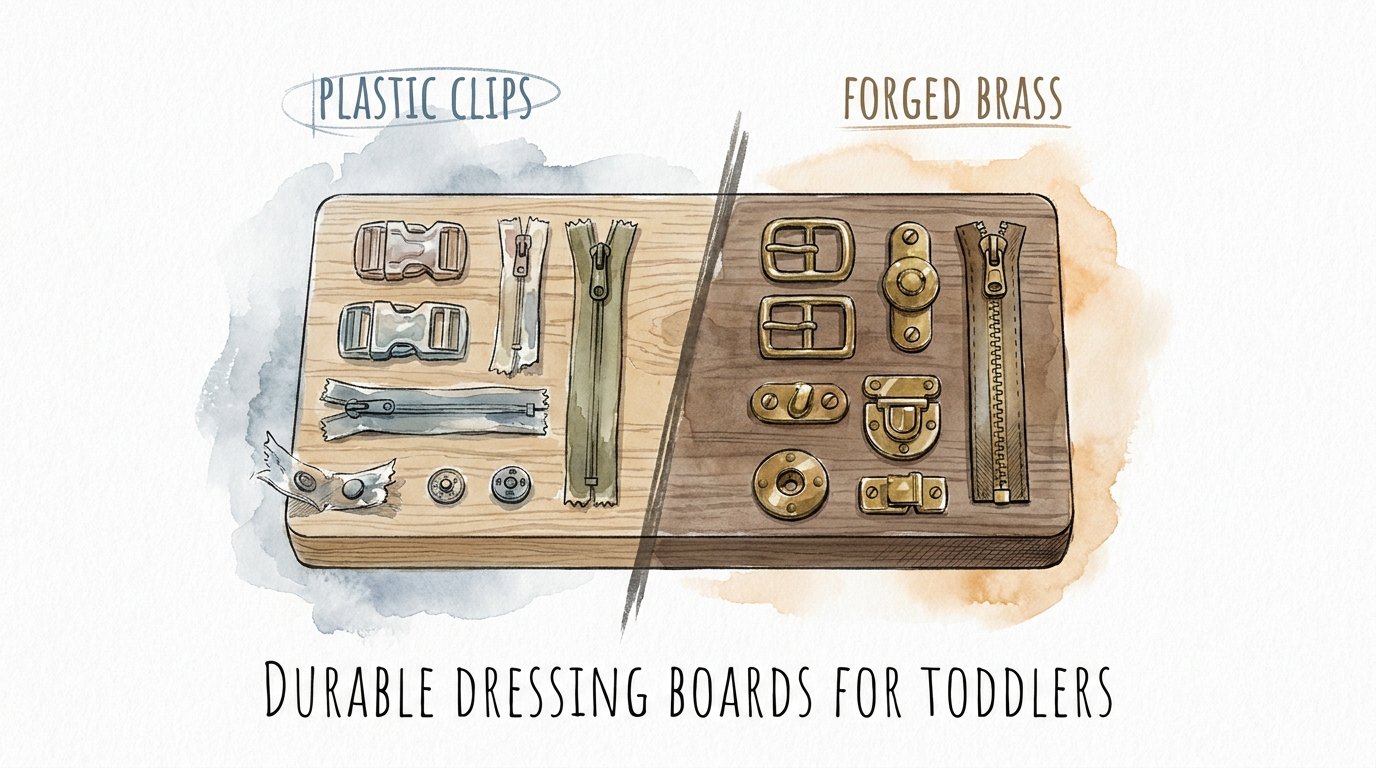
In a real-world setting, these boards serve as a dedicated practice station. You will find them in high-end preschools, occupational therapy clinics, and the homes of parents who value “slow” parenting. They exist to transform a frustrating daily chore into a rewarding skill-building exercise. By using materials like forged brass, heavy-duty canvas, and thick leather, these boards provide the proprioceptive feedback necessary for deep learning. The resistance of a metal zipper or the “snap” of a high-tension button tells the child’s brain exactly how much force is required, a nuance that cheap plastic alternatives completely fail to convey.
How It Works: Building a Legacy Board
Creating a board that lasts decades requires more than a trip to the craft store. You need to think like a shipwright or a saddlemaker. The goal is to create a piece of equipment that is as beautiful as it is functional. Follow these steps to assemble or select a board that will serve multiple generations of children.
1. Select Your Foundation
Start with a base that won’t warp or splinter. Solid hardwood like cherry or maple is ideal because of its weight and stability. If you prefer plywood, choose a Baltic Birch with at least 13 plies. The board should be at least 3/4 of an inch thick to provide enough “meat” for hardware screws. Sand the edges until they are buttery smooth, then seal the wood with a non-toxic food-grade oil or beeswax finish. This ensures the board is safe for little hands while maintaining a natural, grounding aesthetic.
2. Source Industrial Fasteners
Skip the sewing section and head to the hardware or upholstery department. You want zippers with metal teeth and large, easy-to-grab sliders. Look for “YKK” size 10 zippers, which are often used in luggage or outdoor gear. For snaps, industrial-grade “line snaps” made of nickel or brass are superior to the tiny plastic ones found on baby onesies. These require a “set” and “strike” action that builds significant hand strength. When choosing buckles, look for heavy-weight roller buckles used in belts or pet collars.
3. Choose High-Grit Fabrics
The fabric is the interface between the child and the tool. Use materials that won’t fray under intense use. 12oz cotton duck canvas, heavy denim, or vegetable-tanned leather are the gold standards. Leather is particularly effective because it doesn’t stretch like knit fabrics, meaning the child must be more precise with their movements. If you are using fabric, hem the edges twice or use a heavy-duty binding tape to prevent the board from looking ragged after a month of use.
4. Tension and Alignment
One of the biggest mistakes in DIY dressing boards is loose fabric. If the fabric is floppy, the child will struggle to get the leverage needed to close a button or pull a zipper. Stretch the fabric taut across the frame or base before securing it. Use stainless steel staples or, better yet, decorative brass upholstery tacks. The alignment must be perfect—if the two sides of a zipper don’t meet exactly at the bottom, the child will experience unnecessary frustration that has nothing to do with their actual skill level.
The Benefits of Heavy-Duty Tactile Feedback
Why go through the effort of sourcing brass and leather? The answer lies in the science of sensory integration. Every time a child interacts with a high-quality dressing board, they are engaging in “heavy handwork.” This type of activity provides intense proprioceptive input to the joints and muscles of the hand and wrist. This input is a vital precursor to complex tasks like handwriting and tool use.
Refined Motor Planning: Metal fasteners require a specific sequence of movements. A plastic buckle might click even if it’s misaligned, but a brass buckle demands a specific angle. This forces the child to plan their movements more carefully, building the neural pathways for “executive function”—the ability to organize and execute a series of steps to reach a goal.
Increased Grip Strength: Pushing a metal snap together or pulling a heavy zipper builds the intrinsic muscles of the hand. These are the same muscles used to hold a pencil or use a pair of scissors. Modern children, who spend significant time with low-resistance touchscreens, often suffer from “soft hands.” A durable dressing board is a gym for their fingers.
Confidence through Competence: There is a unique psychological satisfaction in mastering a difficult tool. When a child finally manages to secure a heavy leather belt on their own, the “click” isn’t just a sound; it’s a signal of victory. This builds a sense of self-reliance that carries over into other areas of their life. They don’t just feel capable; they *are* capable.
Challenges and Common Pitfalls
The path to creating a high-end dressing board is littered with potential errors. The most common mistake is overcomplicating the layout. When a board is cluttered with too many different fasteners, the child becomes overstimulated and can’t focus on mastering one skill at a time. It is better to have three or four high-quality, well-spaced fasteners than a dozen cramped ones.
Another challenge is the weight of the hardware. While we want “commanding” tools, they must still be usable by a two-year-old. A zipper meant for a heavy-duty motorcycle jacket might be too stiff for a toddler’s small hands to initiate. The “goldilocks” zone is hardware that feels substantial but moves smoothly. If you have to use your full adult strength to open a latch, it’s too much for the board.
Maintenance is also a factor. Unlike plastic toys that can be wiped down with a harsh chemical cleaner, natural materials require care. Leather needs occasional conditioning to prevent it from becoming brittle. Brass may tarnish over time, though many parents view this “patina of use” as a beautiful record of the child’s hard work. If you aren’t prepared to occasionally oil the wood or wax the zipper teeth, a high-durability board might eventually become a high-friction board.
Limitations: When to Scale Back
A heavy-duty dressing board is not the right tool for every situation. Its greatest strength—its weight and permanence—is also its primary limitation. These boards are not portable. If you are looking for something to keep a toddler quiet in the backseat of a car, a solid maple board with brass hardware becomes a dangerous projectile in a sudden stop. In those scenarios, a soft “quiet book” is the safer, if less tactile, choice.
Environmental factors also play a role. If you live in an extremely humid climate, solid wood boards can swell, causing zippers to bind or fabric to sag. In these cases, you might need to choose marine-grade hardware and specialized finishes to ensure the tool remains functional. Additionally, for children with severe tactile defensiveness or certain sensory processing disorders, the “cold” feel of metal and the “rough” texture of canvas might be overwhelming rather than instructional.
Finally, cost is a realistic boundary. Sourcing solid wood, thick leather, and industrial hardware can easily run three to five times the cost of a mass-market plastic dressing board. While the “cost per use” is significantly lower because the board won’t break, the initial investment can be a barrier. For some, a hybrid approach—using a high-quality wooden base with repurposed thrift store clothing—is a more accessible way to achieve the same educational goals.
Hardware Comparison: Forged Brass vs. Plastic Clips
The differences between professional-grade hardware and “toy-grade” clips are measurable across several key metrics. Understanding these differences helps you decide where to invest your budget.
| Feature | Forged Brass / Metal | Molded Plastic |
|---|---|---|
| Tactile Feedback | High: Vibrations travel through metal to the hand. | Low: Plastic absorbs sound and vibration. |
| Resistance | Dynamic: Varies based on angle and pressure. | Static: Usually “on” or “off” with little nuance. |
| Longevity | Decades: Can be polished and repaired. | Years: Brittle plastic snaps and cannot be fixed. |
| Developmental Value | High: Encourages deliberate, focused strength. | Medium: Provides basic mechanical understanding. |
| Aesthetics | Heirloom: Ages gracefully with use. | Disposable: Scratches and fades over time. |
Practical Tips and Best Practices
If you are setting up a dressing board station, follow these best practices to ensure your child gets the most out of the experience. The goal is to set them up for success while still providing a meaningful challenge.
- Mount the Board: A dressing board is most effective when it is stationary. Mounting it to a wall at the child’s chest height allows them to use both hands to manipulate the fasteners without having to hold the board itself.
- Sequence the Difficulty: Don’t introduce all fasteners at once. Start with large buttons (1 inch or larger) and zippers. Move to snaps and Velcro later. Leave shoe tying and complex buckles for the final stage of mastery.
- Use High-Contrast Colors: Use a fabric color that contrasts sharply with the hardware. For example, use dark blue canvas with silver zippers. This helps the child visually “isolate” the task and see exactly how the parts fit together.
- Condition Your Leather: If using leather straps, apply a small amount of mink oil or leather conditioner before the child starts. This makes the leather more supple and prevents it from cracking, ensuring a smoother “glide” through the buckles.
- Wax the Zippers: A tiny bit of beeswax or a specialized zipper lubricant on metal teeth can prevent the zipper from snagging. A “stuck” zipper is the fastest way to end a child’s concentration and cause frustration.
Advanced Considerations for Practitioners
For those looking to go beyond the basics, consider the architectural aspect of your board. Serious practitioners often incorporate “found” hardware—vintage locks from old trunks, brass clasps from nautical supply stores, or even toggles from professional-grade duffel coats. These unique items provide a variety of textures and mechanical “feels” that standard store-bought hardware simply can’t match.
Scaling is another consideration. As your child grows, a “modular” board design allows you to swap out sections. You might replace a simple large-button panel with a complex “hook and eye” or “safety pin” panel. This ensures the board remains a relevant challenge as their fine motor skills evolve into the surgical precision required for advanced craftsmanship later in life.
Performance optimization also involves thinking about the auditory feedback. The “click” of a well-seated snap or the “zip” of a metal track provides an acoustic reward. In a classroom or multi-child environment, this helps create a “rhythm of work.” You can even choose specific hardware based on the sound it produces, using the auditory cues to help the child know when a task is completed successfully.
Scenario: The Mudroom Master
Imagine a typical Tuesday morning. You are rushing to get out the door. Your three-year-old, Leo, is struggling with a rain jacket. In most households, the parent would step in, zip the jacket for him, and rush to the car. But Leo’s home has a “Mudroom Station” with a durable dressing board mounted right next to the coat rack.
Because Leo has spent the last month “playing” with the heavy-duty YKK zipper on his board, his muscle memory is primed. He knows he needs to seat the pin fully in the box before pulling the slider. He knows the weight of the metal and the tension required. Instead of a meltdown, he looks at his jacket, applies the same deliberate strength he used on his practice board, and zips it himself. He walks to the car with his head held high. The “tactile legacy” of the board has translated directly into real-world independence.
Final Thoughts
Durable dressing boards are more than just a way to teach a child to get dressed. They are a statement of respect for the child’s ability to handle “real” things. When we provide toddlers with materials that have weight, texture, and history, we tell them that their work is important. We move them away from the world of flimsy distractions and into a world of meaningful mechanics.
Investing in a board made of wood, brass, and leather is an investment in your child’s cognitive and physical development. It builds hand strength, improves concentration, and fosters a sense of pride that plastic toys simply cannot replicate. These tools are designed to be used, battered, and passed down—a tactile legacy that stays with a child long after they’ve outgrown the board itself.
Start small. Find a solid piece of wood and a single high-quality latch. Watch how your child interacts with it. You will likely see a level of focus and determination that you haven’t seen with their other toys. From there, you can expand, creating a custom curriculum of fasteners that will guide them toward total independence. The journey from plastic clips to forged brass is a journey toward mastery.
Sources
1 berkshiremontessori.org | 2 montessoriacademy.com.au | 3 stirthewonder.com | 4 waterfrontacademy.org | 5 joyrealtoys.com | 6 christopheracademy.com | 7 aliexpress.com | 8 busilly.com | 9 scribd.com