Best Backyard Movie Screen Ideas
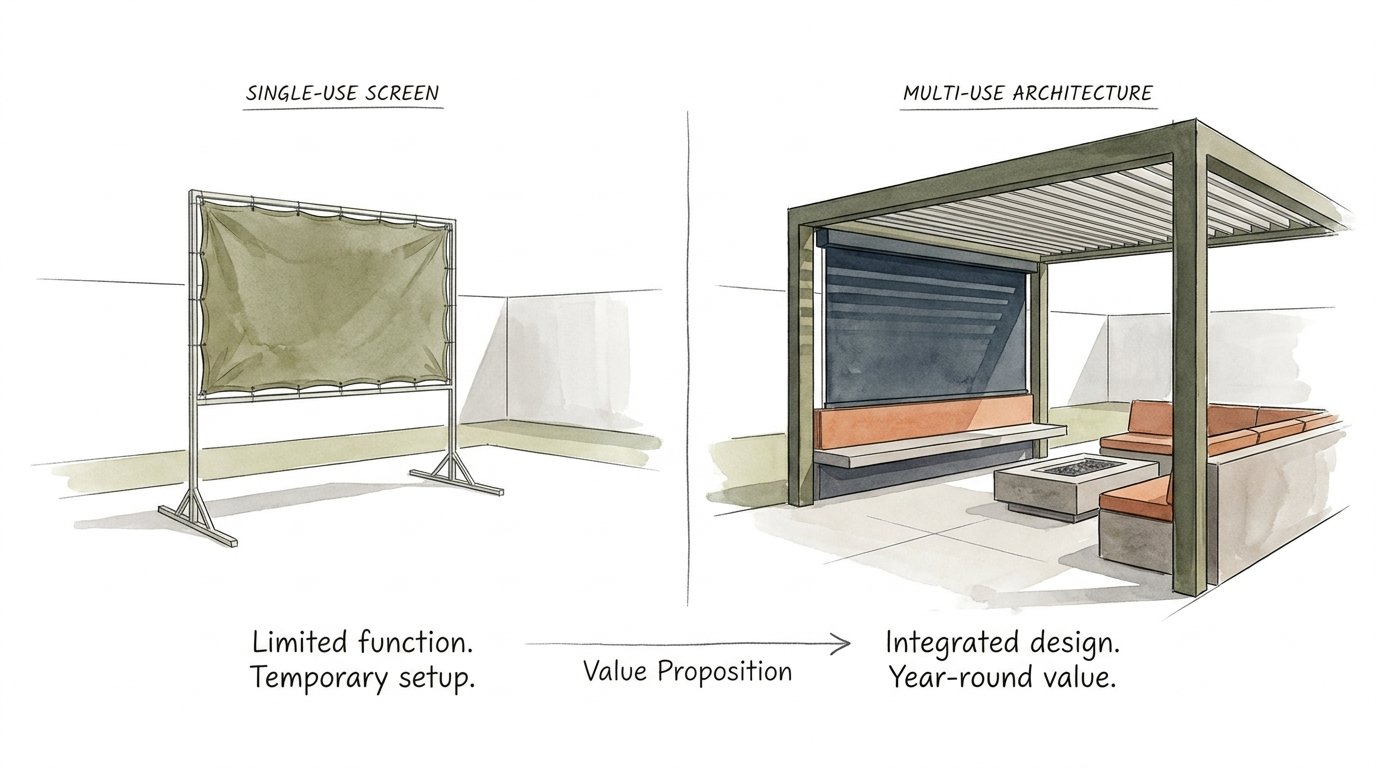
Why buy a piece of plastic that spends 360 days a year in your garage when your garden already has a hidden theater? We are taught to buy a specific gadget for every task. But the pro backyard designer knows that a great movie night doesn’t need more ‘stuff’—it needs better architecture. See how a simple sail shade or a painted wall outperforms a $200 portable screen.
You probably have everything you need to create a world-class outdoor cinema without cluttering your storage shed. Stop looking for a product and start looking at your landscape. Your home’s exterior walls, fences, and overhead structures are waiting to be activated. This guide will show you how to turn your backyard into a cinematic destination.
Focusing on architecture instead of accessories changes everything. A permanent or semi-permanent setup is always ready for a spontaneous Friday night film. No more wrestling with blowers or untangling flimsy poles in the dark. Let’s explore the best backyard movie screen ideas that blend seamlessly into your lifestyle.
Best Backyard Movie Screen Ideas
A backyard movie screen is any surface designed to reflect light from a projector while maintaining image clarity. Most people think they need a specialized “gadget” for this. In reality, the best screens are often integrated into the yard’s existing structures. These ideas range from low-cost DIY projects to sophisticated architectural features.
Outdoor cinema has evolved beyond the shaky bedsheet. Modern materials like blackout cloth and specialized projection paints allow for 4K resolution in the open air. These setups exist to maximize the “fun-to-effort” ratio. High-quality screens stay taut, resist wind, and offer a crisp picture that rivals a commercial theater.
One popular approach is the Painted Exterior Wall. If you have a flat side of a garage or a smooth stucco wall, you have a 150-inch screen ready for paint. Using a matte white or light gray finish creates a permanent, maintenance-free viewing area. This setup is perfect for “drive-in” style movie nights in the driveway.
Another clever idea is the Dual-Purpose Sail Shade. White shade sails provide UV protection during the day and act as a massive projection surface at night. They are weather-resistant and designed to handle wind. This makes them far more durable than the typical portable plastic screen.
For those who want a “hideaway” look, Retractable Outdoor Blinds are the gold standard. These motorized screens roll down from a patio header or pergola with the push of a button. They offer incredible tension, which is vital for a smooth image. When the movie is over, the screen disappears completely.
How to Build Your Own Movie Screen Step-by-Step
Building a screen allows you to customize the size and durability to fit your specific space. You can choose between a lightweight portable frame or a more permanent installation. Both methods prioritize a taut, wrinkle-free surface.
The PVC Pipe Frame Method
Creating a PVC frame is the most cost-effective way to build a large, movable screen. Use 1.5-inch or 2-inch PVC pipes to ensure the frame does not bow under the weight of the fabric. Thicker tubing is essential for screens larger than 100 inches to maintain structural integrity.
Start by cutting your pipes to match a 16:9 aspect ratio. For a standard 120-inch screen, you will need horizontal pieces around 105 inches long and vertical pieces around 59 inches high. Connect these using PVC elbows and T-joints. Do not glue the joints if you want the frame to be collapsible for storage.
Select Blackout Cloth for your screen material. This fabric is specifically designed to block light from passing through, which keeps the image bright and vibrant. Attach the cloth to the frame using ball bungees or heavy-duty clips. Pull the fabric tight from the center outward to eliminate every single wrinkle.
The Permanent Wood Post Method
Wooden posts offer a more professional and stable alternative for windy backyards. Use two 4×4 pressure-treated posts set in concrete or heavy whiskey barrel planters. This creates a permanent “goalpost” structure that can support a heavy-duty screen year-round.
Install heavy-duty hooks or a curtain rod between the posts. You can hang a grommeted screen made of marine-grade polyester or high-quality canvas. This setup is rugged enough to stay outside through various seasons. Adding solar light caps to the posts can turn the structure into a decorative landscape feature when not in use.
Benefits of Integrated Backyard Screens
Choosing an architectural approach over a standalone gadget offers measurable advantages. The primary benefit is stability. Portable screens often act like sails, catching the slightest breeze and distorting the image. Integrated screens are anchored to the house or ground, providing a rock-steady viewing experience.
Practicality is another massive win. A retractable screen or a painted wall requires zero setup time. You can walk outside, turn on the projector, and start the movie in under two minutes. This eliminates the “friction” that often prevents families from actually using their outdoor theater equipment.
Aesthetics play a huge role in property value and enjoyment. A bulky inflatable screen looks like a temporary eyesore in a well-manicured garden. Conversely, a screen integrated into a pergola or a beautifully painted theater wall feels like a deliberate design choice. It enhances the backyard’s “outdoor room” vibe.
Cost efficiency is the hidden advantage. You can build a professional-grade 150-inch screen using PVC and blackout cloth for less than $60. Pre-made “outdoor cinema” kits often charge a premium for lower-quality materials and flimsy stands. Investing that saved money into a better projector will have a much bigger impact on your movie night.
Challenges and Common Mistakes
Wind is the undisputed enemy of the outdoor movie night. Many beginners fail to properly weight their screens. An unweighted frame can tip over in winds as low as 8 mph. Always use sandbags, water anchors, or ground stakes to secure your structure.
Ambient light is another frequent hurdle. Projectors struggle against streetlights, porch lights, and the moon. Placing your screen in a “shadow pocket” created by your house or a fence can significantly improve contrast. Avoid placing the screen directly under a neighbor’s security light.
Using the wrong material is a classic mistake. White bedsheets are thin and allow light to pass through. This results in a dim, “ghostly” image with poor color saturation. If you can see the grass through your screen, you are losing 50% of your projector’s brightness. Always use a material with a high opacity, such as blackout cloth.
Neglecting the audio setup often ruins the experience. Built-in projector speakers are notoriously weak in open environments. Sound disperses quickly outdoors. Plan for a dedicated soundbar or a pair of high-quality Bluetooth speakers positioned near the screen to create an immersive soundstage.
Limitations of Backyard Projectors
Daytime viewing is almost impossible with consumer-grade projectors. Even the most powerful home units cannot compete with direct sunlight. Outdoor movie nights are strictly a “dusk-to-dawn” activity. If you need a screen for afternoon sports, an outdoor-rated TV is a better, albeit more expensive, choice.
Weather constraints are a reality for any electronic setup. Most projectors are not weather-resistant and must be brought inside after use. Even “permanent” screens will eventually face UV degradation. PVC pipes may become brittle and yellow after 18 to 24 months of direct sun exposure.
Insects can be a major distraction. Projector lamps emit heat and light that attract bugs. Placing a fan near the projector can help blow them away. Some users prefer to use rear-projection setups, where the projector sits behind a translucent screen, to keep the equipment (and the heat) further away from the audience.
Comparing Screen Options
Deciding between different materials depends on your budget and how often you plan to use the space. This table breaks down the most common choices for backyard cinema.
| Material | Best Use | Cost | Image Quality |
|---|---|---|---|
| Blackout Cloth | DIY Frames | Low | Excellent |
| Projection Paint | Walls/Plywood | Medium | Pro-Level |
| Sail Shade | Dual-Purpose | Medium | Good |
| White Tarp | Weatherproof | Low | Fair |
| Inflatable | Events | High | Good |
Focusing on measurable factors like “Gain” is essential for serious setups. Gain is a measurement of light reflectivity. A screen with a 1.0 gain reflects light uniformly. Higher gain screens (1.1 to 1.5) focus the light back toward the audience, making the image appear brighter—perfect for lower-lumen projectors.
Practical Tips for the Perfect Setup
Optimize your projector placement using the “Throw Ratio.” Every projector has a specific distance it needs to be from the screen to fill the area. Calculate this before you mount any permanent brackets. Using a projector stand with adjustable height can help you avoid “keystone” distortion.
Choose a projector with at least 3,000 lumens for outdoor use. This ensures the image is visible even if there is slight light pollution from the neighborhood. High-contrast ratios are also important for maintaining deep blacks in dark movie scenes.
Seating arrangement matters more than you think. Arrange chairs in a “stadium” style if you have a natural slope in your yard. Use bean bags and outdoor rugs for a cozy, low-profile front row. Make sure everyone has a clear line of sight to the bottom of the screen to avoid neck strain.
Power management is the backbone of a safe theater. Use heavy-duty, outdoor-rated extension cords. Keep cords tucked against walls or under rugs to prevent tripping hazards in the dark. A portable power station can be a great alternative if you want a “cord-free” setup in the middle of the lawn.
Advanced Considerations for Enthusiasts
Serious practitioners should look into Acoustically Transparent Fabrics. These materials allow sound to pass through the screen. This allows you to hide your speakers directly behind the image, just like a real cinema. It aligns the sound with the action on screen for a more professional feel.
Ambient Light Rejecting (ALR) Paint is a game-changer for backyard walls. These specialized coatings are designed to reflect only the light coming from the projector’s angle while absorbing light from other directions. This allows you to start your movie earlier in the evening before it is pitch black.
Consider the “Soundscape” of your neighborhood. Sound travels differently at night. Directional speakers or “zone” audio setups can keep the movie volume high for your guests while minimizing the noise that reaches your neighbor’s bedroom windows. Using a Bluetooth transmitter with multiple headphone outputs is a “silent disco” style solution for late-night viewing.
Real-World Scenario: The Pergola Hideaway
Imagine a backyard with a cedar pergola. Instead of buying a portable screen, the homeowner mounts a manual pull-down screen to the interior header of the structure. The screen is 120 inches and features a black backing to prevent light bleed.
During the day, the pergola is a dining area. When the sun sets, the screen is pulled down in seconds. The projector is mounted to a small, weather-protected shelf on the opposite side of the pergola. A soundbar is mounted just above the screen.
This setup uses simple numbers to achieve professional results. The projector is 12 feet from the screen, providing a perfect 120-inch image. The sound is contained within the “room” of the pergola, creating an intimate and high-quality experience without any “stuff” being dragged across the lawn.
Final Thoughts
Creating a backyard movie theater is about seeing the potential in your existing space. Why settle for a temporary plastic gadget when you can build a cinematic destination that enhances your home? By focusing on architecture and high-quality materials like blackout cloth or projection paint, you create a more stable and professional environment.
Remember that the best setup is the one you actually use. Reducing the setup time through permanent or semi-permanent solutions is the key to frequent movie nights. Start with a simple DIY frame or a dedicated wall, and upgrade your audio and projector as your passion for outdoor cinema grows.
Experiment with different locations in your yard to find the best balance of darkness and comfort. Your garden is more than just grass and trees—it is a canvas for your favorite stories. Stop buying more stuff and start building better architecture. Your next great movie night is already waiting right outside your back door.
Sources
1 youtube.com | 2 smartersurfaces.ca | 3 texasoutdoorshades.com | 4 soundcore.com | 5 mosquitocurtains.com | 6 yolloy.net | 7 soundcore.com | 8 tarpsupply.com | 9 bonpergola.com | 10 bobvila.com | 11 elitescreens.com | 12 auton.com | 13 valerion.com | 14 onehandymomma.com | 15 iscapeit.com | 16 caydo.com | 17 homedepot.com | 18 alibaba.com