Teaching Children To Sharpen Tools
A dull tool is a dangerous tool, but a child who knows how to sharpen is a child who is truly independent. We live in a world where things are thrown away the moment they lose their edge. Teaching your child to use a whetstone transforms them from a consumer of disposable goods into a steward of quality tools. Resilience starts with the ability to maintain what you own.
You are not just teaching a mechanical skill when you hand a stone to a young person. You are handing them a philosophy of care. This guide will walk you through the precise steps, safety protocols, and psychological benefits of tool maintenance for the next generation.
Teaching Children To Sharpen Tools
Teaching children to sharpen tools is the process of instructing them on how to restore a keen edge to a blade using abrasive surfaces. This practice typically focuses on hand tools like pocket knives, kitchen knives, and simple garden implements. It is a fundamental part of self-reliance that bridges the gap between childhood curiosity and adult responsibility.
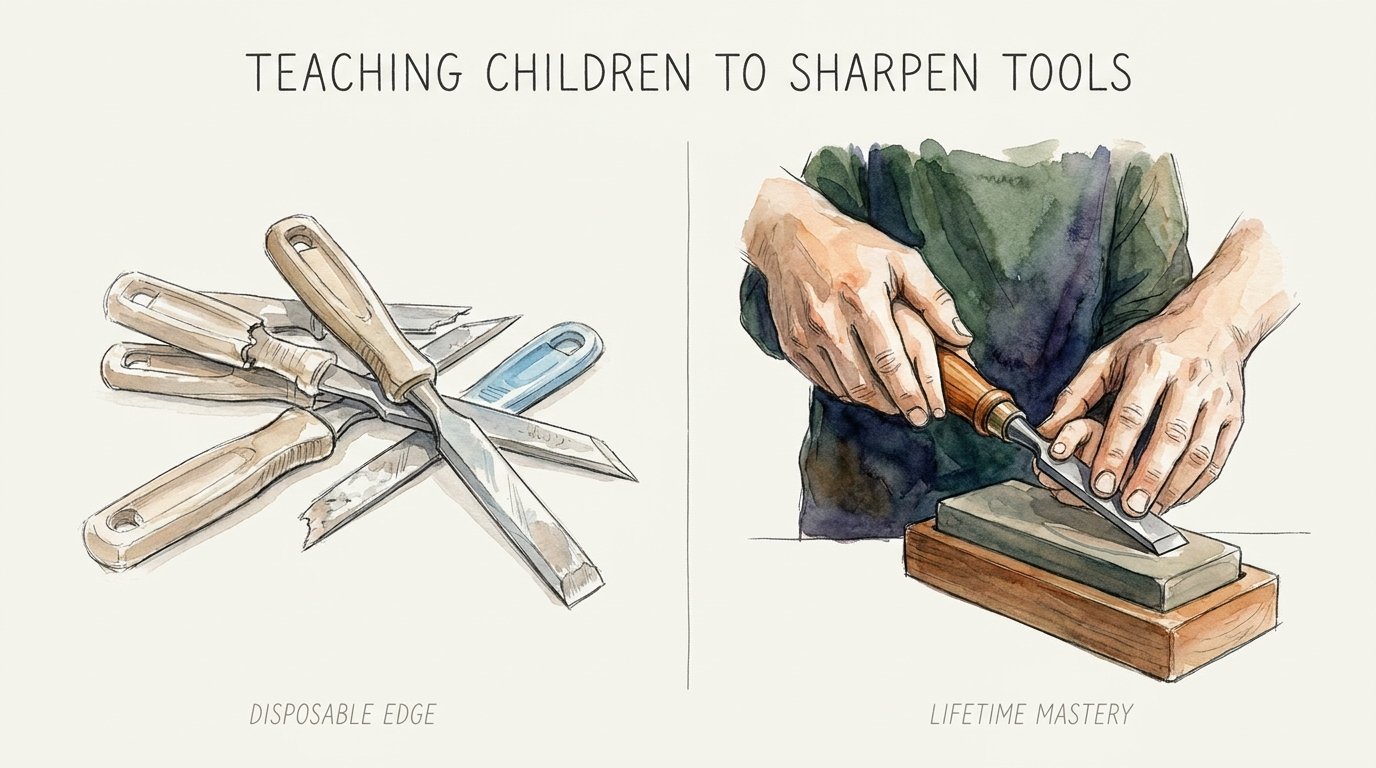
In the real world, this skill is used in woodcarving, professional cooking, and outdoor survival. A child who can maintain a pocket knife understands that a tool is an extension of their hand. They learn that performance depends on preparation. This realization moves them away from a “disposable edge” mentality, where tools are treated as temporary, and toward “lifetime mastery,” where a single quality tool can last decades if properly cared for.
This practice exists because dull tools require more force to use, which leads to slips and accidents. A sharp knife bites into the material, whereas a dull one skids across the surface. By teaching a child to sharpen, you are actually teaching them how to be safer in every task that requires a blade.
How to Sharpen a Tool with a Whetstone
Success in sharpening comes down to consistency and patience. You must prepare the environment before the blade ever touches the stone.
Step 1: Preparing the Stone
Most traditional whetstones require soaking in water for 10 to 15 minutes. Bubbles will rise from the stone as air is replaced by liquid. The stone is ready when the bubbles stop. If you are using “splash-and-go” stones or diamond plates, you simply need a quick spray of water or specialized lapping fluid to keep the surface lubricated.
Step 2: Setting the Safety Zone
Establish a “blood bubble” or safety circle. This is an arm’s-length radius around the child where no one else is allowed to enter. Ensure the sharpening station is at a comfortable height, usually around the child’s waist, so they can use their body weight rather than just arm strength. A non-slip base for the stone is essential to prevent it from sliding during the stroke.
Step 3: Finding the Angle
Finding the correct angle is the hardest part for beginners. Most knives require an angle between 15 and 20 degrees. A simple trick is to hold the knife at a 90-degree angle to the stone, then tilt it to 45 degrees, and then tilt it halfway again to reach approximately 22 degrees. You can also use a stack of two pennies placed under the spine of the knife as a physical reference for the correct height.
Step 4: The Sharpening Stroke
Guide the child to use long, sweeping strokes. They should push the blade across the stone as if they are trying to shave a very thin layer off the top of the stone. The pressure should be firm but not crushing—roughly the same pressure you would use to wipe a smudge off a window. Remind them to maintain the same angle from the heel of the blade all the way to the tip.
Step 5: Raising the Burr
Teach the child to feel for the “burr.” A burr is a microscopic curl of metal that forms on the opposite side of the edge being sharpened. It is the signal that you have ground enough metal to reach the apex. Once they feel that rough “wire edge” along the entire length of the blade, it is time to flip the knife and repeat the process on the other side.
Step 6: Progression and Stropping
Move from a coarse grit (400-600) to a medium grit (1000) and finally a fine grit (3000-6000) for polishing. The final step is stropping on a piece of leather. This removes the final remnants of the burr and aligns the edge for a razor-sharp finish.
Benefits of Early Tool Maintenance
The advantages of teaching children to sharpen extend far beyond the workshop. This skill develops fine motor coordination and tactile sensitivity.
Safety is the primary benefit. Statistics show that more injuries occur with dull knives because the user must apply excessive, uncontrolled force. A sharp knife follows the user’s intent. When a child creates that edge themselves, they develop a profound respect for the tool’s power. They are less likely to treat it as a toy because they have seen the work required to make it functional.
Patience and focus are cultivated through the process. Sharpening is a repetitive, meditative task. It requires the child to slow down and pay attention to minute details. This “flow state” is an excellent antidote to the instant gratification found in digital entertainment.
Sustainability becomes a lived value. Instead of asking for a new tool when one becomes dull, the child learns to restore what they have. This builds a sense of stewardship. They begin to see the world not as a collection of things to be consumed, but as a system to be maintained.
Common Mistakes and Pitfalls
Many beginners struggle with inconsistent angles. If the child wobbles the blade during the stroke, they will “round over” the edge rather than sharpening it. This mistake happens when the child tries to move too fast. Encourage them to go slow—precision is more important than speed.
Another frequent error is failing to raise a burr. Some children are afraid to remove too much metal and stop before they have actually reached the apex. Without a burr, the knife will never truly be sharp. Use the “Sharpie trick” to help them visualize their progress. Color the edge of the blade with a black permanent marker; if the marker is only being removed from the top or bottom of the bevel, the angle is wrong.
Using too much pressure is a common pitfall. Excessive force can gouge the stone or cause the blade to slip dangerously. The weight of the hand and a slight downward push are usually sufficient. If the stone is dry, it can also clog with metal particles, known as “swarf,” which stops the sharpening process. Always keep the stone lubricated.
Limitations and Constraints
Children should generally avoid sharpening serrated blades. These require specialized tapered rods and a much higher level of technical skill. Attempting to sharpen a serrated bread knife on a flat whetstone will ruin the teeth and frustrate the learner.
Extremely damaged or chipped blades may be too difficult for a beginner. If a knife has a large “nick” in the metal, it requires significant steel removal using very coarse diamond plates. This can be physically taxing and discouraging for a child. These tasks are better handled by an adult or a professional until the child has mastered basic maintenance.
Environmental limitations also play a role. Sharpening is a messy, wet process. It is not ideal for indoor areas with sensitive flooring or furniture. Always set up in a dedicated workspace like a garage, basement, or outdoor bench. Additionally, very hard “super steels” used in high-end modern folding knives can be incredibly difficult to sharpen on standard stones. For these, diamond abrasives are necessary because traditional aluminum oxide stones may not be hard enough to cut the steel effectively.
Disposable Edge vs. Lifetime Mastery
The following table illustrates the difference between the modern consumer mindset and the stewardship mindset taught through sharpening.
| Factor | Disposable Edge Mindset | Lifetime Mastery Mindset |
|---|---|---|
| Cost Over Time | High (Constant replacement) | Low (One-time quality purchase) |
| Tool Quality | Low (Stays dull, cheap materials) | High (Heirloom quality) |
| Skill Level Required | None (Consumer only) | High (Skilled practitioner) |
| Environmental Impact | High (Landfill waste) | Minimal (Maintenance only) |
| Safety | Low (Unpredictable dull blades) | High (Predictable sharp blades) |
Practical Tips for Parents
Start with a dedicated practice knife. A carbon steel Opinel No. 7 is an excellent choice. Carbon steel is much easier to sharpen than stainless steel because it has a finer grain structure and responds more quickly to the stone. The feedback is clearer, making it easier for the child to “feel” when they are doing it right.
Use a sharpening guide for the first few sessions. These are small clips that attach to the spine of the knife and hold it at a perfect 20-degree angle. They act like training wheels for a bicycle. Once the child develops the muscle memory for the feeling of the blade on the stone, the guide can be removed.
Encourage the use of a magnifying glass or a jeweler’s loupe. Being able to see the scratch patterns and the burr up close makes the science of sharpening more tangible. It turns a chore into a laboratory experiment. Always have a first-aid kit visible and nearby, not because you expect an accident, but to reinforce that safety is a professional standard.
Advanced Considerations for Serious Practitioners
Serious practitioners often move beyond basic water stones to explore different abrasive technologies. Diamond plates, such as those made by DMT or Atoma, stay perfectly flat and cut faster than any other medium. They are excellent for “flattening” your water stones, which naturally hollow out in the center over time.
Metallurgy is another area of deep study. Different steels have different Rockwell Hardness (HRC) ratings. A soft kitchen knife (54-56 HRC) is easy to sharpen but loses its edge quickly. A high-end Japanese knife (60-64 HRC) holds an edge for a long time but can be brittle and requires a delicate touch on the stones. Understanding these nuances helps a practitioner choose the right tool for the job.
Grit progression can be customized based on the intended use. For a “toothy” edge that excels at cutting tomatoes or rope, you might stop at 1000 grit and move straight to a strop. For a “push-cutting” edge needed for shaving or fine woodworking, you might progress all the way to 8000 or 10,000 grit for a mirror polish.
Example Scenario: The First Pocket Knife
Imagine a ten-year-old child who has just received their first pocket knife. After a month of whittling sticks, the blade no longer slices through wood; it crushes it. This is the perfect teachable moment.
The parent sets up a 1000-grit water stone on the kitchen table with a damp towel underneath. The child uses a black marker to color the edge. On the first few passes, the child notices the marker is only disappearing from the very top of the edge—they are holding the knife too flat. After adjusting the angle and seeing the marker disappear evenly across the bevel, the child continues for several minutes.
Suddenly, the child stops and runs their thumb (carefully, perpendicular to the edge) across the back of the blade. They feel it—a tiny, rough snag. “I found the burr!” they exclaim. They flip the knife, repeat the steps, and then move to a leather strop. Ten minutes later, the knife slices through a piece of paper with a satisfying “zip.” The child isn’t just happy because the knife is sharp; they are proud because they made it that way.
Final Thoughts
Teaching a child to sharpen tools is one of the most practical ways to build resilience and independence. It replaces a passive relationship with the world with an active one. Instead of being at the mercy of a dull blade, the child becomes the master of the edge. This mastery flows into other areas of life, teaching them that problems can be solved with patience, the right tools, and a bit of “elbow grease.”
The transformation from consumer to steward is a vital rite of passage. It ensures that quality tools stay in service for a lifetime rather than ending up in a scrap heap. Encourage your child to experiment with different stones and different tools. Let them make mistakes on cheap practice knives so they have the confidence to maintain the high-quality tools they will eventually inherit.
Start this journey today. Grab a stone, find a dull knife, and sit down with your child. The edge they create on that blade is only the beginning; the real edge is the one they are developing in their own character. Building these skills now creates a foundation of self-reliance that will serve them for the rest of their lives.
Sources
1 nobliecustomknives.com | 2 wordpress.com | 3 akti.org | 4 nascoeducation.com | 5 keithnixknives.com | 6 crkt.com | 7 worksharptools.com | 8 fiddlebackforge.com | 9 opinel-usa.com | 10 bladeforums.com | 11 chuboknives.com | 12 grassrootsmuddyboots.com | 13 youtube.com | 14 jendeindustries.com.au