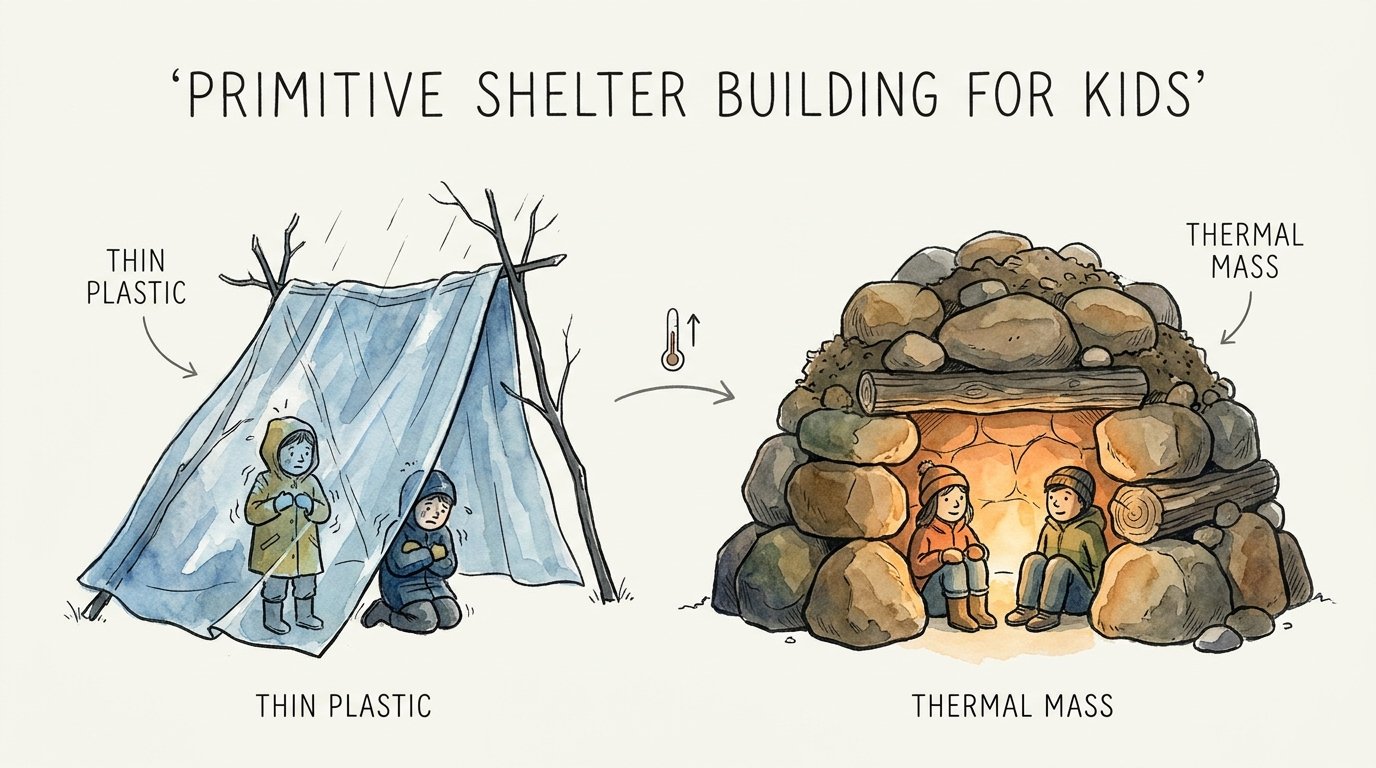
Primitive Shelter Building For Kids
A piece of plastic is just a cover; a layer of leaves is an engineering masterpiece. We buy expensive ‘outdoor’ toys that offer zero protection from the elements. A debris hut teaches children about insulation, structural integrity, and the thermal properties of the earth. In a world of flimsy plastic, give them the skill to build a fortress out of what the forest provides for free.

Think about the last time your child played in the woods. They likely picked up a stick and imagined it was a sword or a magic wand. This instinct to interact with the environment is the foundation of survival. It is the beginning of understanding how the world works. When we teach children to build primitive shelters, we are not just playing “house” in the dirt. We are teaching them the fundamentals of engineering, thermodynamics, and self-reliance.
Most modern outdoor gear focuses on portability and “thin plastic” technology. While a lightweight tarp has its place, it provides almost zero thermal mass. It blocks the rain but does nothing to stop the creeping cold of the ground or the biting wind. A debris hut is different. It is a thick, heavy, organic structure that interacts with the user’s body heat. It is a lesson in how nature provides everything necessary for life if you know how to assemble it.
This guide will take you through the process of building a debris hut with your children. We will explore the science of insulation, the mechanics of structural stability, and the psychological benefits of mastering the wild. Whether you are in your backyard or deep in a national forest, these skills turn a simple walk in the woods into a masterclass in survival engineering.
Primitive Shelter Building For Kids
Primitive shelter building is the art of creating a protective structure using only natural materials found in the immediate environment. For children, this usually starts with the debris hut. This specific type of shelter is often called a “natural sleeping bag” because it is designed to fit the occupant tightly. It relies on a thick layer of forest floor material—leaves, pine needles, and grasses—to trap air and keep the occupant warm.

In the real world, survival experts use these structures when they are stranded without gear. It is the ultimate “no-tool” solution. You do not need a knife, a saw, or cordage to build a functional debris hut. You only need your hands and a basic understanding of structural integrity. This makes it the perfect entry point for kids who are just beginning their journey into bushcraft and outdoor education.
The core concept is simple: you are creating a micro-environment. Instead of trying to heat a massive room, you are building a small, insulated cocoon that uses your own body heat as the furnace. By teaching kids this concept, you help them visualize energy efficiency in a way that a thermostat on a wall never could. They see how the thickness of the walls directly impacts how warm they feel inside.
Beyond survival, building these shelters connects children to the history of humanity. For thousands of years, our ancestors built versions of these structures to survive every climate on Earth. When a child crawls into a shelter they built with their own hands, they aren’t just playing; they are participating in an ancient human tradition. It builds a sense of primal confidence that modern toys simply cannot replicate.
How to Build a Debris Hut: Step-by-Step Engineering
Building a debris hut is a logical process that follows the engineering design process. You start with a problem—exposure to the elements—and you use materials to create a solution. Follow these steps to guide your children through the build.
1. Site Selection and the “3D” Rule
The first step is finding the right spot. Teach your kids to look for a location that is high and dry. Avoid “bottom lands” where cold air and water settle. Look for the “3D” materials: Dead, Down, and Detached. We never want to harm living trees. The forest floor is usually littered with everything we need. Ensure there are no “widow-makers”—dead branches hanging precariously in the trees above your build site.
2. The Ridge Pole (The Backbone)
The ridge pole is the most important piece of wood in the shelter. It needs to be sturdy enough to hold the weight of several hundred pounds of leaves. A good rule of thumb for kids is to find a stick that is roughly one and a half times their height. One end of the ridge pole is propped up on a stump, a rock, or a sturdy fork in a tree at about hip height. The other end rests on the ground. This creates the primary triangular frame.
3. Ribbing (The Skeleton)
Once the ridge pole is secure, it is time for the ribs. These are smaller sticks leaned against the ridge pole at a 45-degree angle. They should be placed close together, almost like a ribcage. Tell your children to leave enough space at the high end for a doorway. The ribs should be just wide enough for the child to crawl inside. If the ribs are too wide, the shelter will have too much “dead air space,” making it harder to stay warm.
4. Lattice and Netting
Before adding the leaves, you need a “net” to hold them in place. This is called the lattice. Have the kids find very small, twiggy branches and lay them perpendicular to the ribs. This creates a mesh that prevents the leaves from falling through the cracks and onto the occupant. This step is a great lesson in material distribution and how smaller components can support a larger mass.
5. The Insulation Layer (The Crunch Test)
Now comes the heavy lifting. This is the most labor-intensive part of the build. You need to pile leaves, pine needles, and dry grass onto the frame. For true survival, you need at least three feet of debris on all sides. Teach your kids the “Arm-span Rule”—if they can reach through the leaves and touch the sticks, the wall is too thin. The goal is to trap as much “dead air” as possible within the layers of debris.
6. The Internal Bedding
The ground is a heat thief. It will pull the warmth right out of a body through conduction. To prevent this, the inside of the hut must be filled with at least a foot of soft, dry debris. The child should “burrow” into this pile. When they lie down, the bedding should compress but still keep them off the bare earth. This is the difference between a miserable night and a cozy one.
Benefits of Primitive Shelter Building
The benefits of this activity extend far beyond the woods. When a child builds a debris hut, they are engaging in multi-sensory learning. They feel the weight of the wood, the texture of the leaves, and the change in temperature as they crawl inside. This builds neural pathways associated with spatial reasoning and physical coordination.
One of the primary benefits is the development of resilience. Building a shelter is hard work. It takes time, effort, and sometimes things fall down. When a ridge pole slips or a wall collapses, the child has to problem-solve. They have to analyze why it failed and try again. This builds a “growth mindset” that is essential for academic and personal success.
From a STEM perspective, shelter building is a masterclass in physics. Children learn about compression and tension. They see how a triangle is a stronger shape than a square. They learn about R-values (the measure of thermal resistance) without ever opening a textbook. They see that “dead air space” is the secret to warmth, which is the same principle used in modern home insulation and high-end sleeping bags.
Finally, there is the psychological benefit of “the fortress.” Every child has an innate desire for a space that is theirs—a “secret base.” By building a primitive shelter, they are creating a safe haven. This fosters a sense of autonomy and competence. They realize that they don’t need a plastic playhouse from a big-box store to have a sanctuary. They can create one from the earth itself.
Challenges and Common Mistakes
Even though the concept is simple, there are several pitfalls that can turn a “masterpiece” into a pile of wet sticks. Recognizing these early will save your children a lot of frustration.
- The “Mansion” Mistake: Most kids want to build a huge shelter. In survival, big is bad. A huge shelter has too much air for your body to heat up. Teach them to build it snug—just enough room to turn over, but no more.
- The Shallow Ridge Pole: If the ridge pole is at too low of an angle, water will pool on top and soak through. If it is too steep, the leaves will slide off. Aim for a 45-degree angle for optimal water runoff and debris retention.
- Skipping the Lattice: Kids often try to throw leaves directly onto the ribs. The leaves fall through, the kids get frustrated, and the structure becomes a mess. Emphasize the importance of the twiggy mesh layer.
- Insufficient Insulation: A few inches of leaves is just a decoration. To be a “fortress,” it needs to be feet thick. Most people stop way too early. Use a stick to measure the thickness periodically.
Another common error is ignoring the ground insulation. It is tempting to spend all your time on the roof because it looks cool. But in most environments, you lose more heat to the ground than to the air. If the floor isn’t thick and fluffy, the shelter will fail its primary mission of keeping the occupant warm.
Limitations: When the Forest Says No
While the debris hut is versatile, it isn’t a magic fix for every environment. Understanding its limitations is part of being a serious practitioner. For example, in a pine-dominated forest, you might not have enough broad leaves to create a waterproof seal. Pine needles work, but they require much more volume to achieve the same R-value as maple or oak leaves.
Environmental constraints also include weather. If it is already pouring rain, gathering wet leaves will only get you wet. While a well-built debris hut can be built with wet materials (the internal friction of the leaves eventually generates a small amount of heat, and the thickness can still trap body warmth), it is a grueling process. In these cases, a tarp shelter might be a more practical, immediate solution.
There is also the factor of energy expenditure. Building a full-sized, three-foot-thick debris hut can take 4 to 6 hours of hard labor. If a child is already exhausted or cold, this might not be the best choice. In a true survival scenario, you have to weigh the calories burned against the warmth gained. This is a great conversation to have with older children about resource management.
Comparison: Thin Plastic vs. Thermal Mass
To truly appreciate a primitive shelter, you have to compare it to modern alternatives. Many parents think a cheap “adventure tent” is the best way for a kid to stay safe. Let’s look at the numbers and the physics.
| Feature | Thin Plastic (Tarp/Tent) | Thermal Mass (Debris Hut) |
|---|---|---|
| Insulation | Near Zero (Needs a sleeping bag) | High (Acts as a sleeping bag) |
| Wind Protection | Good (If properly staked) | Excellent (Heavier mass stays put) |
| Setup Time | 5-10 Minutes | 2-5 Hours |
| Durability | Tears easily | Self-healing (Just add more leaves) |
| Cost | $20 – $200 | $0 (Free) |
As the table shows, thin plastic is great for speed, but thermal mass is superior for actual warmth. A plastic tarp creates a “dead air” space, but the walls are so thin that heat transfer happens almost instantly via radiation. The debris hut’s thick walls absorb that heat and slowly radiate it back to the occupant, similar to how a brick oven stays warm long after the fire is out.
Practical Tips and Best Practices
To make the experience successful and fun, apply these “pro-level” tips during your next build. These small adjustments make a huge difference in the final quality of the shelter.
- The Arm-Span Rule: When gathering sticks, tell kids to only pick up pieces no longer than their arm span. This prevents them from trying to haul heavy logs that could cause injury or over-exertion.
- The Leaf Rake: Don’t pick up leaves by the handful. Teach kids to use a large branch with many smaller “fingers” to rake the leaves into piles. It is 10 times more efficient.
- The Compression Test: Once the internal bedding is in, have the child crawl in and out five times. This compresses the leaves. If they can feel the ground after the fifth time, add another six inches of debris.
- Water Test: If you have a spray bottle, “rain” on the completed shelter. This shows the kids where the weak spots are. They can see the water channel off the leaves or drip through a hole, allowing them to patch it immediately.
Always remember the Leave No Trace principles. When you are finished with your “fortress,” dismantle it. Scatter the leaves and return the sticks to the forest floor. This teaches children that we are guests in the woods and that part of our skill is leaving the environment exactly as we found it.
Advanced Considerations for Serious Builders
If your children have mastered the basic debris hut, it is time to introduce advanced concepts. One such concept is the Door Plug. This is a “bundle” of leaves and branches tied together that the child pulls in after them to seal the entrance. Without a door plug, up to 40% of the internal heat can escape through the opening.
Another advanced topic is ventilation physics. In a very tightly sealed hut, carbon dioxide can build up. Teach older children to poke a small “chimney” hole near the top of the ridge line and a small intake hole near the bottom. This creates a convection current that brings in fresh oxygen while letting out stale air, all while maintaining the thermal envelope.
You can also discuss Thermal Belts. This is the concept of where to build on a mountain. Building in the valley is cold because of “cold air drainage.” Building on the peak is cold because of wind. The “thermal belt”—the middle third of a slope—is often the warmest spot to build. This introduces topography and meteorology into their survival skill set.
Example Scenario: The Backyard Expedition
Imagine a Saturday morning. Instead of turning on the TV, you tell your kids you are going on a “Backyard Expedition.” You have no tent and no sleeping bags. You only have what is in the yard. You find a sturdy ridge pole from a fallen oak tree. Your kids start gathering the “3D” materials.
By noon, the “skeleton” is up. You talk about why the triangular ribs are stronger than a flat roof. By 3:00 PM, the pile of leaves is two feet thick. The kids are sweaty, tired, but incredibly proud. They crawl inside and realize that it is 10 degrees warmer inside the hut than outside. They have just used physics and engineering to change their environment. They aren’t just kids in the yard anymore; they are engineers of the wild.
This experience sticks. Next time they see a plastic toy, they will look at it differently. They will know that a layer of leaves is an engineering masterpiece and that they have the power to build a fortress out of nothing. That is the true value of primitive skills.
Final Thoughts
Teaching children to build primitive shelters is one of the most impactful ways to foster a connection with nature. It moves beyond “appreciation” and into “interaction.” It transforms the forest from a backdrop for a hike into a warehouse of materials and a laboratory for scientific discovery. By focusing on thermal mass and structural integrity, you give them a foundation in engineering that is both practical and profound.
In a world increasingly dominated by “thin plastic” and digital screens, the debris hut is a return to what is real. It requires patience, physical effort, and a keen eye for detail. These are the traits of great thinkers and survivors alike. Encourage your children to experiment, to fail, and to rebuild. Every leaf they add to that pile is a lesson in resilience and a step toward a deeper understanding of the world around them.
Start small. Build a “mini-shelter” for a toy first. Then move to a full-sized hut. Before you know it, your children won’t be asking for the latest outdoor gadget—they will be looking for the perfect ridge pole. They will be looking for the forest’s free engineering masterpieces.
Sources
1 imthecheftoo.com | 2 diy.org | 3 quakekits.com | 4 youtube.com | 5 practicalsurvivor.com | 6 umaine.edu | 7 thornenaturepreschool.org | 8 wildernessawareness.org | 9 paddlingmag.com | 10 medium.com | 11 wildernesscollege.com | 12 lifesongadventures.com | 13 naomimeredith.com | 14 youtube.com | 15 mos.org | 16 osc.org