Natural Playground Surfacing Diy
A child’s nervous system wasn’t built for petroleum mats; it was built for the earth. We’ve sanitized play to the point of sensory deprivation. While rubber tiles offer ‘impact protection,’ living ground cover offers biological feedback, cooling, and a microscopic world of discovery that a factory cannot replicate.

When we talk about playground safety, we usually talk about head injury criteria and fall heights. But there is a second type of safety we often ignore: biological safety. Standard rubber surfaces are heat-absorbing, static-heavy, and devoid of life. They create a sterile environment that disconnects a child from the very rhythms of nature they are meant to explore.
Switching to natural surfacing isn’t just an aesthetic choice. It is a return to a sensory-rich environment where the ground is a teacher. This guide will walk you through the nuances of natural playground surfacing DIY, from the physics of impact attenuation to the biology of soil microbes.
Natural Playground Surfacing Diy
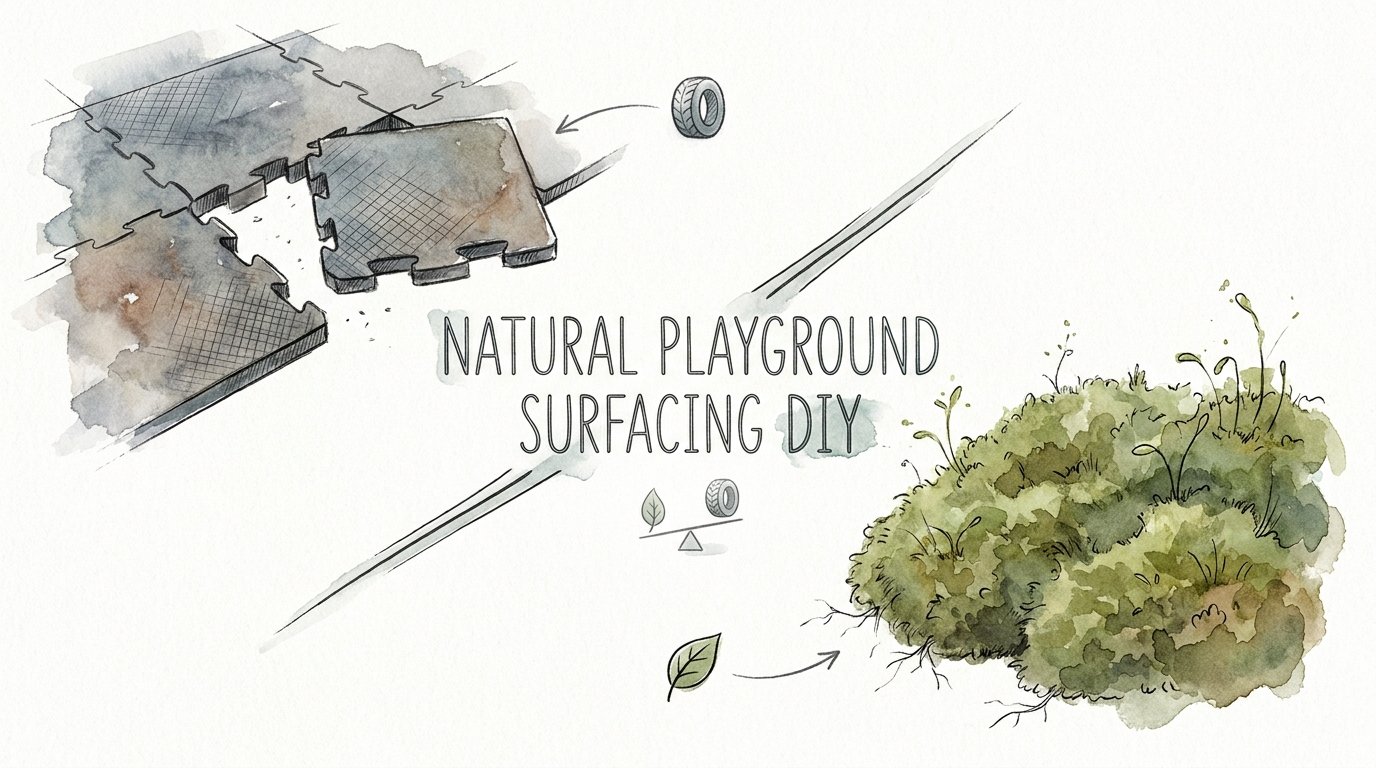
Natural playground surfacing DIY refers to the process of using organic, mineral, or living materials to create a safety-compliant fall zone for play equipment. Instead of relying on synthetic “pour-in-place” rubber or interlocking plastic tiles, this approach utilizes materials like engineered wood fiber, sand, pea gravel, or resilient ground covers like moss and clover.
The goal is to create a “living floor” that satisfies safety standards while providing a cooling microclimate. In the real world, this is used in forest schools, nature-based backyards, and ecological public parks. It allows the playground to breathe, drain naturally, and even contribute to the local ecosystem rather than becoming a source of microplastics.

Imagine a playground where a child falls and, instead of a static-electric shock from a rubber mat, they feel the cool, damp resilience of moss or the soft give of wood fibers. This feedback loop helps children develop a more nuanced understanding of their own physical limits and the environment around them.
The Spectrum of Natural Materials
Not all natural surfaces are created equal. We generally categorize them into two groups: loose-fill and living covers. Loose-fill materials, like Engineered Wood Fiber (EWF) or Double-Shredded Bark, are the heavy lifters for impact protection. Living covers, like Creeping Thyme or Irish Moss, are best for low-impact areas or sensory paths.
A successful DIY project often combines these. You might use EWF directly under a 10-foot slide for maximum safety, while surrounding the perimeter with a lush, walkable moss garden. This hybrid approach balances the rigorous safety requirements of high-fall equipment with the sensory benefits of a living landscape.
Establishing the Living Floor: How to Do It
Transitioning from a grass lawn to a functional natural playground requires more than just throwing down some mulch. It is a structural engineering project. You must manage drainage, containment, and depth to ensure the area remains safe and usable year-round.
Phase 1: Excavation and Drainage
The biggest enemy of natural surfacing is “the bowl effect.” If you simply dig a hole and fill it with wood chips, it will turn into a swamp. You must ensure water can move through the material and into the subsoil. Start by excavating the area to a depth of 12 inches for high-impact zones. Grade the base at a 2% slope toward a lower point of the yard.
For high-performance drainage, install a 3-inch base layer of compacted pea gravel or crushed stone. This acts as a reservoir, holding water during a storm and letting it slowly infiltrate the ground. Cover this base with a high-quality, non-woven geotextile fabric. This prevents your expensive surfacing from mixing with the mud while still allowing water to pass through.
Phase 2: Defining the Borders
Natural materials shift. Without a sturdy border, your wood chips will migrate to the lawn, and your sand will disappear into the wind. Forget plastic edging; use cedar logs, large river boulders, or untreated timber sleepers. These “natural anchors” double as balance beams and seating for parents.
If using logs, peel the bark first to prevent rot and secure them with 12-inch galvanized spikes driven into the ground. Ensure the border rises at least 3 inches above the final level of the surfacing to keep everything contained during vigorous play.
Phase 3: Material Installation
When installing loose-fill materials like EWF, you must account for compression. A 12-inch layer of wood fiber will settle into about 9 or 10 inches over the first month. Fill the area 2 inches higher than your target depth. Use a rake to level it, then use a plate compactor or water the area heavily to help the fibers “knit” together.
If you are establishing a living cover like clover or moss, the process is different. You aren’t just dumping material; you are planting a habitat. For moss, you need a firm, shaded soil base. For clover, a light tilling and high-density seeding will create a resilient, nitrogen-fixing carpet that can handle light foot traffic better than traditional grass.
The Biological and Physical Benefits
Choosing natural surfacing over rubber provides measurable advantages for both the child and the property. These benefits range from psychological well-being to urban heat island mitigation.
- Microbial Exposure: Soil contains Mycobacterium vaccae, a non-pathogenic bacterium that has been shown to increase serotonin levels and reduce anxiety in humans. Rubber is sterile; dirt is a mood-booster.
- Thermal Regulation: On a 90°F day, black rubber surfacing can reach temperatures exceeding 150°F, enough to cause second-degree burns. Living ground cover and wood chips remain significantly cooler, often staying within 5°F of the ambient air temperature.
- Impact Attenuation: Properly maintained EWF and sand are world-class impact absorbers. Unlike rubber tiles, which can harden over time as UV rays degrade the binders, organic loose-fill remains soft as long as it is regularly raked.
- Sensory Feedback: Natural surfaces provide “noisy” feedback. A child hears the crunch of wood chips or feels the coolness of moss. This auditory and tactile input helps with proprioception—the child’s sense of where their body is in space.
Furthermore, natural materials are carbon-sequestering. While a rubber floor is a petroleum-based product that will eventually end up in a landfill, wood chips and moss contribute to soil health and provide habitat for beneficial insects. You are essentially turning a playground into a small carbon sink.
Challenges and Common Mistakes
The most common mistake in natural playground surfacing DIY is underestimating the maintenance. Because these materials are living or organic, they are subject to the laws of decomposition and gravity. If you treat it like a “set it and forget it” project, it will fail.
Common Pitfall: The “Hollow” Zone. Underneath swings and at the exit of slides, kids use their feet to stop, which kicks the surfacing away. This creates a “hollow” that reduces the impact protection to zero. You must rake these areas weekly. Professional installers often hide wear mats (natural fiber or heavy rubber) 2 inches below the surface in these high-traffic spots to provide a secondary layer of protection while keeping the natural look.
Mistake: Using Landscape Mulch instead of EWF. Standard garden mulch often contains large splinters, dyes, and “tramp metal” like nails from ground-up pallets. Only use ASTM F2075 certified Engineered Wood Fiber. It is processed to be splinter-free and tested for purity, ensuring it’s safe for bare feet and curious hands.
The “Hardpan” Effect: If you use sand or pea gravel without proper drainage, the fine particles can settle and compact into a surface as hard as concrete. This is called hardpan. To avoid this, you must occasionally “tilled” the top few inches of the sand or gravel with a rake to keep the air pockets open.
Limitations: When Natural May Not Work
While natural surfacing is superior in sensory and ecological terms, there are realistic constraints. It is not a universal solution for every playground environment.
Accessibility (ADA Compliance): While Engineered Wood Fiber is technically ADA-compliant when properly compacted, it is much harder for a child in a wheelchair to navigate than a smooth rubber surface. If your playground needs to be fully inclusive for mobility devices, you may need to install natural-looking accessible pathways using bonded wood fiber or firm stabilized gravel paths alongside your loose-fill areas.
High-Density Public Areas: In urban parks with thousands of visitors a week, the maintenance of natural surfacing can be overwhelming. Living moss or clover will be trampled into mud under that level of traffic. In these cases, natural materials are best used in “zones”—natural surfaces in the quiet areas and more durable (though less sensory) materials in the heavy-traffic hubs.
Pests and Decomposition: Sand can attract neighborhood cats (becoming a literal litter box), and wood chips eventually break down into soil. You must be prepared to “top off” your wood chips every 1-2 years and keep sand pits covered or use natural repellents like cinnamon oil to keep animals away.
Comparison: Rubber Tiles vs. Living Moss/EWF
When deciding between a modern synthetic floor and a natural DIY approach, consider these measurable factors:
| Feature | Rubber Tiles / PIP | Natural Surfacing (EWF/Moss) |
|---|---|---|
| Surface Temp (Sun) | Very Hot (140°F+) | Cool/Ambient (80-95°F) |
| Upfront Cost | High ($10-$20/sq ft) | Low to Moderate ($2-$7/sq ft) |
| Maintenance | Low (Sweeping) | Moderate (Raking/Topping off) |
| Health Benefit | None (Inert) | High (Soil Microbes/Serotonin) |
| Lifespan | 8-12 Years (then Landfill) | Infinite (with replenishment) |
The “cost” of natural surfacing is shifted from the purchase price to the engagement time. You save money on day one, but you spend 15 minutes every week raking the slide exit. For many parents and educators, this weekly “zen raking” is a small price to pay for a surface that doesn’t off-gas chemicals in the summer heat.
Practical Tips for Success
To ensure your natural playground stays beautiful and safe, follow these immediate actionable tips:
- Install Depth Markers: Paint a ring around the playground equipment legs exactly 12 inches above the ground level. If you can see the ring, your surfacing has settled or shifted and needs to be raked back or topped off.
- Use “Knitting” Fibers: When buying wood fiber, ask for “Engineered” wood fiber rather than “chips.” EWF is made of longer, thinner fibers that interlock (knit) like a carpet, making it much more stable and wheelchair-accessible than round wood chips.
- The Moss Starter Hack: If establishing a moss zone, blend a handful of moss with a cup of buttermilk and water in a blender. Paint this “moss slurry” onto damp soil. It will establish a lush, living carpet much faster than waiting for spores to land naturally.
- Border Safety: Ensure all wooden borders are rounded off. A 90-degree edge on a cedar log can be just as hazardous as the fall itself. A quick pass with a sander or a drawknife can save a lot of scraped shins.
Advanced Considerations: The Integrated Ecosystem
For those looking to take natural playground surfacing to a professional level, consider Integrated Stormwater Management. A playground is often the largest flat surface in a backyard. By using a deep (18-inch) sand or wood fiber pit, you are creating a massive rain garden.
You can direct your home’s downspouts into the gravel sub-base of the playground. The 12 inches of natural surfacing acts as a giant filter, cleaning the rainwater before it reaches the water table. This turns your child’s play area into a functional piece of green infrastructure that prevents local flooding and erosion.
Additionally, think about biodiversity zoning. Use different natural surfaces to encourage different types of play. A deep sand pit encourages “stationary” creative play. A wide EWF zone encourages “gross motor” running and jumping. A mossy “quiet nook” under a tree encourages “introspective” sensory play. By varying the ground cover, you are subconsciously guiding the child’s play patterns.
Scenario: The Backyard “Forest Floor”
Let’s look at a 20×20 foot DIY project. A family wants to install a wooden climbing frame and a slide. Instead of 400 square feet of rubber, they excavate 12 inches deep. They install 4 inches of washed pea gravel, a geotextile layer, and then 10 inches of Engineered Wood Fiber.
Around the edge, they use black locust logs—a rot-resistant wood that lasts decades without treatment. In the “splash zone” of the slide, they bury a 3×3 foot natural jute mat under the wood chips to prevent the “hollow” from forming. Total cost? Roughly $1,200, compared to the $6,000 quote they received for a poured-rubber surface. The result is a cool, aromatic, and safe play space that looks like it grew out of the forest.
Final Thoughts
Natural playground surfacing DIY isn’t just about saving money or choosing a rustic look. It is about honoring the developmental needs of the human child. When we replace living earth with petroleum-based mats, we trade long-term sensory and biological health for short-term maintenance convenience. A child who grows up feeling the resilience of the earth beneath their feet develops a different relationship with risk, nature, and their own body.
By following the structural guidelines for drainage, depth, and containment, you can build a space that is every bit as safe as a commercial park while being infinitely more alive. Start small—perhaps a sand nook or a mossy path—and see how the children respond. You’ll likely find that the ground itself becomes the most popular piece of equipment in the yard.
Experiment with different textures. Mix pine needles with wood chips for scent. Use smooth river stones for borders. The more you deviate from the “sanitized” model of play, the more opportunities you provide for discovery. The earth was our first playground; it’s time we let our children back onto it.
Sources
1 playgroundequipment.com | 2 zeager.com | 3 cunninghamrec.com | 4 adventureturf.com | 5 superiorgroundcover.com | 6 happiestbaby.com | 7 noahsplay.com