Diy Natural Dig Pit Ideas For Kids
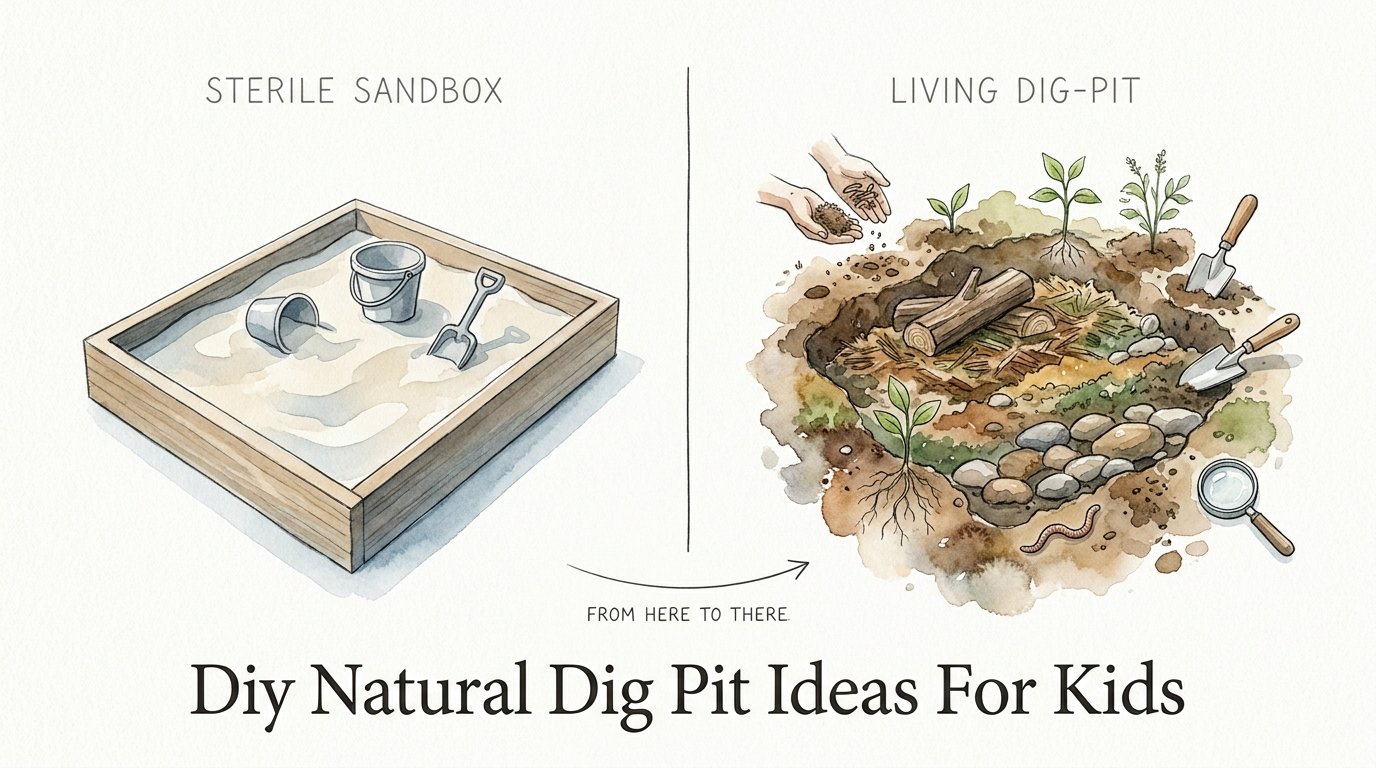
White bagged sand is clinically clean and developmentally dead—it’s time to bring the textures of the real earth back to the play zone. We were told that ‘play sand’ had to be white, bleached, and contained in a plastic box. But the most engaging play happens when the textures are varied and the environment feels alive. Our DIY living dig-pit uses local materials, encourages real digging depth, and integrates with the backyard ecosystem rather than fighting it. Watch their focus triple when the tools are real and the ‘finds’ are natural.

Traditional play spaces often prioritize sanitization over stimulation. While the intention is safety, the result is a sterile environment that lacks the sensory complexity children need for neurological development. A living dig-pit offers more than just a place to push trucks; it provides a direct connection to the biological world beneath our feet.
This guide explores how to reclaim a corner of your yard for authentic, deep-earth play. You will learn how to design, build, and maintain a space that evolves with the seasons. Instead of fighting the mud, you will learn to harness it as a primary tool for learning and resilience.
Diy Natural Dig Pit Ideas For Kids
A DIY natural dig pit is a designated outdoor play area filled with organic materials like soil, mulch, gravel, and sand rather than just sterilized play sand. Unlike a traditional sandbox, which is usually a shallow frame on top of the grass, a dig pit is excavated deeper into the earth to allow for vertical exploration. This space is designed to mimic a mini construction site or a forest floor where kids can find worms, roots, and different soil layers.
These pits exist to provide “heavy work” and sensory-rich experiences that modern indoor environments lack. In the real world, soil is used for everything from agriculture to engineering. A dig pit brings these concepts down to a child’s scale. You might find them in nature-based preschools or “forest schools” where children are encouraged to interact with the environment without the fear of getting dirty.

Imagine a space where a child doesn’t just skim the surface but digs deep enough to see how the soil changes color or how water pools at the bottom. This is the difference between a shallow plastic bin and a living pit. It is an evolving ecosystem where the “toys” are often sticks, rocks, and the dirt itself. Whether you build a “Construction Zone” with gravel or a “Discovery Pit” with dark loam and forest mulch, the goal is to provide a canvas for unstructured, open-ended play.
How to Build Your Living Dig-Pit: Step-by-Step
Building a dig pit requires more planning than a sandbox because you are working with the ground’s natural drainage. Success depends on site selection. Choose a spot that is relatively level but has a natural slope away from your house. Avoid areas directly under fruit trees to prevent rotting fruit from attracting pests, but seek out dappled shade to protect children from the midday sun.
The first step is excavation. Mark out your perimeter using stakes and string. For a truly engaging experience, aim for a depth of 18 to 24 inches. This depth allows for serious “trenching” and provides enough volume for a proper drainage layer. As you dig, save the topsoil for your garden beds, but remove any large, sharp rocks or construction debris found in the subsoil.
Once the hole is cleared, address the drainage. If your soil is heavy clay, water will sit in the pit and turn it into a stagnant pond. To prevent this, dig a slightly deeper hole in the center of your pit—about 6 inches deeper than the rest—and fill it with coarse gravel. This acts as a “sump” for excess water. Cover the entire bottom of the pit with a layer of landscaping fabric or shade cloth. This allows water to pass through but keeps the earth and your play materials from mixing into a muddy soup.
The frame or edging is your next priority. Use natural materials like cedar logs, large smooth boulders, or untreated timber sleepers. Avoid pressure-treated wood from older stocks as they can leach chemicals like arsenic. Modern pressure-treated wood is safer, but many parents prefer the aesthetics of fallen logs or stone. Bury the bottom third of your edging material into the ground to ensure it remains stable when children stand on it.
Filling the pit is where the magic happens. Don’t just use sand. Create a mix of textures. A popular “recipe” includes a base of 60% local soil or dark loam, 20% coarse river sand, and 20% fine wood chips or “playground mulch.” This combination creates a “diggable” consistency that holds its shape for tunnels and hills but drains well. If your child is obsessed with construction, dedicate one corner of the pit to smooth pea gravel.
Benefits of the Living Dig-Pit
The most significant benefit of a natural dig pit is its impact on a child’s developing immune system. Scientific research into the “hygiene hypothesis” suggests that early exposure to diverse microbes found in soil can help train the immune system to respond correctly to threats, potentially lowering the risk of allergies and asthma. Soil contains Mycobacterium vaccae, a beneficial bacterium that has been linked to increased serotonin levels in the brain, which helps reduce anxiety and improve focus.
Physically, digging is “heavy work.” Pushing a shovel into the earth, lifting a full bucket of soil, and moving rocks builds core strength and improves gross motor coordination. It provides deep pressure input to the joints, which is particularly grounding for children with sensory processing needs. Unlike the light resistance of sand, soil offers varying levels of resistance depending on its moisture content, teaching children to grade their physical force.
Cognitively, a dig pit is an engineering laboratory. Children learn about volume, gravity, and structural integrity as they build dams to hold back water or bridges to cross their excavations. They observe biology in real-time as they discover earthworms, beetles, and decaying organic matter. This fosters a sense of stewardship and environmental empathy that cannot be taught through a screen or a book. It turns the backyard into a classroom where the curriculum is written by the earth itself.
Challenges and Common Mistakes
The biggest challenge for most parents is the mess. A living dig-pit involves dirt, and when you add water, it involves mud. To manage this, place your dig pit at a distance from the house and keep a “wash station” nearby—a simple bucket of water and a towel. Establish a “shoes-off” or “boots-only” rule for the play area to prevent tracking dirt into the home. Many families find that having dedicated “play clothes” makes the transition easier for everyone.
Pests are another concern. Neighborhood cats may view a fresh pile of loose soil or sand as a litter box. This is a common pitfall that can lead to health risks like toxoplasmosis. To avoid this, always cover the dig pit when not in use. A simple wooden lattice or a heavy-duty mesh cover allows the soil to breathe while keeping out larger animals. Check the pit regularly for any sharp objects or hornet nests that may have formed in the quiet corners.
Drainage failure is a technical mistake that can ruin the experience. If the pit is not deep enough or the gravel layer is omitted, the area will become a permanent mud hole after a heavy rain. Ensure you have followed the drainage steps correctly. If you find water is still pooling, you may need to install a perforated drainage pipe leading to a lower part of the yard. This extra effort during construction prevents the pit from becoming a swamp in the spring.
Limitations and When to Choose Alternatives
A deep, natural dig pit might not be ideal for every backyard. If you live in an urban area with high levels of lead or other contaminants in the soil, digging deep into the ground could expose children to toxins. In these cases, a raised garden bed filled with clean, imported loam is a safer alternative. Always test your soil if you are unsure about its history, especially in older industrial neighborhoods.
Space constraints also play a role. A functional dig pit needs room for children to move and store their tools. If your backyard is only a few square feet, a large pit might dominate the landscape and leave no room for other activities. In very small spaces, a “sensory tub” or a smaller, movable “construction bin” might be more practical. These can still be filled with natural materials but are easier to manage on a patio or balcony.
Environmental factors like extreme heat or heavy shade can also limit the pit’s usefulness. In desert climates, the soil can become rock-hard and dusty, requiring constant watering to stay diggable. In deep shade, the soil may never dry out, leading to issues with mold or excessive dampness. You must be willing to work with your local climate to keep the pit in a playable state.
Comparison: Sterile Sandbox vs. Living Dig-Pit
Deciding between a traditional sandbox and a natural dig pit depends on your goals for play and your tolerance for mess. Use this table to understand the key differences.
| Feature | Sterile Sandbox | Living Dig-Pit |
|---|---|---|
| Materials | White, washed silica sand | Loam, river sand, mulch, gravel, local soil |
| Depth | Shallow (4-6 inches) | Deep (12-24 inches) |
| Biological Value | Minimal; often sterilized | High; contains beneficial soil microbes |
| Maintenance | Needs regular replacement to stay clean | Needs occasional mulching and seasonal aerating |
| Play Variety | Limited to molding and pouring | Trenching, engineering, biology, heavy lifting |
| Cost | Moderate (sand and plastic frame) | Low (mostly local or recycled materials) |
Practical Tips and Best Practices
To maximize the longevity of your dig pit, focus on your tool selection. Replace flimsy plastic shovels with real, child-sized metal tools. Metal spades and rakes provide the necessary weight and durability for digging into real soil. They also teach children the value of caring for “real” things. Store these tools in a nearby weather-proof bin to prevent them from rusting or becoming a tripping hazard.
Introduce “loose parts” to the pit regularly. Natural loose parts like pinecones, large smooth stones, bark wedges, and “tree cookies” (cross-sections of branches) provide endless opportunities for imaginative play. One day the stones are cargo for a truck; the next, they are the foundation for a miniature castle. Rotating these items every few weeks keeps the environment fresh and sparks new play narratives.
Manage the moisture level of the pit to keep it inviting. During dry spells, use a garden hose to dampen the soil. This makes it easier to dig and prevents dust from getting into eyes and lungs. Conversely, if the pit is too wet, use a rake to turn the soil over and help it aerate. Adding a fresh layer of wood chips every spring can help regulate moisture and keep the “earthy” scent pleasant.
Advanced Considerations for Serious Practitioners
For those looking to fully integrate the dig pit into a backyard ecosystem, consider “edge planting.” Surround the pit with hardy, non-toxic plants that can withstand occasional trampling. Ornamental grasses like Pennisetum or herbs like lavender and rosemary provide sensory stimulation through scent and texture. These plants also help stabilize the ground around the pit and provide cover for beneficial insects.
Think about the “micro-habitat” you are creating. You can intentionally bury “treasures” like large geodes, smooth fossils, or even “dinosaur bones” (clean cow bones from a butcher) at the bottom of the pit before you fill it. This adds an element of archaeology to the play. As children dig deeper over months or years, they find these buried surprises, reinforcing the concept of geological layers and history.
Scaling the pit is also an option for larger families or community spaces. Instead of one single hole, you can create a “digging circuit” connected by log balance beams or stone paths. This encourages movement and social interaction as children move materials from one zone to another. It transforms the dig pit from a standalone toy into a comprehensive landscape feature that adds value to your property and your children’s lives.
Example: The “Arid Construction Zone” Scenario
Consider a family living in a dry, sandy region like the American Southwest. A traditional soil-heavy pit might dry out too quickly. Instead, they build a pit filled with fine pea gravel and decomposed granite. They excavate 18 inches down and use a large galvanized steel stock tank with the bottom removed as their frame. This keeps the material contained while allowing for deep drainage.
Because the material is coarser, they provide heavy-duty metal excavators and dump trucks. To add a “living” element, they incorporate a small water feature nearby—a simple hand pump that allows the kids to “quarry” the gravel and wash it in a small stream bed they’ve lined with river rocks. This setup requires minimal water but provides hours of tactile, weight-based play that mimics a real-world gravel pit operation.
In this scenario, the family avoids the mess of mud but maintains the “heavy work” and sensory depth of a natural pit. By choosing materials that match their local environment, they ensure the play area is sustainable and easy to maintain throughout the year.
Final Thoughts
A DIY natural dig pit is more than a backyard project; it is a commitment to a different kind of childhood. It trades the “perfection” of white sand for the complexity of the earth. By allowing children to dig deep, get dirty, and interact with the biological world, you are providing them with tools for resilience that plastic toys can never replicate. The focus, calm, and pure joy found in a hole in the ground are some of the greatest gifts a backyard can offer.
Building this space requires effort and a bit of engineering, but the rewards are measurable. From improved motor skills to a boosted immune system, the benefits are grounded in science. More importantly, the memories created as children uncover the “treasures” of the soil will last far longer than any store-bought play set. It is time to stop fighting the dirt and start letting it teach our children what it means to be alive.
As you plan your pit, remember that it doesn’t have to be perfect on day one. It is a living space that will change as your children grow. Start with a hole and some good dirt, and let their imagination do the rest. You might find that the best part of the project is watching the “developmentally dead” sandbox be replaced by a zone of vibrant, deep-earth discovery.
Sources
1 naturalstart.org | 2 embracing-motherhood.com | 3 anlscape.com.au | 4 toddlerapproved.com | 5 thepragmaticparent.com | 6 backyardboss.net | 7 erommy.com | 8 safekidsgf.com | 9 natureplays.com | 10 happiestbaby.com | 11 letgrow.org | 12 reddit.com | 13 childrenandnature.org | 14 rutheodesigns.com | 15 thezoofamily.com | 16 soilandstone.com | 17 littlepeoplescove.com | 18 thezoofamily.com | 19 naturalearning.org | 20 lexieloolilyliamdylantoo.com