How To Make Seed Bombs With Kids
That mud puddle isn’t a laundry disaster; it’s a reforestation factory waiting for a mission. To most people, a muddy patch in the yard is a ‘nuisance’ that ruins shoes. To a child with a mission, it’s the ‘asset’ required to heal the earth. Seed bombs are the ultimate way to spend a screen-free afternoon. Mixing local clay, garden mud, and wildflower seeds makes your kids environmental engineers. They aren’t just making a mess; they are creating a mobile meadow that will bloom long after summer ends.
Wildflower seed bombs—often called “earth dumplings” or “green grenades”—serve as a powerful tool for ecological restoration. This practice turns gardening into a tactical, hands-on game. Children get to play with mud while learning about biology, weather patterns, and local ecosystems. These small spheres protect seeds from the elements and predators until the conditions are perfect for growth.
How To Make Seed Bombs With Kids
Seed bombs are small, hand-rolled balls of clay, soil, and seeds. They act as a self-contained planting kit. The clay serves as a protective shell, keeping the seeds safe from hungry birds and the scorching sun. The soil provides an initial boost of nutrients once the shell begins to break down. This ancient technique allows people to plant flowers in hard-to-reach places or areas with poor soil quality.
Modern seed bombing finds its roots in “guerrilla gardening.” This movement gained momentum in New York City during the 1970s. Activists used “seed grenades” to transform vacant, trash-filled lots into vibrant community gardens. Today, the practice focuses on supporting declining pollinator populations. Bees and butterflies rely on these native flowers for survival. Making these with kids bridges the gap between messy play and meaningful environmental activism.
The Master Recipe: How to Build Your Earth Dumplings
Creating a successful seed bomb requires a specific balance of ingredients. You want the ball to be hard enough to survive a toss but soft enough to dissolve when the rain hits. A standard ratio uses five parts clay, three parts compost or potting soil, and one part seed.
Start by mixing the dry ingredients in a large bowl. Red pottery clay or powdered bentonite works best because of its high binding strength. Slowly add water, one tablespoon at a time. The mixture should reach the consistency of stiff cookie dough or modeling clay. If the mixture is too wet, it will stick to your hands and take forever to dry. If it is too dry, the bomb will crumble before it ever hits the ground.
Once the “dough” is ready, pinch off small pieces and roll them into spheres about the size of a golf ball or a large marble. Smaller balls tend to dry faster and fly further. Place the finished balls on a tray lined with newspaper or cardboard. Let them dry in a cool, shaded area for 24 to 48 hours. Drying them too quickly in direct sun can cause the clay to crack and the seeds to sprout prematurely.
Benefits of the Seed Bomb Strategy
Native wildflowers provide the foundation for a healthy local food web. Many modern landscapes consist of mowed grass or invasive ornamental plants. These “green deserts” offer no food for local insects. Seed bombs introduce diverse plant life back into these areas. They specifically support “specialist” pollinators that can only feed on certain native species.
Ecological benefits extend to soil health as well. The roots of wildflowers reach deep into the earth, breaking up compacted soil. This allows water to penetrate deeper into the ground rather than running off into sewers. Over time, these plants die back and add organic matter to the soil, creating a richer environment for future growth.
For children, the benefits are psychological and educational. This activity teaches patience and observation. Kids must wait for the right weather and then watch for weeks to see their work pay off. It builds a sense of agency, showing them that they can directly improve the world around them with their own two hands.
Challenges and Common Mistakes to Avoid
One frequent error is using a “one size fits all” seed mix. Many store-bought wildflower mixes contain invasive species or flowers not suited for your specific climate. Invasive plants can escape the intended area and choke out local vegetation. Always research native species for your specific USDA hardiness zone. Using local seeds ensures the plants are adapted to your rainfall levels and soil pH.
Mold is another common pitfall. If the seed bombs are stored while they are still damp, the moisture trapped inside the clay will cause the seeds to rot or grow fungus. Ensure the balls are rock-hard before placing them in jars or bags. If you live in a high-humidity area, using a fan to circulate air around the drying tray can prevent spoilage.
Poor site selection often leads to disappointment. Tossing a seed bomb onto a thick, established lawn usually fails. The existing grass roots are too dense for the tiny wildflower seedlings to compete. Look for areas with bare soil, recently disturbed ground, or thin vegetation. These spots offer the “gap” in the ecosystem that wildflowers need to take hold.
Limitations and Practical Constraints
Seed bombs are not a magic solution for every environment. In extremely arid or desert climates, the clay shell may become too hard for the seedlings to break through. Without significant rainfall, the bomb simply sits on the surface like a rock. In these regions, “scarifying” or slightly burying the bomb may be necessary to ensure success.
Permission and legal boundaries also matter. While the term “guerrilla gardening” sounds exciting, tossing seeds onto private property can be seen as trespassing. Focus your efforts on your own backyard, community-approved projects, or neglected public spaces where the city has no active management. Always check local regulations regarding the planting of seeds in public parks.
Timing is the final major constraint. Throwing seed bombs in the middle of a summer heatwave is usually a waste. The heat will bake the seedlings before they can establish a root system. The best times for “deployment” are early spring, just before the rainy season, or late autumn. Autumn planting allows the seeds to undergo “stratification,” a natural freezing and thawing process required by many native species to germinate.
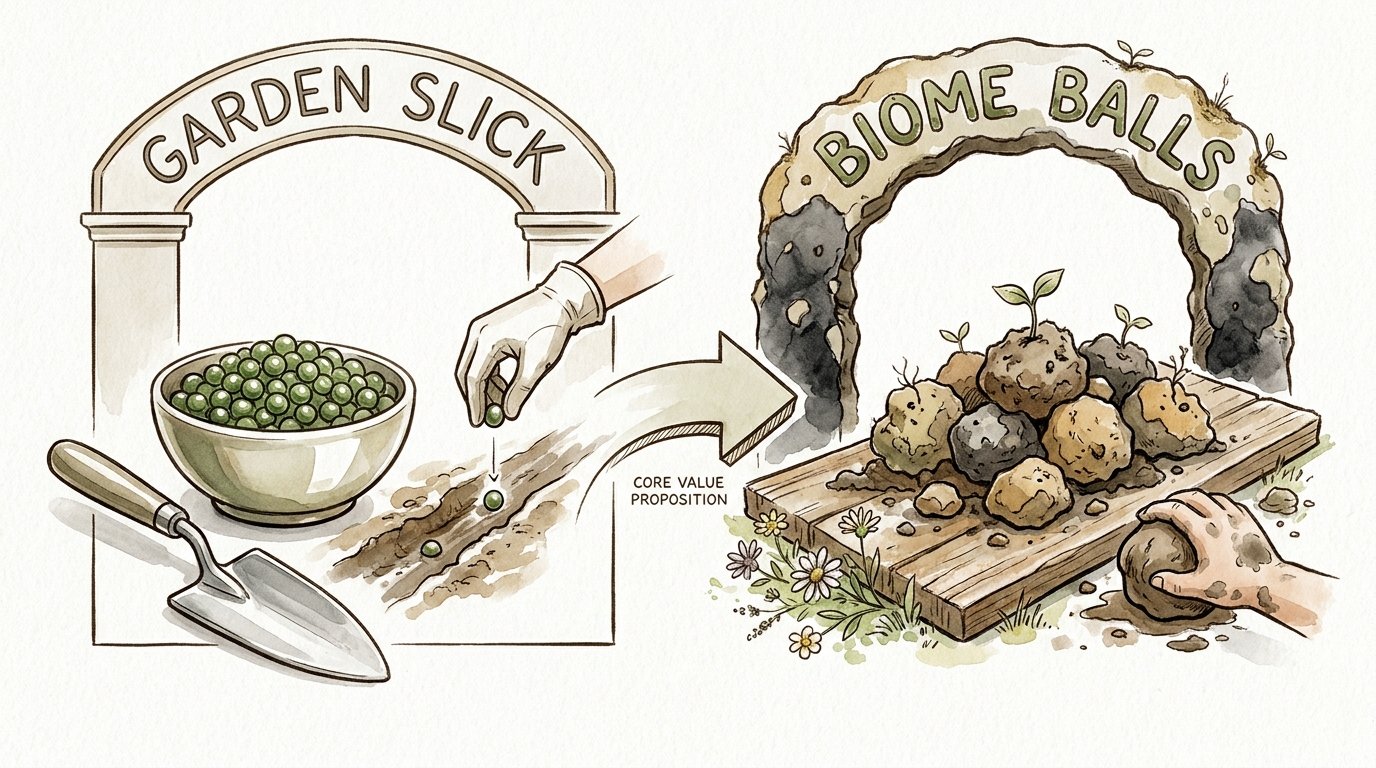
Comparing Methods: Garden Slick vs. Biome Balls
Different goals require different types of seed bombs. You might choose a refined “Garden Slick” approach or a more rugged “Biome Ball” method.
| Feature | Garden Slick | Biome Balls |
|---|---|---|
| Primary Purpose | Aesthetic beauty and gifts | Ecological restoration |
| Clay Type | Refined white or terracotta clay | Raw local clay or bentonite |
| Seed Density | High (for a “pop” of color) | Balanced (for long-term survival) |
| Maintenance | May require supplemental watering | Self-sufficient after rain |
Garden Slicks are perfect for school projects or party favors. They look professional and use clean materials. Biome Balls, however, are for the serious practitioner. They often include “inoculants” like mycorrhizal fungi to help the plants bond with the local soil. Choosing the right style depends on whether you are decorating a flower bed or rewilding a vacant lot.
Practical Tips for Maximum Germination
Success depends on the “break-apart” factor. A seed bomb that stays in a perfect ball forever is a failure. Using high-quality compost ensures the ball is porous enough for water to soak in. Adding a small amount of finely shredded paper or straw can act as “rebar,” giving the ball structural integrity while it dries but helping it crumble once it gets wet.
Regional seed selection is non-negotiable. For the Northeast, look for Black-Eyed Susans and Wild Bergamot. In the Southwest, focus on California Poppies and Desert Marigolds. The Midwest thrives with Purple Coneflowers and Milkweed. Researching these specific species ensures your “bombs” are actually helpful to the local ecosystem.
Consider the “predator load” of your target area. If the site is swarming with birds or squirrels, make the clay shell slightly thicker. This hides the scent of the seeds. If you are planting in a very shady area, choose “woodland” seed mixes. Putting sun-loving meadow flowers in a forest setting will result in weak, leggy plants that never bloom.
Advanced Considerations: Soil Biology and Mycorrhizae
Serious practitioners take seed bombs to the next level by focusing on the microbiology within the sphere. Seeds don’t just need dirt; they need a living community of microorganisms. Adding a teaspoon of “mycorrhizal inoculant” to your mix can drastically increase survival rates. These fungi form a symbiotic relationship with plant roots, effectively acting as an extended root system to gather water and nutrients.
Using “biochar” is another advanced technique. Biochar is a form of charcoal that is incredibly porous. It holds onto water and provides a massive surface area for beneficial bacteria to live. Mixing small amounts of crushed biochar into your seed bombs helps them stay hydrated during brief dry spells. This increases the window of opportunity for the seedling to get its taproot deep into the ground.
Think about the “succession” of your seeds. A high-performance seed bomb might contain both “pioneer” species and “climax” species. Pioneer species, like annual poppies, grow fast and stabilize the soil. They provide shade and protection for slower-growing perennials, like Joe-Pye Weed, which will take over in the second or third year. This tiered approach ensures the area stays green for seasons to come.
Example Scenario: The Urban Median Transformation
Imagine a neglected strip of dirt between a sidewalk and a busy road. The soil is compacted by years of foot traffic and tainted by road salt. Traditional gardening here is impossible; the ground is too hard for a trowel and there is no water source. This is the perfect environment for a Biome Ball.
A group of local kids prepares a batch of seed bombs using extra-strong red clay and a “salt-tolerant” native seed mix. They include species like Sea Side Goldenrod or certain native grasses that can handle harsh roadside conditions. They wait for a week when the weather forecast predicts three days of steady rain.
On the evening before the storm, the kids walk the sidewalk and toss the bombs every few feet. The following rain softens the clay, allowing the seeds to settle into the tiny cracks in the compacted earth. Two weeks later, green shoots appear. By mid-summer, the grey, dusty strip is a corridor of gold and purple flowers. This transformation provides a “refueling station” for bees traveling through the urban environment.
Final Thoughts
Creating seed bombs is a radical act of hope. It takes a small amount of effort and a bit of mud to spark a massive change in a local landscape. This activity connects children to the rhythm of the seasons and the needs of the earth. It proves that environmentalism doesn’t have to be a lecture; it can be a messy, joyful game.
Experimenting with different ratios and seed types allows you to fine-tune your results. Every failed bomb is a lesson in soil science, and every successful bloom is a victory for biodiversity. Encourage your kids to document where they “bombed” and return later to check on the progress.
Starting this project today sets the stage for a greener tomorrow. These little spheres of life hold the potential to turn every “nuisance” mud puddle into a thriving meadow. Grab a bowl, find some clay, and start your mission to rewild the world.
Sources
1 flockingaround.com | 2 dcnatives.org | 3 bloombombs.org | 4 honeybeesuite.com | 5 gardenforwildlife.com | 6 curious.earth | 7 globeslcc.com | 8 playgreenly.com