Rube Goldberg Ideas For Kids At Home
If the toy provides all the energy, the child’s brain goes to sleep. We buy toys that ‘do’ things, but the most engaged kids are the ones building things that ‘work.’ A Rube Goldberg machine transforms boredom into a high-stakes engineering mission. It teaches trial, error, and the invisible laws of gravity with nothing more than what’s already in your junk drawer.
When you hand a child a pre-programmed gadget, they become a spectator. When you hand them a pile of recycled cardboard and a marble, they become an architect. This guide explores how to turn your living room into a laboratory of physics and fun. You don’t need a degree in mechanical engineering to get started—just a willingness to fail fast and try again.
Modern play is often too polished. We have forgotten the magic of the “chain reaction,” where one event triggers another in a beautiful, chaotic sequence. By the end of this article, you will have a complete blueprint for launching your own home engineering projects. Let’s dive into the messy, brilliant world of contraption building.
Rube Goldberg Ideas For Kids At Home
A Rube Goldberg machine is a complex contraption designed to perform a simple task in an elaborate, roundabout way. It is named after Reuben Goldberg, a Pulitzer Prize-winning cartoonist who drew zany inventions that solved everyday problems through ridiculous sequences. Think of a machine that uses a toaster to trigger a hammer, which eventually flips a light switch.
At home, these machines are the ultimate STEM (Science, Technology, Engineering, and Math) playground. They exist in the real world as prototypes for automation and industrial systems, but for kids, they are a way to visualize physics. Instead of reading about gravity in a textbook, they see it pull a tennis ball down a ramp made of books.
You can find inspiration for these machines everywhere—from YouTube music videos like OK Go’s “This Too Shall Pass” to the classic board game *Mouse Trap*. The goal isn’t efficiency; the goal is entertainment and education. In a world of instant gratification, these machines celebrate the long, winding path to a “win.”
Common home ideas include:
- Popping a balloon using a sharpened pencil attached to a toy car.
- Watering a plant by tipping a cup of water with a falling weight.
- Ringing a bell at the end of a long marble run.
- Turning off an alarm clock using a falling book and a string.
How It Works: The Science of the Sequence
Building a successful machine requires an understanding of energy transfer. Every step in your chain reaction must pass “work” to the next step. If the energy dies out halfway through, the mission fails. Understanding these core principles will help you troubleshoot when things inevitably go wrong.
Potential and Kinetic Energy
Everything starts with stored energy. When you hold a ball at the top of a ramp, it has **potential energy**. The moment you let go, that energy converts into **kinetic energy**—the energy of motion. To keep a machine running, you must constantly find ways to “reset” potential energy, like having a falling weight pull a string that lifts a lever.
The Role of Gravity
Gravity is your primary engine. Most home machines move from high surfaces to low surfaces. By starting on a table and ending on the floor, you harness the constant pull of the earth to move your components. Without gravity, you’d need a constant external power source, which makes the engineering much harder.
The Six Simple Machines
Great Rube Goldberg designs rely on the “building blocks” of engineering. Using these six simple machines allows you to manipulate force and direction:
- Inclined Plane: Ramps made of cardboard or tracks that let objects roll.
- Lever: A seesaw made from a ruler and a block that can launch or tip objects.
- Wedge: A doorstop or book used to hold something back until it is triggered.
- Wheel and Axle: Toy cars or rolling cans that transport energy across flat surfaces.
- Pulley: A string over a doorknob that lets a falling object lift something else.
- Screw: A spiral track (like a cardboard tube cut into a coil) that slows down a marble.
Benefits of Building Chain Reactions
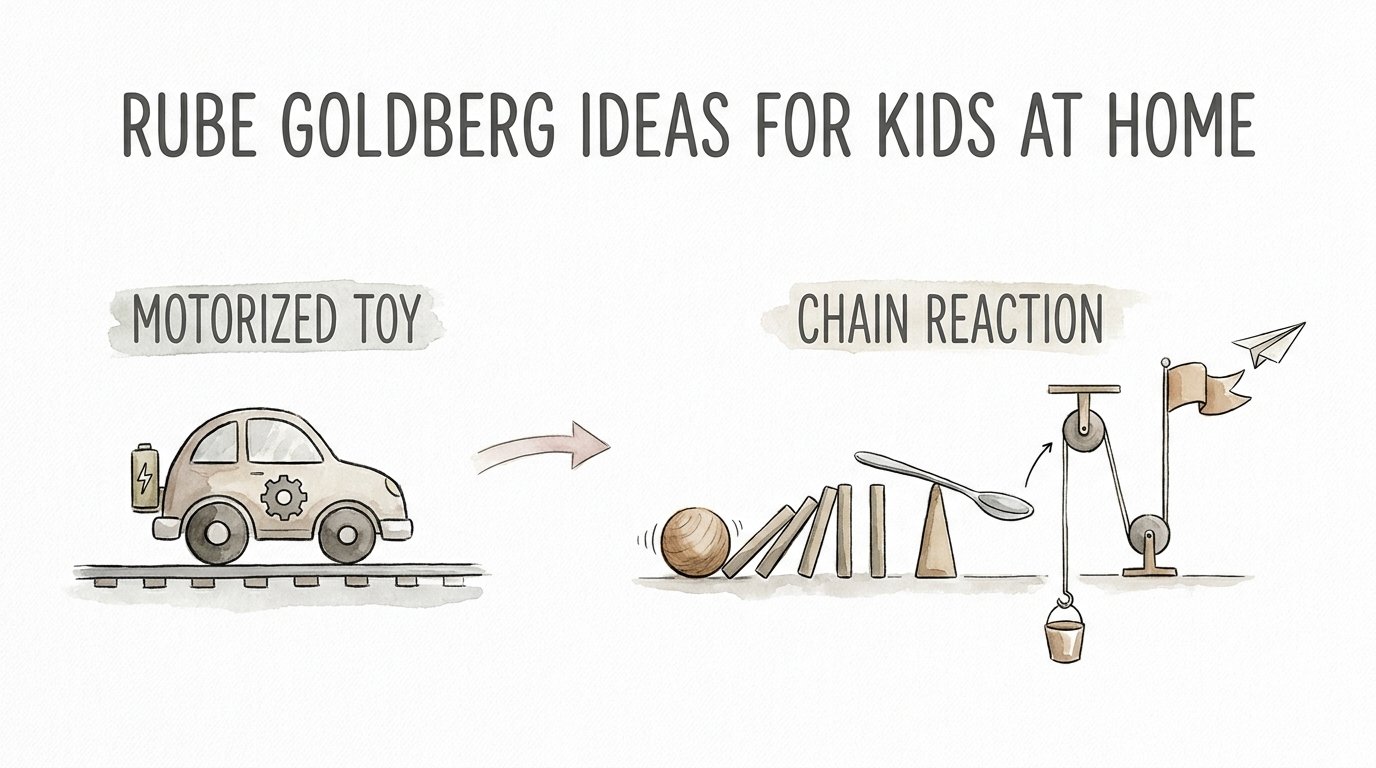
The primary advantage of this hobby is the development of a “growth mindset.” Unlike a **motorized toy** that works the same way every time you press a button, a chain reaction is finicky. It forces a child to look at a failure and say, “The marble missed the cup because the ramp was too steep,” rather than “I’m not good at this.”
Critical Thinking and Spatial Reasoning
Kids have to visualize how objects will interact before they happen. They learn to estimate distance, weight, and speed. If a domino is too far from the next one, the chain stops. This teaches precise measurement and spatial awareness that translates directly to math and architecture.
Social Collaboration
While these can be solo projects, they are world-class team-building exercises. Siblings or friends must negotiate where to place the next “stage” of the machine. They learn to communicate complex ideas: “If you move the chair, the string will be too short.” This collaborative problem-solving is a vital 21st-century skill.
Resourcefulness
There is a unique thrill in looking at a cereal box and seeing a structural support. Rube Goldberg machines encourage kids to repurpose junk. This reduces the need for expensive kits and teaches them that they have the tools to create within their immediate environment.
Challenges and Common Mistakes
The most frequent error is trying to build the whole machine at once. Beginners often set up twenty steps and then try to run the trigger from the start. This leads to “cascading failure,” where you don’t know which specific part failed. The professional way to build is to **work backward** or test in segments.
Friction: The Invisible Enemy
Friction is the force that resists motion. A marble rolling on carpet will stop much sooner than a marble rolling on a hardwood floor. Many kids get frustrated when their cars don’t reach the next trigger. The solution is usually to increase the slope of the ramp or switch to a smoother surface.
The Weight Gap
A common pitfall is trying to have a light object trigger a heavy one. A single domino does not have enough mass to knock over a heavy textbook. You must “step up” the energy. A domino can knock over a small ball, which rolls into a medium-sized block, which eventually tips the heavy book.
Alignment Issues
Even a one-millimeter shift in a table can ruin a run. Many machines fail because the “aim” was slightly off. Professional builders often use masking tape to mark the exact spot where a component should sit. If your machine worked once but won’t work again, check if your objects have shifted.
Limitations and Environmental Constraints
While these projects are fantastic, they are not without limits. Space is the biggest constraint. A truly impressive machine can take up an entire room, making it a trip hazard for other family members. You must decide early on if the project is a “one-day build” or a permanent installation.
The Frustration Threshold
There is a fine line between a “fun challenge” and “total frustration.” Younger children (under 6) may lack the fine motor skills to reset a 50-step domino chain. For younger builders, it is better to keep the machine to 3-5 high-impact steps. As their patience grows, so can the complexity.
Material Fragility
Household items like tape and cardboard aren’t always durable. A ramp made of flimsy paper will sag after three runs, changing the physics of the ball’s path. Reliability is hard to achieve with “junk drawer” materials, meaning these machines are usually temporary artistic expressions rather than permanent tools.
Practical Tips for a Successful Build
If you want to move from “clunky mess” to “engineering masterpiece,” follow these best practices. These tips are the difference between a machine that works 10% of the time and one that works 90% of the time.
- Start at the End: Decide on your “grand finale” first. Once you know the goal (like popping a balloon), build the step immediately preceding it. Work your way back to the start.
- Test in Segments: Don’t move to step three until step one and two work three times in a row. This is called “modular testing.”
- Standardize Your Triggers: Use the same type of dominoes or the same weight of marbles throughout a section to keep the force consistent.
- Use “Guides”: If a ball keeps rolling off a ramp, tape “guardrails” made of straws or folded paper to the sides to keep it on track.
- The “Gentle” Start: The first trigger should be easy to activate. A gentle nudge or a single marble is enough to start a high-energy chain.
Advanced Considerations for Serious Builders
For those who have mastered the basics, it’s time to scale up. You can move beyond simple gravity and start incorporating other forces of nature. This is where the project shifts from a toy into a genuine mechanical system.
Incorporating Electronics
Try using a **micro:bit** or an **Arduino** to act as a bridge between physical and digital worlds. A falling weight could hit a sensor that triggers a motor on the other side of the room. This introduces kids to basic coding and circuit logic within their physical build.
Compound Machines
Challenge your builders to use all six simple machines in one run. Can you have a screw (spiral ramp) lead into a pulley, which then triggers a lever? Combining these mechanisms requires a deeper understanding of how force is multiplied or redirected.
The Multi-Room “Long Game”
Some advanced practitioners use “slow-burn” triggers to bridge gaps. A melting ice cube could eventually tip a balance, or a slow-running water stream could fill a bucket over five minutes. This introduces the element of **timing** and makes the machine feel like a living organism.
Example Scenario: The “Cereal Pourer”
Imagine you want to pour a bowl of cereal without touching it. Here is a 5-step blueprint:
Step 1: A toy car rolls down a ramp made of three hardcover books. This is your “Trigger.”
Step 2: The car hits a line of 20 dominoes. The dominoes snake around the base of a lamp, providing a visual “delay.”
Step 3: The final domino hits a marble resting on a “wedge” (a small piece of tape). The marble rolls down a paper towel tube taped to the table edge.
Step 4: The marble falls into a paper cup hanging from a string. The string goes over a doorknob (our “Pulley”).
Step 5: As the cup falls, the other end of the string pulls a “lever” (a ruler) that is holding a box of cereal. The box tips, and breakfast is served.
Final Thoughts
Rube Goldberg machines are more than just a way to pass a rainy afternoon. they are a masterclass in persistence and mechanical logic. In a world dominated by digital screens, these contraptions offer a tactile, high-stakes way to engage with the physical world. They prove that you don’t need a **motorized toy** to be entertained; you just need a bit of imagination and a lot of duct tape.
Watching a machine you built finally work after 50 failed attempts creates a sense of accomplishment that no video game can match. It validates the “trial and error” process that is at the heart of all great scientific discoveries. Whether the machine is three steps or thirty, the lesson remains the same: every action has a reaction.
Encourage your kids to start small and dream big. Let them fail, let them fix it, and most importantly, let them get messy. The junk drawer is waiting, and the laws of physics are ready to be tested. It’s time to start building something that actually “works.”
Sources
1 freddythefrogcaster.com | 2 study.com | 3 thomasnet.com | 4 brains-and-motion.com | 5 psu.edu | 6 lodgeslearning.com | 7 freddythefrogcaster.com | 8 inventorsoftomorrow.com | 9 tinkerlab.com | 10 momentixtoys.com | 11 freddythefrogcaster.com | 12 medium.com