Outdoor Art Studio Ideas For Kids
We try to contain the mess by shrinking the canvas, but all we’re really doing is shrinking their imagination. Small-scale art leads to small-scale thinking. By moving the ‘studio’ from the sheltered dining room to the exposed backyard, you remove the fear of the ‘mess’ and replace it with the freedom of scale. A child with a mural-sized canvas doesn’t just paint; they choreograph. They use their whole body, and in doing so, they expand their vision of what is possible.

Stepping outside changes the chemistry of creativity. Indoors, kids often feel the weight of rules. They worry about the rug, the walls, and the limits of the A4 paper. Outdoors, those boundaries vanish. The sky becomes the limit, and the grass becomes the drop cloth. This shift transforms art from a quiet, seated task into a high-energy physical event.
Setting up a dedicated outdoor creative space is one of the most impactful moves a parent or educator can make. It fosters a sense of agency. It encourages risks. It turns “be careful” into “go big.” We are going to walk through how to build, maintain, and maximize an outdoor art studio that evolves with your child.
Outdoor Art Studio Ideas For Kids
An outdoor art studio is a permanent or semi-permanent zone designed for open-ended creative exploration. It is not just a plastic table moved to the lawn for twenty minutes. It is a structured environment where materials are accessible and the floor is meant to be stained. These spaces exist to bridge the gap between traditional art and sensory play.
Real-world applications of these studios range from forest schools to high-end backyard “maker spaces.” In these environments, children use vertical surfaces like fences, horizontal surfaces like pavement, and three-dimensional spaces like mud kitchens. A fence-mounted easel allows a toddler to use their entire arm to make a mark. A driveway mural gives a group of kids the space to collaborate on a story that stretches thirty feet long.

Think of it as a “no-limits” laboratory. Here, the process matters more than the product. The goal is not to produce a refrigerator-worthy masterpiece every time. The goal is to let the child explore how gravity affects a drip of paint or how sunlight changes the color of a wet stone.
How to Build Your Open-Air Art Zone
Building a functional studio requires more than just buying a kit. You need to consider the environment, the stability of the surfaces, and the flow of the workspace. Follow these steps to create a professional-grade creative hub in your own yard.
Choose the Foundation
Select a location that offers a mix of sun and shade. Natural light is essential for seeing true colors, but direct midday sun can dry paint too quickly and cause discomfort. Level ground is a must for standing easels. If you have a patio or deck, use that for activities involving small pieces like beads or clay. Use the grass for high-mess activities like splatter painting or mud sculpting.
Install Vertical Workstations
Vertical surfaces are game-changers for gross motor development. Attach a large sheet of clear plexiglass or a weatherproof chalkboard directly to your fence. This setup allows children to paint with their chest at the center of the work, encouraging whole-body movement. Ensure the bottom of the easel sits about 18 to 24 inches off the ground for preschoolers.
Organize for Independence
Storage must be child-height and weather-resistant. Use heavy-duty plastic bins or galvanized metal buckets to house supplies. Group like items together: brushes in one container, sponges in another. A rolling art cart with locking casters is excellent for moving supplies from a shed to the studio area. This setup teaches children to manage their own workspace.
The Cleanup Station
Place the studio near a hose or an outdoor sink. Transitioning from art to “inside time” is much easier when hands and brushes are washed before entering the house. A simple bucket of soapy water and a stack of old towels can serve as a mobile wash station. This keeps the mess contained to the “danger zone” and reduces parent stress.
Benefits of Moving the Studio Outside
Practical benefits of outdoor art extend far beyond just keeping the house clean. These spaces provide measurable developmental advantages that are difficult to replicate in a confined indoor setting.
Gross Motor Mastery: Painting on a large scale requires reaching, bending, and stretching. Children use their shoulders, cores, and arms to navigate a large canvas. This “whole-body art” strengthens the large muscle groups needed for physical coordination.
Sensory Integration: The outdoors provides a rich sensory backdrop. Kids hear the wind, feel the sun, and smell the grass while they work. These inputs help regulate the nervous system, making art a therapeutic experience for many children.
Freedom to Fail: Mistakes feel less permanent outside. If a child spills a cup of paint on the grass, it is a non-event. This lack of pressure encourages children to experiment with “process art,” where they can try bold techniques without fear of ruining the environment.
Environmental Connection: Using natural “loose parts” like seed pods, sticks, and stones connects children to the rhythm of the seasons. They learn to see the artistic potential in the world around them, turning a fallen leaf into a paintbrush or a smooth rock into a sculpture.
Challenges and Common Mistakes
Setting up an outdoor space comes with unique hurdles. Understanding these pitfalls early will save you time and money.
One frequent error is using indoor-grade furniture. Untreated wood will warp, and cheap plastic will become brittle under UV exposure. Always choose materials rated for outdoor use or apply a high-quality sealant to wooden easels. Rust-resistant fasteners are a small but vital detail; standard screws will leave orange streaks on your fence after the first rain.
Leaving materials exposed is another common mistake. Brushes left in the sun will lose their bristles, and paints will dry into hard pucks. Every session must end with “stowing the gear.” If the studio is permanent, ensure you have a waterproof storage cabinet or a heavy-duty tarp to cover the main stations.
Wind is the enemy of light materials. Paper flying across the yard is a recipe for frustration. Use heavy-duty clips, magnets (if using a metal surface), or even rocks to weigh down canvases and paper rolls. If the wind is high, pivot to heavy mediums like clay or rock painting.
Limitations of the Outdoor Approach
Realistic constraints exist for every setup. Weather is the primary limitation. Rain, high winds, and extreme cold can shut down a studio for days or weeks. If you live in a climate with long winters, your outdoor studio will be a seasonal luxury rather than a year-round staple.
Space can also be a boundary. A small urban balcony does not offer the same “scale” as a sprawling suburban backyard. In these cases, you must focus on verticality. Use the walls and glass doors as your primary surfaces rather than trying to fit a large table.
Urban environments also face challenges with debris. Dust and pollen can settle on wet paintings, which may frustrate older children looking for a “clean” finish. If a child is working on a high-detail project, the uncontrolled outdoor environment may not be the ideal choice.
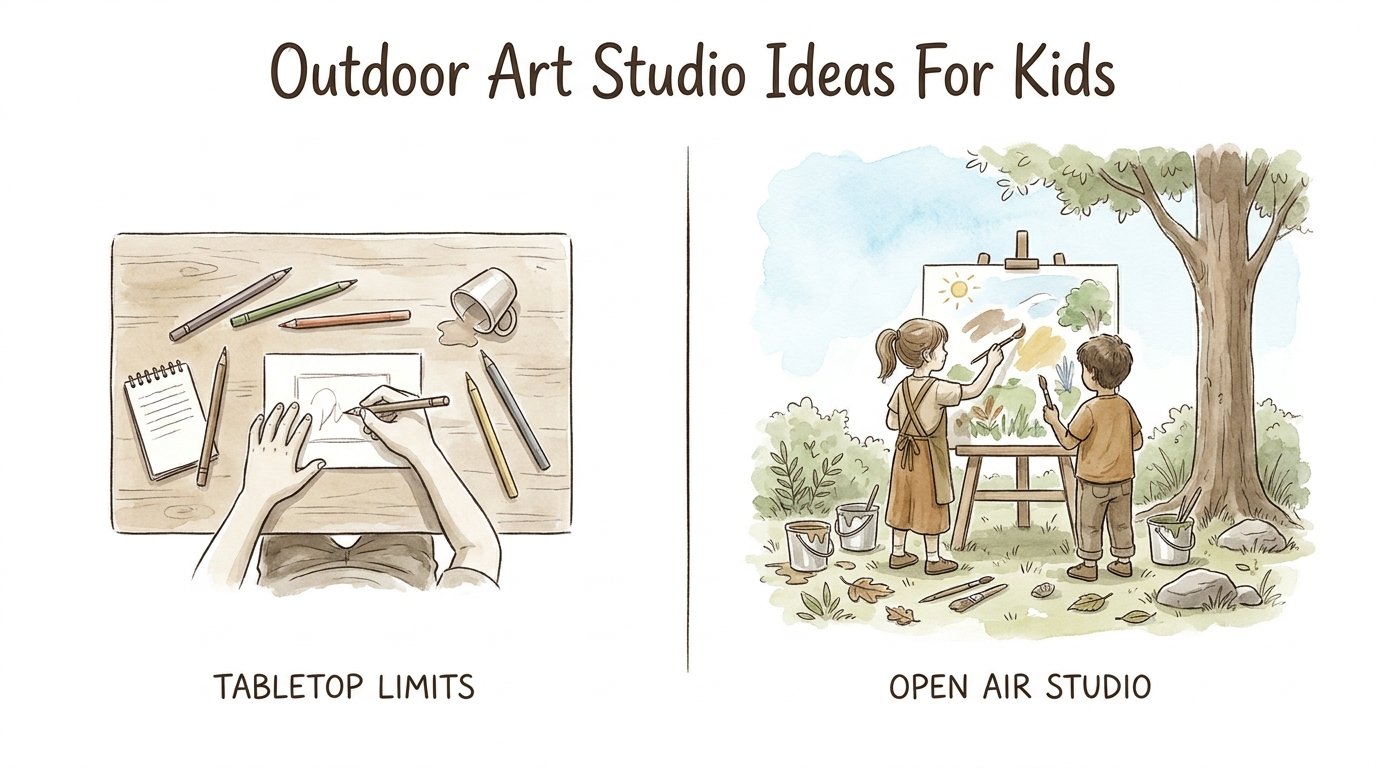
Tabletop Limits vs. Open Air Studio
| Feature | Indoor Tabletop | Outdoor Studio |
|---|---|---|
| Physical Scale | Restricted to arm’s length. | Whole-body range. |
| Mess Tolerance | Low (High stress). | Maximum (Zero stress). |
| Cleanup Time | Moderate to High. | Low (Hose-down capable). |
| Material Variety | Controlled/Clean. | Natural/Loose parts. |
| Child Independence | Limited by supervision. | High (Self-directed). |
Practical Tips for Success
Maximizing your outdoor studio requires a few pro-level adjustments. These tips improve efficiency and keep the space inviting throughout the season.
- Use Washable Mediums: Stick to tempera or water-based paints for the majority of play. These rinse off skin, clothes, and surfaces with minimal effort.
- Embrace “Transient Art”: Not every project needs to be saved. Use water and brushes to “paint” the sidewalk. The art disappears as the water evaporates, providing a fresh canvas every ten minutes.
- Repurpose Household Items: Old brooms, muffin tins, and spray bottles make excellent outdoor art tools. A broom dipped in paint creates massive, sweeping strokes that a standard brush cannot match.
- Sun Protection: Install a simple shade sail or use a large patio umbrella. Protecting the artist from UV rays extends the duration of the creative session.
- Document the Process: Since many outdoor projects are large or temporary, take photos. This builds a digital portfolio for the child without cluttering your physical space.
Advanced Considerations for Dedicated Spaces
Serious practitioners often look for ways to integrate STEAM (Science, Technology, Engineering, Art, and Math) into the outdoor studio. This elevates the space from a “messy zone” to a sophisticated learning environment.
Incorporate physics by setting up a pendulum painting station. Suspend a bucket with a small hole in the bottom from a tripod. As the bucket swings over a large roll of paper, it creates intricate geometric patterns based on gravity and momentum. This teaches children about force and motion through a visual medium.
Explore chemistry with “Sun Prints” or cyanotypes. Use light-sensitive paper and natural objects like ferns or flowers. Leaving them in the sun allows the UV rays to create a permanent blue-and-white silhouette. This process introduces the concept of chemical reactions and the power of the sun’s energy.
Consider the “Reggio Emilia” approach by treating the environment as the “third teacher.” Rotate the available materials weekly to prevent boredom. Introduce “provocations”—a tray of blue paint, some sea shells, and a mirror—to spark a specific theme of exploration.
Real-World Scenario: The Saturday Mural Session
Imagine a Saturday morning where three children are given a 10-foot roll of butcher paper taped to the driveway. Instead of small brushes, they have sponges attached to sticks and spray bottles filled with diluted liquid watercolors.
One child begins by “misting” the paper to create a base layer of soft colors. Another uses a sponge to stomp out a series of shapes. The third child gathers fallen leaves and uses them as stencils, spraying over them to leave white silhouettes behind.
The kids are moving constantly. They are squatting, reaching, and talking to each other about where the “forest” should go. There is no yelling about paint on the rug. When they are finished, the paper is rolled up to dry on the deck, and the driveway is hosed clean in sixty seconds. This is the power of scale and freedom in action.
Final Thoughts
Moving art outdoors is a fundamental shift in how we view childhood development. It honors the child’s need for movement and their natural curiosity about the world. By removing the physical and psychological barriers of the indoor “mess,” we allow them to think bigger and bolder.
This transition does not require a massive budget or a professional design. It starts with a fence, a few buckets of paint, and the willingness to let things get a little dirty. The rewards are found in the child’s increased confidence and their ability to see the world as a limitless canvas.
Experiment with different surfaces and tools. Watch how your child’s body language changes when they have six feet of space instead of six inches. You are not just building an art studio; you are building a sanctuary for their imagination to run wild.
Sources
1 communityplaythings.com | 2 xihakidz.com | 3 blogspot.com | 4 kcs.co.uk | 5 jacksonsart.com | 6 kaplanco.com | 7 communityplaythings.com | 8 nexthomedecors.com | 9 tinybeans.com | 10 funshineexpress.com | 11 littlebinsforlittlehands.com