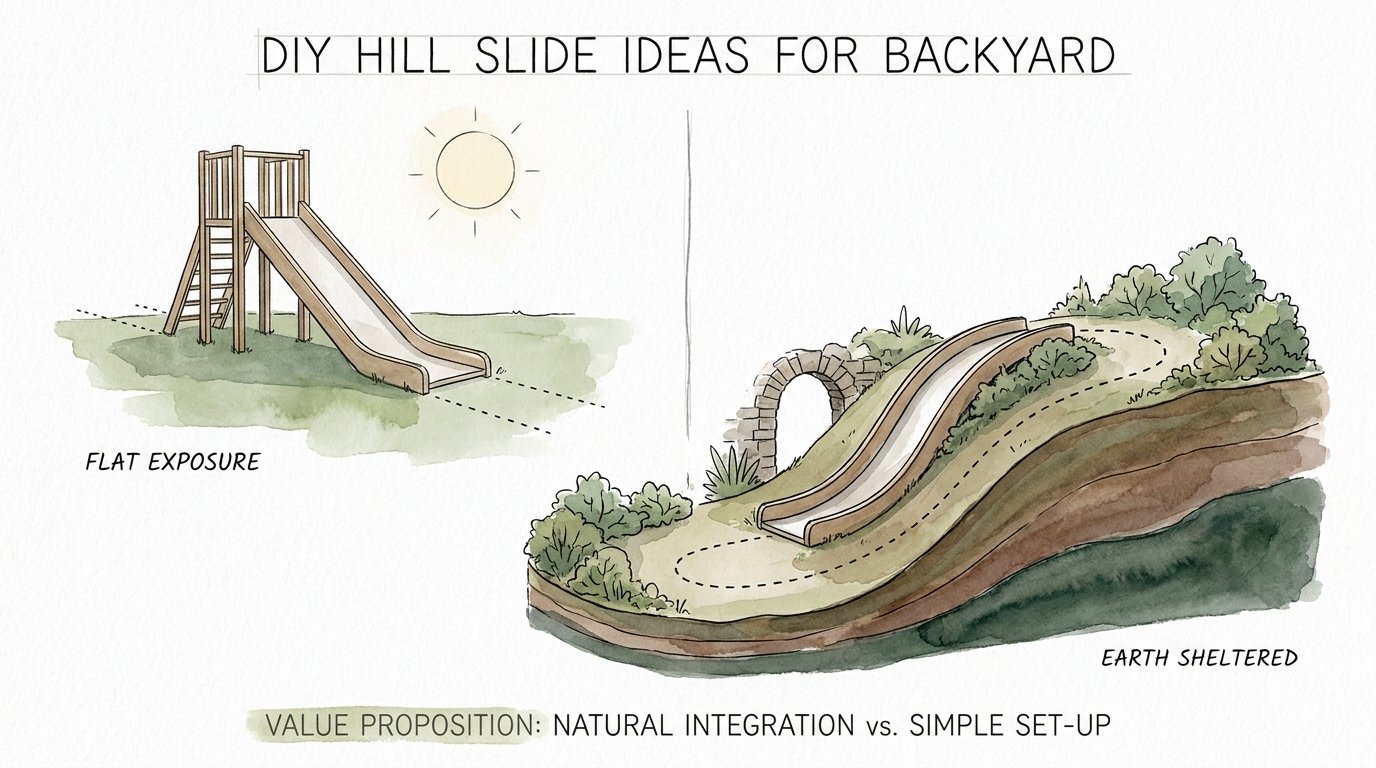
Diy Hill Slide Ideas For Backyard
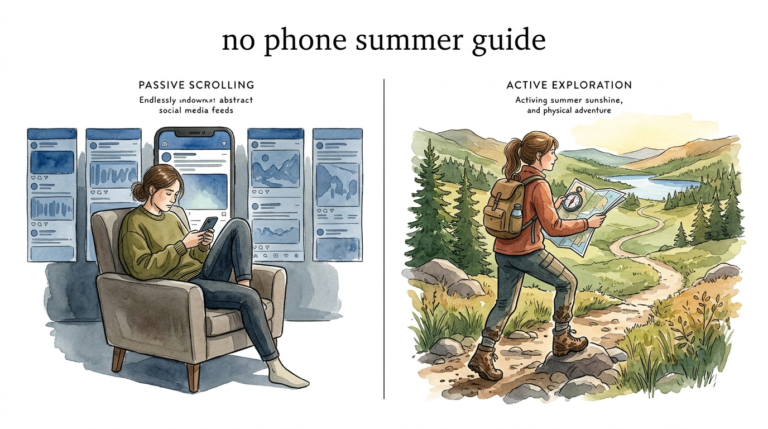
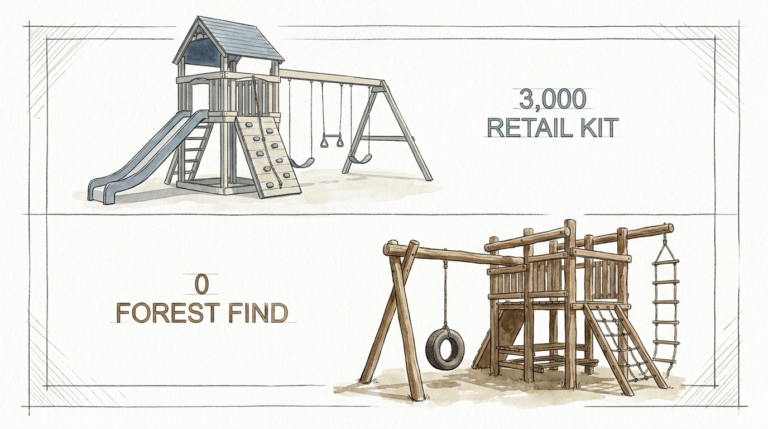
Why are we building play sets on top of the ground when the ground itself is the ultimate playground? We spend thousands on plastic structures that get too hot to touch by noon. Meanwhile, a simple earth berm provides natural cooling, wind protection, and a slide that never wobbles. It’s time to stop fighting the landscape and start playing with it.

Integrating a slide directly into your backyard topography isn’t just a design choice; it is a fundamental shift in how we view play. Instead of a bulky tower taking up visual space, an embankment slide disappears into the greenery. This approach offers a tactile, immersive experience that traditional freestanding units simply cannot match.
The concept is simple: you use the existing slope of your land—or build a new one—to support the structure. This eliminates the danger of falls from high ladders and allows for longer, more creative slide paths. Whether you have a massive hillside or a tiny bump in the lawn, there is a way to turn that elevation into a high-speed adventure.
Diy Hill Slide Ideas For Backyard
A backyard hill slide, often called an embankment slide, is a playground element designed to follow the natural contours of the earth. Unlike traditional slides that require a ladder and a platform, these units sit directly on or slightly above the soil. This category of play equipment exists to maximize safety and aesthetic appeal by utilizing the earth’s natural stability.
In real-world applications, you see these in modern public parks and high-end residential landscapes. They are favored by landscape architects because they don’t obstruct views and they encourage children to interact with nature. Instead of just “using a machine,” kids are climbing the hill, feeling the grass, and navigating the terrain.

Common examples of this setup include:
* The Embedded Straight Shot: A classic HDPE (High-Density Polyethylene) slide bolted into a wooden frame and set into a trench in the hill.
* The Zig-Zag Ridge: Multiple slide sections joined together to navigate a winding path down a steeper or longer embankment.
* The Drainage Pipe Tunnel: Using large-diameter corrugated HDPE pipe (usually 30 to 36 inches) to create a subterranean tunnel slide.
* The Double Racer: Two parallel slides installed side-by-side to allow for head-to-head competition.
How the Mechanics of a Hill Slide Work
Building a slide into a hill requires more than just laying a piece of plastic on the grass. You have to account for gravity, friction, and the relentless power of water. The first step is calculating your slope. Safety standards suggest an average angle of 30 degrees, never exceeding 50 degrees at any single point.
Start by marking your path with a shovel or landscape paint. You will need to excavate a shallow trench that matches the width and profile of your slide. This ensures the slide sits flush with the ground, which is the key to it being a true embankment slide. If the bottom of the chute is more than 12 inches above the ground, it officially becomes an “elevated” structure, which requires different safety surfacing.
Support is the next priority. Most DIYers use pressure-treated lumber rated for ground contact (UC4A or higher). You build a small header at the top of the hill to anchor the slide’s “entry” and a footer at the bottom to stabilize the exit. Between those two points, the earth itself provides the majority of the structural support, provided you have compacted the soil properly.
Benefits of the Earth-Sheltered Approach
The practical benefits of an embankment slide are measurable and immediate. One of the biggest advantages is thermal stability. Because the slide is in direct contact with the earth, the soil acts as a massive heat sink. On a blistering July afternoon, a freestanding plastic slide can reach temperatures that cause skin irritation, but an earth-sheltered slide stays significantly cooler.
Safety is another massive win. In a traditional playground, the most common injuries occur from falls off ladders or platforms. With a hill slide, the “fall height” is effectively zero for the duration of the ride. If a child rolls out of the slide, they simply land on the hillside rather than dropping six feet onto a hard surface.
Durability is often overlooked as well. Freestanding structures are subject to wind load and the constant “wobble” of active play, which eventually loosens bolts and cracks plastic. A hill slide is anchored by the weight of the earth. It doesn’t move, it doesn’t sway, and it can often support the weight of adults who want to join in the fun.
Challenges and Common Pitfalls
The biggest enemy of a backyard hill slide is erosion. When you remove grass and move dirt to install a slide, you are creating a path for water. If you don’t manage drainage, the first heavy rain will turn your slide into a mud flume and wash out the soil from underneath the structure. This leads to gaps, which can cause the plastic to crack under weight.
Another mistake is failing to level the “exit zone.” Kids come down these slides with significant momentum. If the exit isn’t perfectly level and slightly elevated above a soft landing area, they will hit the ground with an abrupt, uncomfortable jolt. You need a flat run-out of at least 6 to 10 feet depending on the height of the hill.
Material choice is a frequent stumbling block. Many people try to save money by using thin, residential-grade slide inserts. These are designed to be hung from a wooden swing set, not to be buried in dirt. The moisture in the soil can degrade the underside of cheap plastics. Always look for “embankment-rated” slides or heavy-duty HDPE that can handle the environmental stress.
Limitations to Consider
Not every yard is a candidate for a hill slide. If your slope is too shallow—less than 20 degrees—the friction of the slide material will be greater than the pull of gravity. The result is a “slide” where kids have to scoot themselves down manually. On the flip side, a slope that is too steep (over 50 degrees) is dangerous and difficult to maintain.
Soil type plays a huge role in the success of the project. Sandy soils are prone to “slumping” and require extensive retaining walls or geotextile reinforcement to hold the slide in place. Heavy clay is better for stability but is a nightmare for drainage. If you live in an area with high clay content, you must install a dedicated drainage system behind or beneath the slide.
Space is the final constraint. A 5-foot vertical drop requires roughly 10 to 12 feet of horizontal space for the slide itself, plus another 6 to 8 feet for the safety exit zone. If you have a small, tiered backyard, you might find that the slide takes up more “living space” than a traditional compact play set.
Comparison: Flat Exposure vs. Earth Sheltered
Understanding the difference between a traditional freestanding slide (Flat Exposure) and an embankment slide (Earth Sheltered) helps in making the right choice for your property.
| Feature | Flat Exposure (Freestanding) | Earth Sheltered (Hill Slide) |
|---|---|---|
| Installation Difficulty | Low – Bolt together and level. | High – Requires excavation and grading. |
| Safety Risk | Higher – Danger of falls from height. | Lower – Minimal fall height. |
| Summer Temperature | Hot – Surface exposed to air and sun. | Cool – Soil acts as a heat sink. |
| Aesthetic Impact | Obtrusive – Visible structure. | Seamless – Blends into landscaping. |
| Maintenance | Occasional bolt tightening. | Erosion control and weeding. |
Practical Tips for a Better Build
To ensure your hill slide lasts for years, you need to think like a landscaper. Use landscape fabric under the slide and around the footings. This prevents weeds from growing up through gaps and helps stabilize the soil particles. If you’re building a longer slide, overlap your sections so the top piece always sits *inside* the bottom piece to prevent water and debris from getting caught in the seams.
Consider the “Up-Route.” If you have a slide, kids will inevitably climb back up the hill. This constant foot traffic will kill grass and create a muddy “cow path” next to your slide. Install a set of “log stairs” or stone steps right next to the slide. This protects your hill from erosion and gives the kids a safe, grippy way to get back to the top.
Ground cover choice is essential. Instead of standard turf grass, which is hard to mow on a steep incline, try a low-growing, durable ground cover like Micro-Clover or Creeping Thyme. These plants require less maintenance, handle foot traffic well, and have deep root systems that lock the soil in place around the slide’s edges.
Advanced Considerations for Serious Practitioners
If you want to take your backyard hill slide to the professional level, look into hydrostatic pressure management. When a hill is saturated with water, the weight of the water-logged soil can actually push a slide out of its trench. Installing a simple French drain—a perforated pipe wrapped in gravel—running parallel to the slide underground can redirect this water and protect the integrity of your build.
Lighting is another advanced upgrade. Installing low-voltage LED strip lighting under the lip of the slide or along the side steps makes the playground usable after sunset. It also adds a high-end, architectural feel to the backyard. Ensure all electrical components are rated for direct burial and outdoor use.
For those with very steep or tall hills, you might consider sectional stainless steel. While expensive, stainless steel offers the fastest ride possible. Because it is earth-sheltered, the “overheating” issue common with metal slides is mitigated by the constant contact with the cool earth. A 40-foot stainless steel winding hill slide is a legacy-level backyard feature that will last 30 years or more.
Example Scenario: The 8-Foot Terrace Project
Imagine a backyard with a retaining wall that creates an 8-foot drop from the patio to the lower lawn. Instead of a dangerous drop-off, the homeowner decides to install a 16-foot wavy embankment slide.
The process begins by cutting a 36-inch wide notch into the retaining wall. A wooden header made of 4×4 pressure-treated posts is set into concrete at the top. The slide is bolted to this header. Along the 16-foot run, the homeowner installs three “ribs”—horizontal 2x4s buried in the dirt—that the slide is screwed into to prevent it from shifting sideways.
At the bottom, a 6-foot by 6-foot “splash pad” of engineered wood fiber (mulch) is installed 12 inches deep. To manage the “Up-Route,” the homeowner uses the leftover stones from the retaining wall to build a set of winding stairs on the left side of the slide. The result is a safe, high-energy play area that looks like it was part of the original house design.
Final Thoughts
Building a DIY hill slide is one of the most rewarding ways to transform your backyard. It turns a “difficult” slope into the highlight of the home and encourages kids to spend hours outdoors. By moving the play surface to the ground level, you eliminate the biggest risks of traditional play sets while gaining a structure that stays cool, stable, and beautiful for years.
Success with this project comes down to respecting the elements. If you take the time to manage drainage, choose the right materials, and secure your footings, your hill slide will become a neighborhood legend. It’s an investment in the landscape that pays dividends in every high-speed trip down the hill.
Start small if you need to, but don’t be afraid to think big. The earth is ready to play—you just need to provide the slide. Experiment with different textures, add some plantings, and watch as your backyard evolves from a simple lawn into a dynamic, multi-dimensional playground.
Sources
1 bigbendlandscaping.com | 2 asla.org | 3 hearnlandscape.com | 4 cpsc.gov | 5 playgroundequipment.com | 6 playworld.com | 7 amirplay.com | 8 nativeseedgroup.com | 9 rainscapes.com