Teaching Kids Tool Safety At Home
When something breaks, do you teach your child to reach for a credit card or a screwdriver? We are raising a generation of consumers who think ‘broken’ means ‘trash.’ But the strongest family bonds are forged in the workshop, not the checkout line. Teaching your child to maintain and repair the objects in their life builds a sense of agency that no app can provide. Turn ‘this is broken’ into ‘we can fix this’ and watch their confidence explode.
In a world of touchscreen interfaces, the tactile reality of a mechanical fastener is a superpower. Every loose cabinet handle or squeaky hinge is an invitation to a masterclass in logic and physics. You aren’t just fixing a piece of furniture. You are installing a permanent hardware update in your child’s brain that says, “I can impact the world around me.”
Modern parenting often leans toward safety through avoidance. We hide the tools because they are sharp or heavy. However, true safety comes through competence and familiarity. A child who understands how a saw cuts is much safer than one who views it as a forbidden mystery. This guide will walk you through the transition from a consumer mindset to a stewardship ethic.
Teaching Kids Tool Safety At Home
Tool safety is the foundational set of habits that allows a person to interact with physical forces without injury. It exists to bridge the gap between curiosity and consequence. In real-world situations, tool safety is what separates a successful weekend project from an emergency room visit. It is not a list of “don’ts” but a protocol for “dos.”
Safety starts with the environment. A dedicated, well-lit workspace with a stable surface is essential. Small hands struggle to control tools when the workpiece is sliding around. Clamps and vises are your best friends here. They act as “third hands,” keeping the object still so the child can focus entirely on tool control.
Proper attire is the next pillar of home tool safety. Safety glasses are a non-negotiable requirement for any task involving impact or friction. If a child is hammering, drilling, or sawing, they wear eye protection. Closed-toe shoes protect feet from dropped tools. Short sleeves or rolled-up sleeves prevent loose fabric from getting caught in moving parts or snagging on rough edges.
One helpful analogy for kids is the “Red Zone” concept. Teach them that every tool has a “Red Zone”—the sharp edge of a saw, the business end of a hammer, or the tip of a screwdriver. These zones must always point away from the body and toward the ground when not in play. Establishing these mental boundaries early creates a lifelong habit of situational awareness.
The Mechanics of Learning: How Kids Process Manual Skills
Children do not learn tool use through lectures. They learn through observation and tactile feedback. This is called experiential learning. When a child sees you drive a screw, they are mapping the rotation of your wrist and the pressure of your shoulder.
Fine motor development plays a massive role in what a child can handle. A toddler has limited grip strength and “gross motor” control. They use their whole arm for movements. As they grow, they develop “fine motor” control, allowing them to use their fingers and wrists independently. This progression dictates which tools they should use at each stage.
Patience is the currency of the workshop. A task that takes you five seconds may take a child five minutes. This struggle is where the neural pathways for problem-solving are built. If you take the tool away to “finish it quickly,” you have robbed them of the “Aha!” moment when the screw finally seats flush.
Teach the “Why” alongside the “How.” Explain that a screwdriver works like a ramp wrapped around a pole. Explain that a hammer uses leverage and velocity to multiply force. Connecting these physical principles to the tool in their hand transforms a chore into a science experiment. It makes the learning “sticky” and applicable to other areas of their education.
Age-Appropriate Tool Progression
Every child matures at a different rate. Use these age brackets as a guide, but always prioritize your child’s specific focus and maturity level.
The Preschool Years (Ages 3–5)
At this stage, the goal is familiarity and safety habits. Focus on measurement and soft assembly. A child-sized tape measure with a slow retraction speed is a perfect first tool. It teaches numbers, spatial reasoning, and the habit of “measuring twice.”
Introduce safety glasses early. Make them a “superhero mask” for the workshop. Let them play with wooden or plastic nuts and bolts to understand the mechanics of threading. You can also introduce a small, stubby screwdriver for tightening loose (non-electrical) cabinet pulls under direct supervision.
Early Elementary (Ages 6–9)
This is the golden age for hand tools. A 7-ounce or 8-ounce “stubby” hammer is ideal. It is heavy enough to drive a nail into soft pine but light enough for a child to swing with control. Using a hammer that is too heavy leads to fatigue and missed strikes, which increases injury risk.
Introduce real screwdrivers and hand drills (manual egg-beater style). These tools require coordination between both hands. Start with soft materials like balsa wood, craft foam, or scrap pieces of cedar. These materials offer little resistance, allowing the child to master the movement before they have to worry about the force.
Pre-Teens (Ages 10–12)
By now, children can handle more complex hand tools like pull-saws and wrenches. A Japanese-style pull-saw is often easier for kids because the cutting action happens on the pull stroke, preventing the blade from buckling. This is also a great time to introduce basic plumbing tasks, like replacing a showerhead or clearing a p-trap.
Teach them about different types of fasteners. Learning the difference between a Phillips head, a Flathead, and a Torx bit is essential. Ownership is a powerful motivator here. Giving them their own small, high-quality tool kit creates a sense of pride and responsibility.
Teenagers (Ages 13+)
Teens have the physical strength and cognitive maturity for most power tools. Start with a cordless drill. Teach them about torque settings and how to prevent the drill from “binding.” This age group can also begin assisting with automotive maintenance, such as oil changes or tire rotations.
Always emphasize the “One Second Rule.” Before pulling a trigger or making a cut, pause for one second to check hand placement and the environment. This brief moment of reflection prevents the vast majority of workshop accidents.
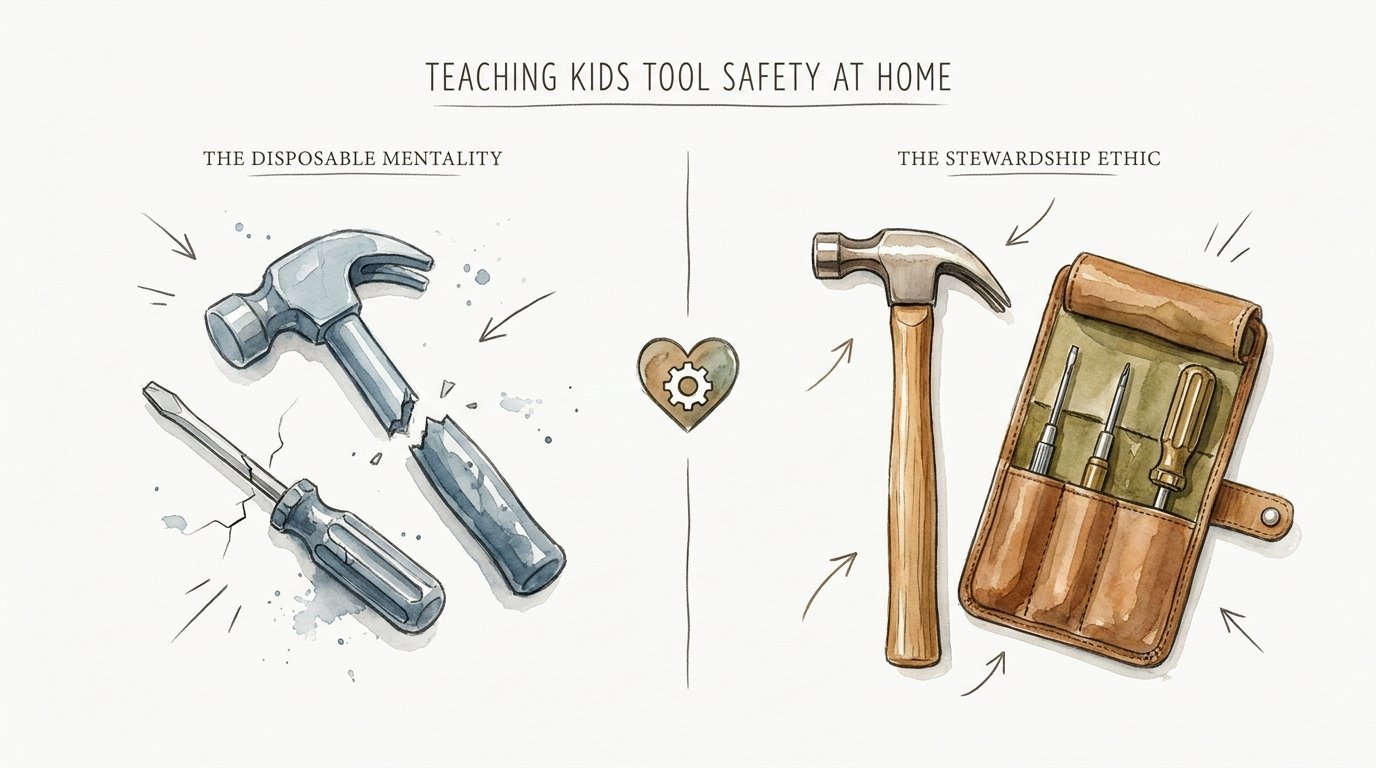
The Stewardship Ethic vs. The Disposable Mentality
The disposable mentality says that if something is broken, it is useless. It treats the world as a bottomless vending machine. This mindset leads to environmental waste and a feeling of helplessness when things go wrong. If you cannot fix your world, you are a hostage to the people who can.
The stewardship ethic treats objects as responsibilities. It values the resources and labor that went into making an item. When a child fixes a toy or repairs a loose chair leg, they are practicing stewardship. They are learning that they have the power to extend the life of their environment.
Stewardship builds empathy. It requires the child to look at an object and understand its “pain point.” Where did it break? Why did it break? How can I make it stronger? These questions are the foundation of engineering and design thinking. They also teach the child that their actions have long-term consequences.
How to Use a Hammer and Screwdriver: A Step-by-Step Guide
Teaching these two foundational tools properly will prevent 90% of early workshop frustrations.
Teaching the Hammer
Start by explaining that the hammer is an extension of the arm. Show them how to grip the handle near the end—not up near the head. Gripping at the end provides the leverage needed to let the tool do the work.
Use a “pilot hole” for beginners. Instead of having the child hold a tiny nail while swinging a heavy hammer, use a small nail set or a thin drill bit to start a hole. This keeps their fingers away from the “impact zone” until the nail is stable.
Focus on “tapping” first. The goal isn’t to drive the nail in one go. It is to find a rhythm. Tell them to “pet the nail” with the hammer head until it stands on its own. Once it is secure, they can transition to full swings.
Teaching the Screwdriver
The biggest challenge with screwdrivers is “cam-out.” This happens when the bit slips out of the screw head, often stripping the screw. Explain that a screwdriver requires two forces: downward pressure and rotational force.
Most kids forget the downward pressure. Tell them to “lean into it” with their palm on the back of the handle while their fingers do the turning. This keeps the bit locked into the screw.
Demonstrate how to choose the right size bit. A bit that is too small will spin and ruin the screw. A bit that is too large won’t sit deep enough. Show them how a perfectly matched bit can almost hold the screw on its own without magnetic help.
Benefits of Teaching Repair Skills
Teaching children to fix things provides measurable cognitive and emotional benefits. It is one of the few activities that engages the whole child simultaneously.
- Confidence: There is no substitute for the feeling of “I fixed it.” This internal validation builds a sturdy self-image that doesn’t rely on likes or comments.
- Spatial Reasoning: Visualizing how a 3D object fits together or moves is a vital STEM skill. Repairing a gear mechanism or a wooden joint forces the brain to think in three dimensions.
- Logical Troubleshooting: Repair is a puzzle. If the light won’t turn on, is it the bulb? The switch? The cord? Children learn to isolate variables and test hypotheses.
- Motor Skills: Using tools develops the “proprioceptive” sense—knowing where your body is in space. It refines hand-eye coordination in a way that video games cannot.
- Economic Literacy: When a child sees that a $2 part can save a $50 appliance, they begin to understand the value of money and maintenance.
Challenges and Common Mistakes
The biggest mistake parents make is “The Hover.” We are so afraid of a small scratch or a bruised thumb that we never let the child actually exert control. If you are holding the tool while they are holding it, they aren’t learning. They are just a passenger.
Another mistake is using dull or low-quality tools. A dull saw is far more dangerous than a sharp one because it requires more force to use. When a tool requires “muscle” rather than “technique,” it is prone to slipping. Buy high-quality, real tools that are simply sized for smaller hands.
Avoid the “Lecture Trap.” If you spend 20 minutes talking before they get to touch the tool, you will lose their interest. Keep the safety talk to two minutes, demonstrate the technique once, and then let them try. Correct their form in real-time with short, encouraging cues.
Don’t ignore the “Clean Up” phase. Many parents skip this to save time, but tool maintenance and organization are 50% of the skill. A tool that isn’t put back in its place is a tool that will be lost or damaged. Make the “Reset” a mandatory part of the project.
Limitations: When This May Not Be Ideal
While we want to encourage “The Repair Mindset,” we must also teach boundaries. There are certain systems in a home that are not for beginners.
The most obvious limitation is high-voltage electricity. Children can help change a lightbulb or assist a parent in replacing a faceplate (with the breaker off), but they should never work on live circuits or complex wiring. The risks of arc flash or electrocution are too high for a learning environment.
Natural gas lines are another firm boundary. Any repair involving gas stoves, furnaces, or water heaters requires professional certification. Teach your child that “fixing” also means knowing when to call an expert. This is part of being a responsible steward.
Physical height is a final constraint. Children lack the balance and limb length for safe ladder work at significant heights. Working on a roof or cleaning second-story gutters should be reserved for those with the physical maturity to manage the risk.
Comparing Tool Types for Kids
| Feature | Toy/Plastic Tools | Adult Tools | Quality “Real” Kids’ Tools |
|---|---|---|---|
| Functionality | None; imaginative play only. | Full power/weight; hard to control. | Fully functional; optimized for control. |
| Safety | High (too safe to be useful). | Low (heavy, oversized grips). | High (textured grips, rounded corners). |
| Skill Building | Negligible. | High, but frustrating for small hands. | Maximum; allows for successful repetition. |
| Durability | Low; snaps under pressure. | High. | High; steel and forged components. |
Practical Tips and Best Practices
Establish a “Tool License” system. Create a small card or certificate for each tool your child masters. They “earn” their hammer license after driving 50 nails correctly. They earn their saw license after making three straight cuts. This gamification keeps them engaged and emphasizes that tool use is a privilege earned through safety.
The pegboard system is the gold standard for organization. Use a marker to trace the outline of each tool on the board. This “Shadow Boarding” technique makes it immediately obvious where a tool belongs. It also allows you to do a quick “safety sweep” at the end of the day to ensure everything is accounted for.
Keep a “Practice Log.” Record the date and the project. Over months, your child can look back and see their progression from simple hammering to complex assembly. This visual record of growth is a massive confidence booster.
Always keep a basic first aid kit in the workshop. Teach the child how to clean a small nick or apply a bandage. Knowing how to handle a minor injury calmly is a vital part of workshop culture. It takes the “fear” out of the mistake and replaces it with a procedure.
Advanced Considerations for Serious Practitioners
Serious young practitioners should learn the art of maintenance. This means teaching them that tools are not “one and done.” Show them how to wipe down metal tools with a light coat of oil to prevent rust. Show them how to check for loose handles or chipped blades.
Maintenance is the highest form of stewardship. It shows that you value the tool itself, not just what the tool can do for you. A child who can sharpen a pencil with a utility knife or oil a squeaky hinge on their own toolbox has graduated from “user” to “custodian.”
Introduce the concept of “Mechanical Sympathy.” This is the ability to “feel” what a tool is doing. Is the drill struggling? Is the saw binding because the wood is pinching? Developing this intuition prevents broken tools and ruined projects. It requires quiet observation and a deep connection to the material.
As your child advances, introduce measuring with precision. Teach them how to use a square to ensure a 90-degree corner. Teach them how to use a level. These tools introduce the concept of “objective truth” in building. If the level says it’s crooked, it’s crooked—no matter how much you want it to be straight.
Real-World Scenarios
The Squeaky Door Mission: Identify a door in the house that squeaks. Ask your child to diagnose the problem. Introduce a can of 3-in-1 oil or WD-40. Show them how to apply a tiny drop to the top of the hinge pin. Let them swing the door back and forth to work the oil in. The immediate silence is a powerful lesson in the efficacy of simple maintenance.
The Loose Handle Operation: Find a cabinet handle that wiggles. Hand your child a screwdriver and ask them to fix it. Watch as they realize they have to hold the handle on the outside while turning the screw on the inside. This “dual-sided” problem-solving is a classic example of spatial logic in action.
The Birdhouse Project: This is the ultimate “real world” test. It involves measuring, sawing, hammering, and finishing. Use cedar or pine. Let the child do the assembly while you provide the stability. When the birdhouse is hung and a bird eventually moves in, the cycle of “I made this and it serves a purpose” is complete.
Final Thoughts
Teaching your child tool safety and repair skills is an investment in their character. You are handing them the keys to a world where they are participants, not just observers. This journey requires patience, a few band-aids, and a willingness to let them struggle. The result is a child who looks at a broken world and sees a series of solvable problems.
Confidence is built through competence. When a child masters a tool, they master a small piece of their environment. This sense of agency will carry over into their schoolwork, their relationships, and their eventual careers. They will become the people who step forward when others step back.
Encourage them to experiment. Give them a “junk box” of old electronics or mechanical parts to take apart. Deconstruction is the first step toward reconstruction. Most of all, enjoy the process. The hours you spend together over a workbench will be remembered long after the “things” you built have worn out. Get into the workshop and start building a legacy of stewardship today.
Sources
1 handyfamm.com | 2 hsi.com | 3 nationwidechildrens.org | 4 handyfamm.com | 5 stackexchange.com | 6 msu.edu | 7 measuringflower.com | 8 bestpickreports.com | 9 startsateight.com | 10 harpercollege.edu | 11 hi-spec.com | 12 nsta.org | 13 woodcrestpreschool.com | 14 greenwoodhardware.com | 15 makezine.com | 16 storiesofourboys.com | 17 youtube.com | 18 parentmap.com | 19 blinds.com | 20 hammersawdrill.com | 21 woodworkersjournal.com