Diy Solar Oven For Kids
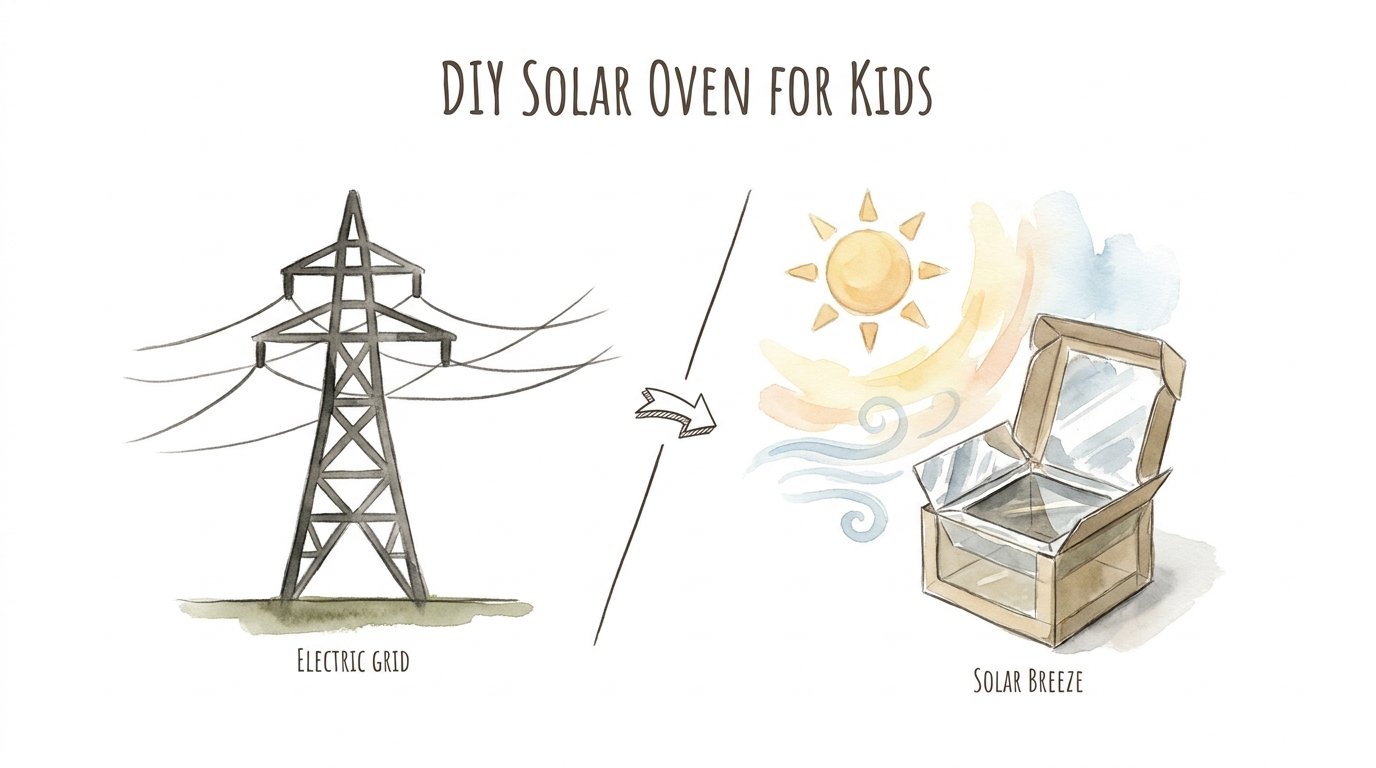
Why pay for electricity when the summer sun is offering to cook your snacks for free? We’ve become passive consumers of the grid, but your backyard is actually a high-powered energy laboratory. This summer, trade the microwave pings for the silent power of the sun and teach your kids the physics of heat reflection.
Building a solar oven is more than just a craft project. It is a front-row seat to the power of renewable energy. You are not just melting marshmallows; you are harnessing the same photons that power satellites and heat the planet. It is time to step away from the kitchen and into the sunlight.
Diy Solar Oven For Kids
A DIY solar oven is a simple device that captures sunlight and converts it into heat to cook food. It works as a low-cost, eco-friendly alternative to traditional stoves. Instead of burning gas or using electricity from the electric grid, it uses solar thermal energy to achieve cooking temperatures. These ovens are widely used in science classrooms and scouting trips to demonstrate thermodynamics.
In the real world, solar ovens are literal lifesavers. In regions with scarce firewood or expensive fuel, large-scale solar cookers provide a way to pasteurize water and cook meals without producing harmful smoke. They are the ultimate example of “appropriate technology”—simple enough to build with household items but powerful enough to change lives. For a child, it is a box that turns sunlight into a hot snack. For the world, it is a path toward energy independence.
Visualizing a solar oven is easy if you think of a parked car on a hot day. The interior of the car gets much hotter than the air outside because the windows let light in but trap the heat. Your DIY oven does exactly the same thing. It is a miniature greenhouse designed to keep your food in the “hot zone.”
How It Works: The Science of the Sun
Understanding the physics of a solar oven helps you build a better one. There are four main principles at play: reflection, absorption, insulation, and the greenhouse effect. Each one is a critical piece of the puzzle that turns a cardboard box into a functional cooker.
Reflection is your first step. You use shiny surfaces like aluminum foil to “catch” the sun’s rays and bounce them into the box. This increases the total amount of energy entering the oven. The more light you can redirect toward your food, the higher your internal temperature will climb.
Absorption happens at the bottom of the box. Dark colors, specifically black, are excellent at absorbing all visible wavelengths of light and converting them into thermal energy. This is why you line the bottom of your oven with black construction paper. It acts as a heat sink, soaking up the light and getting hot to the touch.
Insulation prevents that heat from escaping. Cardboard is a natural insulator, but adding rolled-up newspapers or foam can create a stronger thermal barrier. This ensures that the heat stays around your food rather than leaking out into the cooler air outside.
The greenhouse effect is the final magic trick. A clear plastic window allows short-wave solar radiation to enter the box. Once that light hits the black paper and turns into long-wave heat (infrared), it cannot easily pass back through the plastic. The heat is trapped, and the temperature inside begins to rise.
Step-by-Step: Building Your Pizza Box Oven
You do not need expensive tools to start your solar cooking adventure. Most of the materials are likely already in your recycling bin. Here is the most popular method using a standard pizza box.
- A clean pizza box (the larger, the better).
- Aluminum foil.
- Clear plastic wrap (high-quality works best).
- Black construction paper.
- Non-toxic glue and clear shipping tape.
- A wooden skewer or ruler.
- Scissors or a utility knife (adult supervision required).
Start by cutting a flap in the lid of the pizza box. Draw a square about an inch from the edges and cut three sides, leaving the side near the hinge intact. Fold this flap up so it stands tall. This is your reflector. Cover the inner side of this flap with aluminum foil, keeping it as smooth as possible. Wrinkles scatter light, but a smooth surface reflects it directly.
Next, open the box and line the bottom with the black construction paper. This is your cooking surface. For extra efficiency, you can glue foil to the inner sides of the box as well, but keep the bottom black. To create the “window,” tape a double layer of plastic wrap over the opening you cut in the lid. Ensure the seal is airtight. Any gap will let your precious heat escape.
Finally, use your skewer or ruler to prop the foil flap open at an angle. You want the sunlight to hit the foil and bounce straight through the plastic window. Place your oven in a sunny spot, and you are ready to cook.
Best Solar Oven Recipes for Beginners
When starting out, focus on foods that require melting rather than intense baking. These recipes are perfect for testing your oven’s power without waiting hours.
Solar S’mores: This is the classic entry-level experiment. Place a graham cracker in the oven, top it with a marshmallow, and wait. Once the marshmallow looks puffy and soft, add a piece of chocolate. Close the lid for another two minutes until the chocolate glistens. Smush another cracker on top and enjoy the sun-baked goodness.
Backyard Nachos: Spread a layer of tortilla chips on a small aluminum pie tin. Sprinkle a generous amount of shredded cheese over the chips. Place the tin in the center of your black paper heat sink. In about 20 to 30 minutes on a hot day, you will have perfectly melted nachos. Add salsa or jalapeños afterward for a complete snack.
English Muffin Pizzas: Split an English muffin and spread a thin layer of pizza sauce on each half. Top with mozzarella cheese and a slice of pepperoni. Because the bread is already baked, you are only waiting for the cheese to melt and the sauce to warm up. This usually takes about 40 to 60 minutes depending on the sun’s intensity.
Benefits of Solar Cooking
Choosing to cook with the sun offers measurable advantages for both the environment and your household. It is a practical way to reduce your reliance on traditional energy sources.
The most immediate benefit is zero emissions. Traditional cooking methods—whether gas, wood, or coal—release CO2 and other pollutants into the atmosphere. A solar oven produces nothing but heat. It is a completely clean way to prepare food, helping to lower your family’s carbon footprint one snack at a time.
There are significant economic savings over the long term. While a cardboard oven is a fun project, even a professional-grade solar cooker pays for itself by using free energy. You are effectively bypassing the utility company. Every hour you spend cooking outside is an hour your stove or microwave isn’t drawing power from the grid.
From an educational standpoint, this project is unmatched. It teaches children about renewable energy, physics, and environmental stewardship in a way they can taste. It moves the conversation from abstract concepts to practical application. They learn that the sun isn’t just for light; it is a massive, reliable power plant.
Challenges and Common Mistakes
Even the best-built solar oven can fail if the setup is wrong. Beginners often run into a few common pitfalls that are easy to fix once you know what to look for.
The biggest mistake is improper alignment. The sun moves across the sky, but your oven stays still. If you set your oven and walk away for three hours, the sun will eventually move out of the “sweet spot.” Check your oven every 30 to 60 minutes and rotate it to face the sun directly. If you see a shadow inside the box, your angle is off.
Another frequent error is using the wrong cookware. Shiny or white pans reflect heat away from the food. For the best results, use thin, dark-colored pans or even an old black pie tin. These will absorb the heat and transfer it to the food much faster. Avoid using heavy ceramic or glass dishes unless you have a very high-powered oven, as they take too long to preheat.
Impatience can also ruin the experience. A solar oven works like a slow cooker, not a microwave. It takes time for the air inside to reach cooking temperatures. On a 75°F day, it might take 40 minutes just to preheat. If you keep opening the lid to check the food, you lose about 25°F of heat instantly. Use the plastic window to monitor your progress and keep the lid shut.
Limitations of DIY Solar Ovens
While solar cooking is incredible, it does have realistic constraints. Understanding these will help you manage expectations and plan your experiments better.
Weather dependency is the most obvious limitation. You need clear, direct sunlight for the oven to work effectively. High-level clouds or haze can significantly reduce the UV index and the available thermal energy. If the wind is high, it can strip heat away from the box faster than the sun can replace it. On a windy day, you may need to shield your oven or add extra insulation.
Temperature caps are another factor. A DIY pizza box oven will usually max out between 200°F and 250°F. This is plenty for melting cheese or making s’mores, but it isn’t hot enough to fry an egg or sear meat. Professional-grade parabolic cookers can reach 500°F, but your cardboard project is strictly a low-and-slow device.
Lastly, food safety is a major consideration. Raw meat should only be cooked in a solar oven if you are using a thermometer and can guarantee the temperature stays above the “danger zone” of 140°F. For kids’ projects, it is much safer to stick to pre-cooked items or simple melts to avoid any risk of foodborne illness.
Comparing Solar Oven Types
Not all solar cookers are created equal. Depending on your goals, you might choose a different design than the basic box.
| Feature | Box Cooker (DIY) | Panel Cooker | Parabolic Cooker |
|---|---|---|---|
| Max Temperature | 200°F – 250°F | 250°F – 300°F | 400°F – 500°F |
| Cost to Build | Very Low ($5) | Low ($15) | High ($50+) |
| Complexity | Simple | Moderate | High |
| Cooking Speed | Slow | Moderate | Fast |
The box cooker is best for baking and slow cooking. The panel cooker uses large reflective wings to direct light onto a dark pot inside a plastic bag, offering a bit more power. The parabolic cooker uses a curved dish to focus light into a single point, allowing you to actually fry or boil food.
Practical Tips for Best Results
To get the most out of your sun-powered kitchen, follow these best practices for efficiency.
- Preheat the oven: Put your oven out in the sun for 30 minutes before adding the food. This gets the “air mass” inside hot and ready.
- Maximize surface area: Spread your food out thin. A flat layer of chips will heat up much faster than a tall pile of them.
- Seal the gaps: If you see steam on the plastic wrap, you have a good seal. If you don’t, check for air leaks around the edges of the tape.
- Check the UV Index: High noon (11 AM to 3 PM) is your prime time. The sun is at its highest angle, and the energy is most concentrated.
If you want to take it a step further, try adding a solar breeze of sorts by using a small battery-operated fan inside (if the box is large enough) to circulate the air, though this is usually overkill for a pizza box. The goal is steady, trapped heat.
Advanced Considerations for Serious Makers
If you have mastered the pizza box and want more power, it is time to look at thermal mass. You can place a black-painted brick inside the oven to act as a heat battery. It will take longer to heat up, but it will keep the oven hot even if a cloud passes by.
For those interested in solar tracking, you can build a simple rotating base. This allows you to easily turn the oven to follow the sun without lifting it. Serious practitioners often use “reflected gain” by adding multiple mirrors or highly reflective Mylar instead of aluminum foil. Mylar reflects up to 98% of light, whereas foil is closer to 70%.
Scaling up usually involves moving from cardboard to rigid materials like plywood or metal. An insulated wooden box with a glass lid can reach temperatures over 350°F, allowing you to bake bread or roast vegetables. These permanent setups are great additions to an off-grid lifestyle or a sustainable garden.
Scenario: A Backyard Science Day
Imagine a Saturday afternoon. Instead of reaching for a bag of cold chips, you and your kids set up a “Solar Cafe.” You have three different ovens: a standard pizza box for s’mores, a panel cooker for warming up some pre-cooked beans, and a experimental shoebox oven.
You use a thermometer to track which design gets the hottest. The kids record the temperatures every 15 minutes in a notebook. They notice that the oven with the tightest plastic seal is winning. By 1:00 PM, the cheese is bubbling on the nachos. This isn’t just lunch; it is a successful experiment in thermodynamics. They have seen firsthand that sustainable energy isn’t just a concept in a book—it is a physical force they can control.
Final Thoughts
Building a DIY solar oven is a powerful way to reconnect with the natural world. It reminds us that we are surrounded by free, abundant energy every day. By making a few simple adjustments to a cardboard box, you can turn a summer afternoon into a masterclass in physics and sustainability.
This project is the perfect starting point for anyone looking to reduce their dependence on the grid and explore renewable technology. Whether you are doing it for the science, the environment, or just the delicious sun-baked s’mores, the experience is always rewarding.
Take the lesson beyond the backyard. Encourage your kids to think about how this same energy can power entire homes or clean drinking water for communities across the globe. The sun has been cooking for billions of years—it is about time we joined the party.
Sources
1 solarcooker.org | 2 sciencebuddies.org | 3 raydientrural.com | 4 howweelearn.com | 5 hersheyland.com | 6 bucknell.edu | 7 scholastic.com | 8 wildernesscollege.com | 9 solarovens.org | 10 youtube.com | 11 circularecology.com | 12 imthecheftoo.com | 13 solarbrother.com | 14 homesciencetools.com | 15 grillio.com | 16 brec.org | 17 fandom.com | 18 theprovidentprepper.org | 19 fandom.com | 20 perkins.org | 21 solarcookers.org | 22 youtube.com | 23 sunshineonmyshoulder.com | 24 a1solarstore.com