Diy Modular Play Fort Ideas
If a playground only does one thing, your child’s brain will eventually stop engaging with it. Most playhouses are just glorified storage sheds for spiders after the first month. By using a modular system of notched planks, the playground becomes a puzzle. One day it’s a pirate ship, the next it’s a mountain base. When the play is dynamic, the boredom disappears.

Parents often struggle with the “one-hit wonder” toy. You spend a weekend building a static tower, and the kids love it for exactly three weeks. After that, it becomes a piece of yard art that you have to mow around. Modular play forts solve this by introducing the concept of loose parts play. Instead of a fixed structure, you provide a toolkit of building components.
This approach transforms the backyard into a living laboratory. Children move from passive users of a space to active architects. They learn about balance, structural integrity, and teamwork without ever realizing they are doing “school work.” This guide explores how to build and implement a modular notched-plank system that evolves alongside your family.
Diy Modular Play Fort Ideas
A DIY modular play fort is a collection of oversized building components designed to be assembled and reassembled by children. Unlike a traditional playset that arrives in a crate and stays bolted together forever, these systems rely on physics and geometry. The most popular version uses notched planks—essentially giant, life-sized versions of classic log building toys.
These systems exist because the way children play is not linear. A seven-year-old has different physical and imaginative needs than a four-year-old. A modular system allows you to add height, complexity, or different features like ramps and bridges as your child grows. It is a system found in world-class “adventure playgrounds” and forest schools, but it is perfectly suited for a suburban backyard.

Imagine a set of cedar boards, each with precision-cut slots. When these slots interlock, they create a stable wall. If you add a plank with three notches, you can create a corner. If you add a longer board, you have a bench or a balance beam. The simplicity of the design is what makes the possibilities endless. It moves the focus from a “finished product” to a “continuous process.”
In real-world applications, these forts act as the centerpiece for “Loose Parts Theory,” a concept introduced by architect Simon Nicholson in the 1970s. He argued that the more variables a space has, the more creative the play will be. A modular fort is the ultimate variable. It is a house, a store, a castle, or a car, depending entirely on the day’s objective.
How It Works: Designing and Cutting Your System
Creating a modular system requires a shift in your woodworking mindset. You are not building a structure; you are manufacturing a kit. Consistency is the most important factor here. If your notches are off by even an eighth of an inch, the pieces will not fit together smoothly, or worse, they will be too loose to be safe.
Selecting the Right Lumber
Lumber choice determines the longevity and safety of your fort. Cedar is the preferred material for most practitioners. It is naturally resistant to rot and insects without the need for the heavy chemical treatments found in standard pressure-treated pine. More importantly, cedar is much less likely to splinter, which is a critical safety consideration for small hands.
If you are on a strict budget, Douglas Fir or pressure-treated pine can work, but you must be diligent about sanding and sealing. Always look for “ground contact” rated boards if you expect the fort to sit directly on the grass. Standard 2×4 and 2×6 boards are the most common choices because they provide enough weight to be stable without being too heavy for a child to lift with a friend’s help.
The Geometry of the Notch
The magic happens at the notch. For a standard 2×4 board (which actually measures 1.5 inches by 3.5 inches), your notch should be exactly 1.5 inches wide. This allows another 2×4 to slide in for a “friction fit.” The depth of the notch should be half the width of the board—usually about 1.75 inches for a 2×4.
Using a table saw with a dado blade is the fastest way to batch out these cuts. If you do not have a dado blade, a miter saw with a depth stop or even a jigsaw can get the job done, though it will take significantly longer. Creating a “master template” board is essential. Use this template to mark every other board to ensure they are identical.
Building the Component Kit
A well-rounded kit needs variety. You should aim to build three main sizes of planks. Long planks (6 to 8 feet) serve as the foundation and top rails. Medium planks (4 feet) are perfect for standard wall sections. Small planks (2 feet) act as spacers and connectors for smaller enclosures.
Do not forget “specialty pieces.” Boards with notches on only one side are great for the very bottom of the structure so they sit flat on the ground. Arched pieces can serve as doorways, and planks with holes drilled in the ends can allow for rope attachments or pulley systems. Every new shape added to the kit unlocks a dozen new building configurations.
Benefits of the Modular Approach
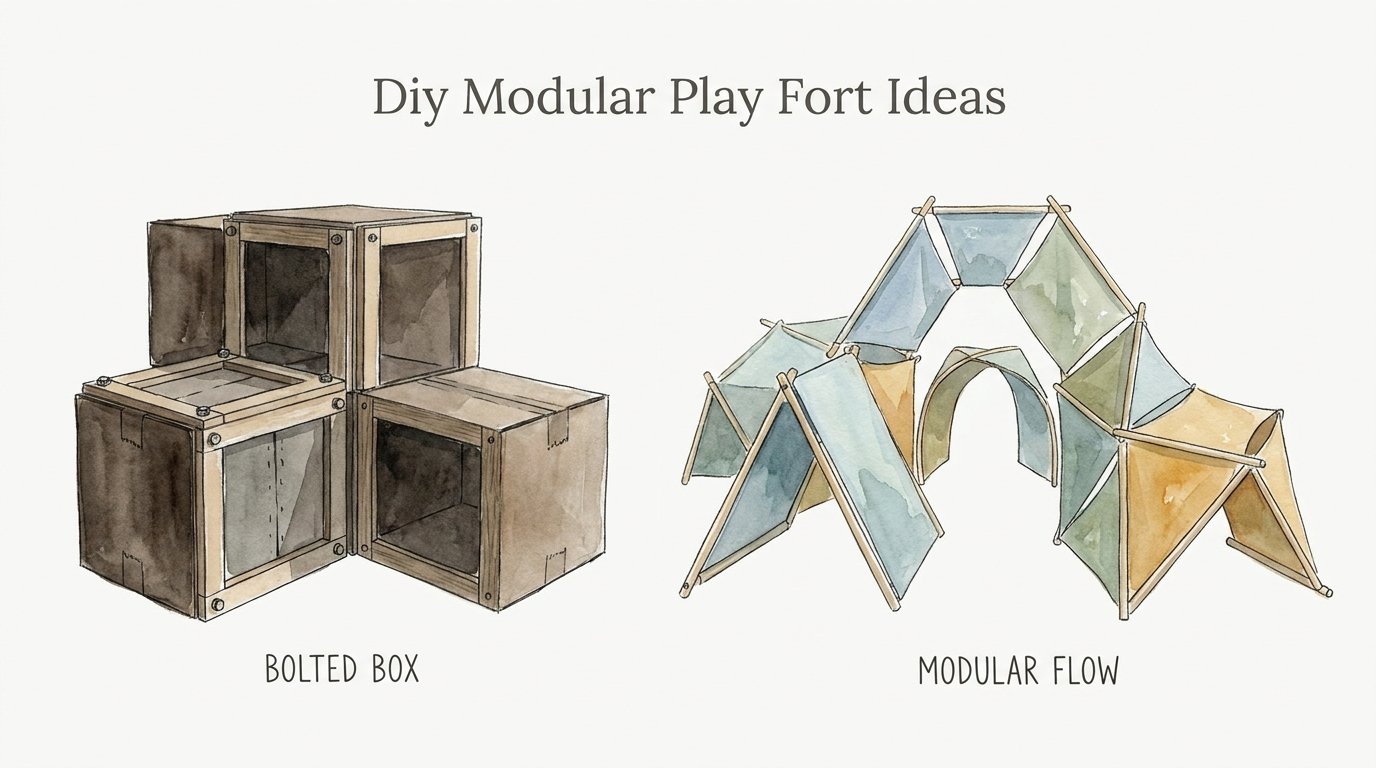
The primary advantage of a modular fort is its adaptability. Most backyard sets are “BOLTED BOX” designs—rigid, fixed, and permanent. A modular fort offers a “MODULAR FLOW,” allowing the playground to change based on the number of children playing or the specific theme of the week.
Cognitive and Physical Development
Modular play is essentially a giant 3D puzzle. When children build their own fort, they are practicing spatial reasoning and basic engineering. They have to understand that a wall needs a return corner to stay upright. They have to calculate how many boards are needed to reach a certain height. This is STEM learning in its purest, most tactile form.
Physically, the act of moving the boards develops gross motor skills. Lifting a 4-foot cedar plank requires coordination and core strength. Because the fort can be rebuilt, the physical challenges can be adjusted. One day the kids might build a low crawling tunnel; the next, they might build a series of high balance beams that challenge their equilibrium.
Longevity and Value
A traditional playhouse has a “shelf life” of about five years before a child outgrows the small door and low ceiling. A modular system has no ceiling. As your kids get taller, they simply build the walls higher. If you move houses, you can pack the fort into the back of a truck in twenty minutes. You can’t do that with a 500-pound bolted swing set.
Maintenance is also easier. If one board rot or breaks, you replace that single board. In a fixed structure, a rotten support post often means the entire unit is compromised. The modular nature allows you to inspect every inch of the wood every time the kids take it down and put it back together.
Challenges and Common Mistakes
The biggest challenge in building a DIY modular fort is precision. Wood is a natural material that expands and contracts with the weather. If you cut your notches too tight in the dry heat of July, they might not fit together at all during a humid August.
Precision vs. Tolerance
A common mistake is making the notches exactly 1.5 inches for a 1.5-inch board. You actually need a “clearance fit.” Adding an extra 1/16th of an inch to the width of the notch ensures that the boards can be assembled easily even if the wood swells slightly. A tight fit might feel more stable, but it leads to frustrated children who can’t get the pieces to interlock.
Material Weight and Safety
Lumber is heavy. A 6-foot 2×6 board can be difficult for a five-year-old to manage alone. This can lead to dropped boards and pinched fingers. The solution is to design the kit around the age of your children. Younger kids do better with 2×4 “Lincoln Log” style systems, while older kids can handle the heft of 2×6 or 2×8 components.
Another pitfall is failing to sand the notches. The inside corners of your cuts are the most likely spots for splinters to hide. Using a small file or a piece of sandpaper wrapped around a block to smooth out every notch is a tedious but mandatory step. A single splinter can end a play session instantly.
Limitations and Environmental Constraints
While modular forts are incredibly versatile, they are not a universal solution for every backyard. There are realistic constraints that you must consider before committing to this project.
Height and Stability
Because these structures are not bolted into the ground, they rely on gravity and interlocking joints for stability. This means they are not suitable for high-altitude play. You should never allow a modular fort to be built higher than four or five feet unless it is being supervised by an adult or has been temporarily braced.
Falling from a height of six feet onto hard ground can cause serious injury. Unlike a fixed set with concreted posts, a modular wall can be pushed over if it isn’t built with proper “returns” or corners. You must establish clear safety rules with your children about how high they are allowed to build.
Surface Requirements
A modular fort needs a level surface. If the ground is significantly sloped, the notches will not line up correctly as the walls go up. This puts uneven stress on the joints and can cause the structure to lean or collapse. If your yard is hilly, you may need to create a dedicated “building pad” using leveled wood chips or sand.
Furthermore, the ASTM F1148 safety standards for home playgrounds recommend a “fall zone” with at least 9 inches of loose-fill material like mulch or pea gravel. This is especially important for modular systems where the configuration changes and children might be tempted to climb on the exterior of the walls.
Comparing the Two Schools of Play
When deciding between a traditional build and a modular system, it helps to look at the measurable differences. The choice usually comes down to whether you value a “finished” look or a “functional” experience.
| Feature | BOLTED BOX (Traditional) | MODULAR FLOW (Notched System) |
|---|---|---|
| Assembly Time | High (10-20 hours once) | Low (15 mins repeatedly) |
| Creativity Level | Fixed Path | Infinite Variations |
| Skill Development | Roleplay only | Engineering + Roleplay |
| Maintenance | Yearly tightening/staining | Individual board replacement |
| Portability | Zero | High |
The “BOLTED BOX” is great for parents who want a “set it and forget it” solution. It provides a reliable place for a swing and a slide. However, the “MODULAR FLOW” system is for the family that views play as an ongoing educational journey. It requires more engagement from the kids but yields higher rewards in terms of development.
Practical Tips and Best Practices
If you are ready to start cutting boards, there are a few professional tricks that will make your modular kit much better. These small adjustments can be the difference between a kit that lasts ten years and one that ends up in the fire pit by winter.
- Rounding the Edges: Use a router with a 1/4-inch round-over bit on every single edge of every board. This significantly reduces the risk of splinters and makes the boards feel much more “premium” and safe for little hands.
- Color Coding: Paint the ends of the boards different colors based on their length. For example, all 6-foot boards are blue, 4-foot boards are green, and 2-foot boards are red. This helps children find the pieces they need and makes clean-up a sorting game.
- Storage Solutions: Modular forts are essentially large-scale clutter when not in use. Build a simple “toast rack” or vertical bin where the boards can be stacked neatly. This keeps the wood off the wet ground and keeps your yard looking tidy.
- Dry-Fit Early: Before you finish-sand every piece, test the notches. It is much easier to widen a notch on the table saw before you have applied a sealer or stain.
Applying a high-quality, non-toxic outdoor sealer is also vital. Look for products that are “toy safe” or food-grade if your children are still in the age group where everything goes in the mouth. A clear cedar sealer will maintain the wood’s natural beauty while protecting it from the graying effects of UV rays.
Advanced Considerations for Serious Builders
Once your kids have mastered the basic “cabin” build, you can introduce advanced components that turn the fort into a complex machine. This is where the modular system really begins to outshine any commercial alternative.
Adding Mechanical Advantages
Introduce a “utility module.” This could be a specific board with a heavy-duty eye bolt or a pulley attached. By integrating ropes and pulleys, children can learn about mechanical advantage. They can build a “supply lift” to bring toys into their fort or create a bucket system for moving sand and water.
Weatherproofing and Roof Systems
A major challenge for modular forts is the roof. Solid wood roofs are heavy and dangerous if they fall. Instead, design a “fabric tension system.” Create a few light frames with notches that can hold a heavy canvas tarp or camo netting. This provides shade and “weatherproofing” without the weight of solid timber.
You can also experiment with different joinery angles. While 90-degree notches are the standard, cutting a few boards with 45-degree angles allows for hexagonal or octagonal structures. This significantly increases the complexity of the builds and keeps older children engaged with the geometry of the system.
Examples and Scenarios in Practice
To see the value of a modular fort, you have to look at the “Play Narrative.” Here is a realistic scenario of how a single kit might be used over the course of a weekend.
Saturday Morning: The Market. The children use the 4-foot planks to build three low U-shaped stalls. They find old crates and use them as counters. The “modular flow” allows them to create a village layout that takes up half the yard. They are practicing social negotiation and basic commerce.
Saturday Afternoon: The Great Flood. A rainstorm is coming. The children decide they need a “boat.” They tear down the market and use the 6-foot foundation planks to create a long, narrow hull. They stack the medium planks to create a “cabin” in the center. The notched joints allow the structure to feel solid as they “sail” through the grass.
Sunday Morning: The Fortress. A group of friends comes over. The boat is no longer big enough. They collaborate to build a multi-room fortress with a single high tower (supervised by Dad). They use every board in the kit. Because the system is modular, there are no “wrong” pieces—only new opportunities for expansion.
In each of these scenarios, the kids are solving different problems. They are communicating, compromising, and exerting themselves physically. A fixed playhouse could never accommodate this level of narrative shifting.
Final Thoughts
If you want to move away from the static, uninspired backyard experience, a modular notched-plank system is the ultimate solution. It bridges the gap between a toy and a tool, offering children a medium that respects their creativity and challenges their intellect. While it requires a bit more effort in the workshop upfront, the payoff is years of engaged, high-quality play.
The transition from a “BOLTED BOX” mentality to a “MODULAR FLOW” mindset is liberating for both parents and children. You no longer have to worry about outgrowing the playground, and the kids no longer have to worry about running out of things to do. The fort is whatever they need it to be at that exact moment.
Start small. Build a dozen boards this weekend and see how your children interact with them. You will likely find that they spend more time building the fort than they ever spent playing inside their old plastic playhouse. That’s the power of modular play—it turns the act of creation into the game itself.
Sources
1 youtube.com | 2 willygoat.com | 3 aaastateofplay.com | 4 woodlit.eu | 5 playsetservices.com | 6 swingsesh.com | 7 nido.edu.au | 8 prettypurpledoor.com