How To Make Natural Cordage For Kids
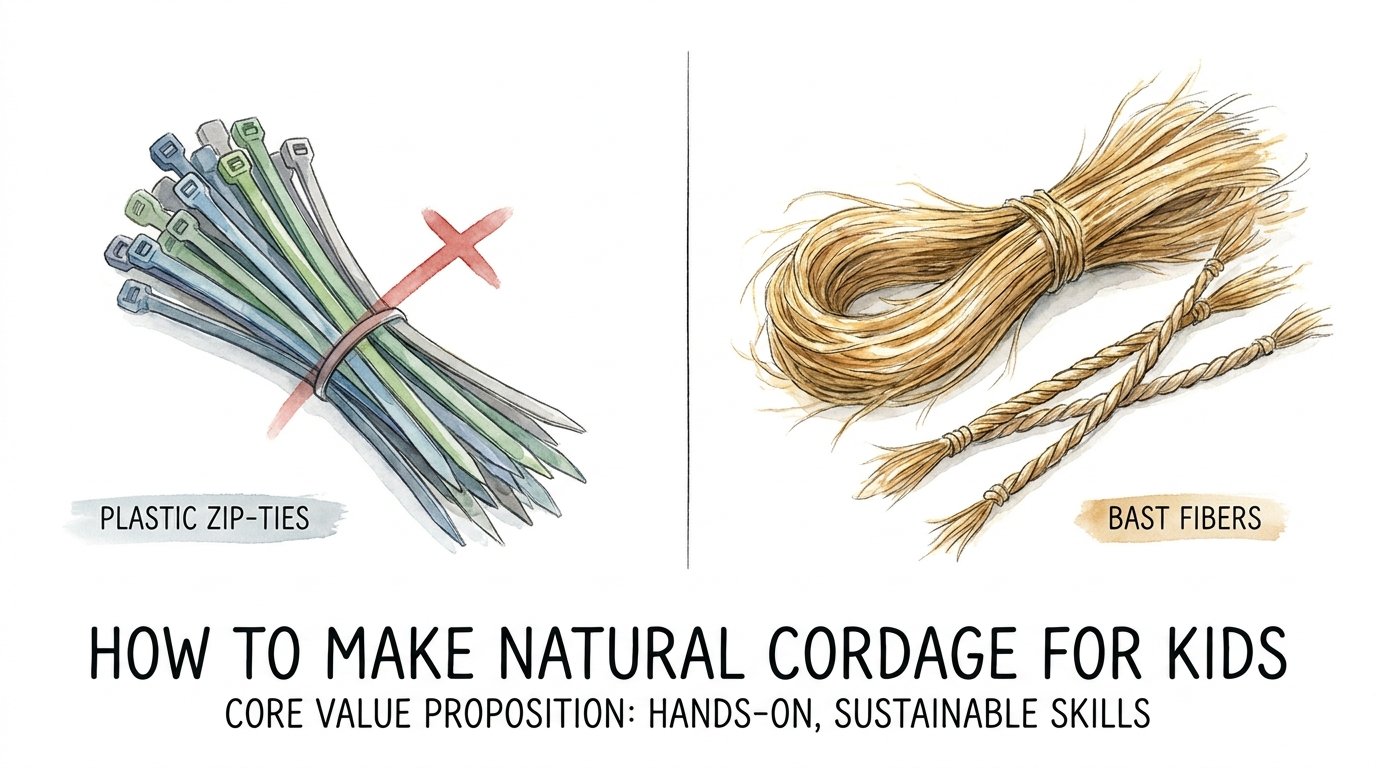
Is your child learning to rely on a factory-made strip of plastic, or the hidden strength of the plants in their own backyard? We’ve traded 10,000 years of human ingenuity for a 5-cent bag of plastic fasteners. When a child learns to harvest, strip, and twist plant fibers into rope, they aren’t just building a fort—they are connecting to a lineage of makers that spans every continent. One creates trash; the other creates a life-long connection to the landscape.

How To Make Natural Cordage For Kids
Natural cordage is the ancient art of turning raw plant fibers into strong, usable string or rope. Long before hardware stores existed, humans relied on “bast fibers”—the strong, stringy material found under the bark of trees or inside the stalks of certain plants. This skill is more than a survival trick; it is a fundamental building block of human civilization. Without rope, there are no nets, no bows, no lashed shelters, and no woven clothing.

Teaching kids how to make cordage transforms a simple walk in the woods into a scavenger hunt for resources. It turns a “weed” into a valuable tool. For a child, the realization that they can manufacture their own equipment from the environment is incredibly empowering. It shifts their perspective from being a consumer of plastic to a producer of high-quality, sustainable tools.
In the real world, cordage making is used in bushcraft, gardening, and even fine crafts. It requires patience and fine motor skills. While a plastic zip-tie might be faster, it is a one-time-use item that eventually turns into microplastic. Natural cordage, however, is biodegradable and infinitely renewable. It represents a deeper understanding of biology and physics in action.
Identifying the Best Plants for Primitive Rope
Success in cordage making starts with the right material. Not every plant is a rope plant. You want fibers that are long, flexible, and strong when dried. Here are the best plants for kids to start with.
Stinging Nettle (Urtica dioica)
Nettle is the gold standard for beginners in temperate climates. It produces long, silky fibers that are surprisingly strong. The challenge is the sting, but this serves as a great safety lesson. Once the plant is dried or boiled, the sting is neutralized, leaving behind incredible material for fine string.
Milkweed (Asclepias syriaca)
Milkweed is famous for its late-season stalks. In the fall, the outer skin of the dead, gray stalks can be peeled away to reveal thick, white fibers. These are easy for small hands to handle because they are robust and don’t break easily during the stripping process.
Dogbane (Apocynum cannabinum)
Also known as “Indian Hemp,” this plant was a favorite among North American indigenous groups. It offers some of the strongest fibers in the wild. The stalks are reddish and hollow, and the fibers are exceptionally long-lasting. It is ideal for kids who want to make a rope they can actually use for heavy tasks.
Yucca and Agave
In arid regions, Yucca and Agave leaves are the primary source. The fibers are locked inside the fleshy leaves. Processing involves “scraping” the green meat away to expose the long, hair-like strands. These fibers are naturally stiff and make very durable, “toothy” rope perfect for lashing.
Inner Tree Bark (Bast)
Trees like Basswood (Linden), Cedar, Willow, and Elm have a fibrous layer between the outer bark and the wood. This is called the “bast” layer. It often requires “retting”—soaking it in water for a week—to soften the glue that holds the fibers together. Once processed, it makes thick, heavy-duty rope for serious fort building.
Step-by-Step: The Reverse-Twist Method
The reverse-twist is the most common technique for making two-ply cordage. It creates a rope that won’t unravel because the two strands are pushing against each other in opposite directions. Follow these steps to guide your child through their first few inches.
1. Prepare the Fibers: Ensure the plant material is dry but slightly supple. If it is too brittle, mist it lightly with water. You want a bundle about half the thickness of a pencil to start with.
2. Create the Kink: Hold the bundle in the middle. Twist it tightly in one direction until it begins to loop or “kink” over itself. This forms an “eye” or a loop at the very top. Pinch this loop between your thumb and forefinger.
3. The First Twist: You should now have two strands hanging down. Take the strand furthest away from you. Twist it away from your body (clockwise) between your fingers. Do this until the strand is tight and wants to curl.
4. The Wrap: Take that same twisted strand and pull it over the other strand toward you (counter-clockwise). Now, the strands have swapped places. Pinch the new “intersection” where the strands crossed.
5. Repeat: Always take the strand that is now furthest away. Twist it away from you, then wrap it over the other strand toward you. This rhythm—twist away, wrap toward—is the secret to strong cordage.
6. Feed the Rope: As you reach the end of a strand, tuck in a new bundle of fiber. Overlap the old end with the new beginning by about two inches. Continue the twist-and-wrap process. The friction of the twist will lock the new piece in place. This is called “splicing.”
The Benefits of Learning Primitive Rope-Making
Why spend an hour making string when you can buy a roll of twine for three dollars? The value isn’t in the product; it’s in the process. This activity hits several developmental milestones for children.
Physical development is the most obvious gain. The “pinch and twist” motion builds incredible grip strength and fine motor control. These are the same muscles used for writing, drawing, and intricate tool work. It requires bilateral coordination—using both hands in sync to maintain tension.
Cognitive benefits include increased focus and patience. Cordage making is meditative. A child cannot rush it; if they do, the rope becomes lumpy or weak. They learn to troubleshoot in real-time, identifying where a strand is getting too thin and figuring out how to add more material without creating a knot.
The emotional connection to history is also profound. When a child realizes that people have been doing this for 30,000 years, they feel like they belong to a larger human story. It builds self-reliance. If they lose their gear in the woods, they know they can literally “make” what they need from a dead plant.
Common Pitfalls and How to Avoid Them
Even simple skills have a learning curve. If your child gets frustrated, it is likely due to one of these common errors. Watch for these “rope-killers” during the process.
Using Wet or “Green” Fibers: Many beginners harvest a fresh plant and start twisting immediately. As the plant dries, it shrinks. The beautiful tight rope they made will become loose and “slinky” by the next day. Always dry the stalks first, then lightly re-moisten them only if they are too brittle to work.
Inconsistent Tension: If one strand is twisted tighter than the other, the rope will look like a spiral staircase. One strand will wrap around the other instead of the two twisting together. Remind the child to give both strands an equal number of twists before wrapping them.
Weak Splices: If the rope keeps snapping at the joints, the splice is too short. Ensure the new fibers overlap the old ones by at least two inches. Don’t add new fibers to both strands at the same time. Stagger the additions so one strand is always solid while the other is being reinforced.
Over-Twisting: It is possible to be too enthusiastic. If you twist a single strand too hard before the wrap, the individual fibers can snap. You want the strand to be tight enough to resist, but not so tight that it starts to “corkscrew” into tiny hard knots before you wrap it.
Limitations and Real-World Constraints
While natural cordage is amazing, it has limits. Understanding these constraints is part of being a skilled practitioner. This helps manage expectations and ensures safety during use.
Strength is the primary limitation. A handmade nettle string will never match the breaking strength of a piece of commercial 550 Paracord or a high-strength plastic zip-tie. Natural cordage is susceptible to rot if left in a damp environment for months. It is “temporary” in a geological sense, though it can last a season or two if cared for.
Time is the second factor. Manufacturing a fifty-foot ridgeline for a tarp could take days of processing and twisting. For large-scale projects, synthetic rope is often more practical. However, for small lashings, trap triggers, or decorative items, natural cordage is often “good enough” and far more rewarding.
Environmental factors also play a role. You cannot harvest cordage plants in the middle of a blizzard or a deep drought and expect the same fiber quality. Knowledge of the seasons is mandatory. Most bast fibers are best harvested in the late summer or autumn when the plant’s life cycle is complete and the fibers are fully “cured” in the stalk.
Comparing Natural Fibers to Modern Fasteners
It helps to see where natural cordage sits in the hierarchy of tools. While we often reach for the plastic solution, natural fibers offer unique advantages that modern fasteners lack.
| Feature | Natural Cordage | Plastic Zip-Ties |
|---|---|---|
| Cost | Free (Labor only) | Inexpensive |
| Environmental Impact | Biodegradable / Zero Waste | Plastic Waste / Non-recyclable |
| Versatility | Adjustable length/thickness | Fixed lengths/Requires daisy-chaining |
| Skill Required | High (Manual Dexterity) | Low (Click and pull) |
| Long-Term Durability | Prone to rot if wet | UV sunlight causes brittleness |
The table shows that while zip-ties are convenient, they are rigid in their application. Natural cordage allows a child to customize the diameter of the rope to the specific job. Need a fishing line? Twist it thin. Need to drag a log? Twist it thick and multiple-ply. The skill of making rope provides flexibility that a bag of plastic cannot match.
Practical Tips for Success
Once the basic twist is mastered, use these pro tips to improve the quality and speed of the cordage. These adjustments turn “string” into “rope.”
- The Thigh Roll: For faster production, move the twist from your fingers to your thigh. Lay the two strands on your leg, roll them both downward with your palm to twist them, then lift and cross them. This uses larger muscle groups and is much faster than finger-twisting.
- Buffing: If the fibers have woody bits (shives) stuck to them, rub the bundle vigorously between your palms. This “buffing” action breaks off the brittle wood and leaves the soft, flexible fiber behind.
- Tapering the Ends: When adding new fibers, don’t just stick a blunt bundle in. Thin out the end of the new bundle so it blends smoothly into the old one. This prevents “bumps” in your rope that can become weak points.
- Wetting the Hands: If your fingers are slipping, dip them in a little water. Slightly damp skin provides much better grip on smooth fibers like Milkweed or Dogbane.
Advanced Considerations: Multi-Ply and Braiding
For kids who have mastered the two-strand twist, there are ways to scale up the strength of their cordage. These techniques are for serious makers who want to create functional gear for camp.
The Three-Strand Braid is the most familiar, but it doesn’t hold its twist as well as a reverse-wrap. A better “pro” move is to make two long pieces of two-ply cordage and then twist those together using the reverse-wrap again. This creates a “four-ply” rope. Each layer of twisting increases the friction and strength of the final product exponentially.
Another consideration is Retting. If you are using inner tree bark, don’t just peel and twist. Submerge the bark in a bucket of water or a slow-moving stream for 7 to 10 days. Bacteria will eat away the pectin (the glue) holding the fibers together. The result is a pile of clean, silky ribbons that make the highest quality “primitive” rope possible.
Scenario: The Fort-Building Challenge
Imagine your child wants to build a tripod for a “woods kitchen” or a simple lean-to shelter. Instead of handing them a roll of duct tape or a handful of zip-ties, give them a bundle of dried Dogbane or Milkweed stalks.
Step 1: They harvest 20 stalks of dried material.
Step 2: They spend 30 minutes stripping the fibers and buffing them until they have a large “bird’s nest” of material.
Step 3: They twist three separate three-foot sections of two-ply cordage.
Step 4: They use a “clove hitch” and a “tripod lashing” to secure three large branches together.
The result is a structure held together by the very plants that grew around it. The child learns the specific strength of the material and the physics of how a lashing works. If the rope breaks, they don’t go to the store; they refine their technique and make a thicker piece. This cycle of trial, error, and creation is the essence of true learning.
Final Thoughts
Making natural cordage is a gateway skill. It opens the door to weaving, basketry, net-making, and advanced bushcraft. It takes a child away from the “buy and discard” culture of modern toys and places them firmly in the role of the creator. When they hold a piece of rope they made from a plant, they are holding a piece of human history.
Encourage your child to experiment with different plants. Every backyard has a different “flavor” of fiber. Some will be strong, some will be brittle, and some will be surprisingly beautiful. This experimentation builds a scientific mind that observes, tests, and adapts to the environment.
The next time you see a patch of tall, dried weeds, don’t see a chore to be mowed. See a potential rope, a future fort, or the start of a lifelong passion for primitive technology. Put down the plastic and start twisting. You’ll be amazed at the strength you can find in the palm of your hand.
Sources
1 wordpress.com | 2 forgottenskillz.com | 3 uksn.org.uk | 4 wildwaybushcraft.co.uk | 5 plantsnap.com | 6 wordpress.com | 7 wildernesscollege.com | 8 youtube.com | 9 jonsbushcraft.com | 10 georgiabushcraft.com | 11 motherearthnews.com | 12 survivalfitness.uk | 13 militarytrained.com | 14 cabletiesandmore.com | 15 cloopband.com