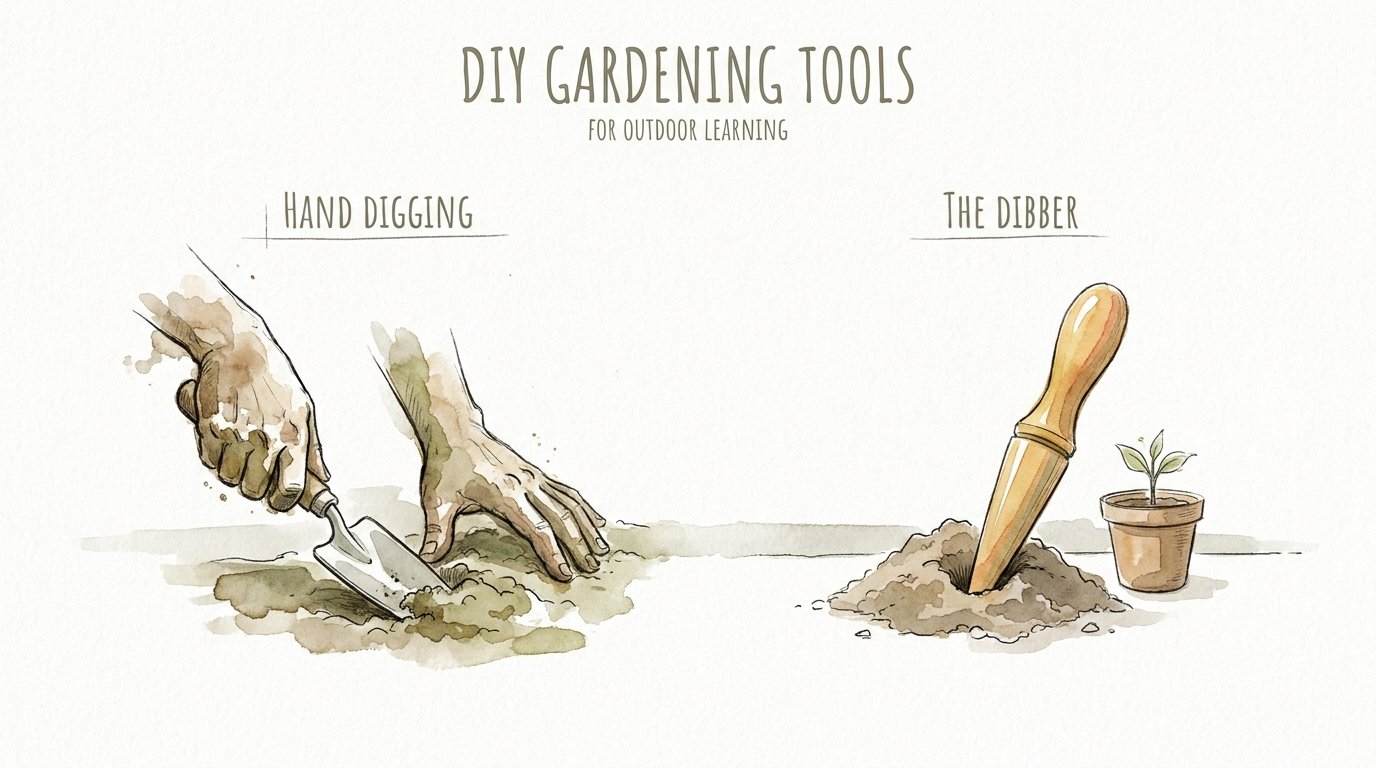
Diy Gardening Tools For Outdoor Learning
Don’t just dig; engineer the perfect environment for a seed to wake up. We often let kids just ‘play in the dirt,’ but when we give them the tools of a master gardener, the psychology changes. A dibber isn’t just a stick—it’s a precision instrument for depth control. Teaching children to use the right tool for the task moves the experience from messy play to purposeful stewardship.

This shift in perspective turns a simple backyard chore into a sophisticated outdoor classroom. Children no longer just drop seeds into random holes. They begin to understand the physics of the soil and the biological needs of the life they are nurturing. Understanding the “why” behind the tool is the first step toward creating a lifelong connection with the natural world.

Diy Gardening Tools For Outdoor Learning
Diy gardening tools for outdoor learning are handmade implements designed to teach children about botany, physics, and responsibility through direct interaction with the earth. These tools bridge the gap between abstract science and hands-on application. A dibber, sometimes called a “dibbler,” is the most iconic example [1.6, 1.14]. It is a slender, pointed tool used to create uniform, narrow holes in the soil for seeds or young transplants [1.3, 1.15].
Historically, these tools date back to Roman times and were often fashioned from old rake handles or sturdy branches [1.6, 1.14]. In an educational setting, they serve as “story sticks” that help kids visualize depth and spacing. Creating these tools at home or in the classroom provides an additional layer of learning as students explore material science and woodworking basics [1.13, 1.15].
The garden becomes a laboratory where every tool has a specific function. Instead of using a broad trowel for every task, students learn that a specialized tool like a dibber reduces soil disturbance and improves seed-to-soil contact [1.3, 1.24]. This approach fosters a sense of craftsmanship and pride in the garden.
Building Your Precision Tool: The Step-by-Step Guide
Creating a custom dibber is a fantastic entry-level woodworking project that requires minimal equipment. You can transform a simple dowel or a scavenged branch into a professional-grade gardening instrument in less than an hour [1.1, 1.10].
Start with a piece of hardwood about 8 to 12 inches long and at least 1.5 inches in diameter [1.1, 1.13]. Hardwoods like oak, maple, or cherry are ideal because they resist the moisture and abrasion of the soil better than softwoods [1.10]. If you are working with children, a thick broom handle or a sturdy rake handle is an excellent starting point [1.6, 1.13].
Taper one end to a rounded point using a belt sander, a wood rasp, or a lathe [1.1, 1.6]. Ensure the point is not needle-sharp; a slightly blunt, rounded tip is more effective at creating a firm “seed bed” at the bottom of the hole [1.1, 1.13]. This rounded shape prevents the tool from creating a narrow air pocket where a seed might get stuck and fail to absorb moisture [1.3, 1.14].
Mark the depth increments on the side of the tool once the shape is complete. Use a file or a wood burner to create permanent lines at every half-inch or one-inch interval [1.1, 1.13]. These marks are critical for outdoor learning, as they allow students to measure the exact requirements of different seeds—such as the 1/4-inch depth needed for tiny carrots or the 2-inch depth required for large beans [1.3, 1.18].
Finish the wood with a non-toxic oil, like linseed or walnut oil, to protect it from the elements [1.1, 1.6]. Avoid synthetic varnishes that can chip off into the soil over time [1.6]. This simple maintenance step teaches children about tool care and the longevity of handmade objects.
The Biological Power of Precision
Using a precision tool like a dibber offers measurable advantages for plant health and germination rates. Traditional digging often creates loose, uneven holes that can lead to “air pockets” around the seed [1.3]. These pockets are the primary cause of failed germination because they prevent the seed from absorbing the consistent moisture it needs to break dormancy [1.3, 1.25].
A dibber creates a clean, cylindrical cavity with a firm base. Dropping a seed into this hole ensures immediate and direct contact with the surrounding moist earth [1.3, 1.25]. Research has shown that this method can reduce seed waste by nearly 40% compared to broadcasting or using a broad trowel [1.3].
Precision tools also minimize soil compaction in the surrounding area. Broad digging can disrupt the delicate “soil crumbs” and the microscopic networks of fungi and bacteria that support plant life [1.24]. A slender dibber penetrates the soil with surgical precision, leaving the surrounding structure intact and airy for new roots to explore [1.3, 1.24].
Beyond the biology, the physical development benefits for children are significant. Manipulating a dibber helps develop fine motor skills and hand-eye coordination [1.4, 1.5, 1.11]. Tasks like measuring depth and allocating specific numbers of seeds to each hole also integrate early math and literacy skills into the gardening experience [1.2, 1.8, 1.9].
Avoid the Pitfalls: Common Planting Mistakes
Mistakes are part of the learning process, but some common errors can lead to frustration in the garden. One of the most frequent errors is planting seeds too deep [1.3]. If a seed is buried deeper than its energy reserves allow, the sprout will die before it ever reaches the sunlight [1.3, 1.15].
Another common pitfall is the “twisting” error. While a slight twist can help the dibber penetrate hard soil, excessive twisting in wet, heavy clay can “glaze” the sides of the hole [1.3]. This creates a hard, smooth wall that delicate new roots struggle to penetrate, effectively trapping the plant in a tiny underground prison.
Forgetting to label is the final hurdle. In the excitement of planting, it is easy to lose track of which row contains which crop. Using DIY plant markers—made from painted rocks, wooden spoons, or recycled plastic containers—is essential for maintaining organization and tracking the success of different planting depths [1.12, 1.22, 1.23].
Understanding the Boundaries
Precision tools are incredible, but they are not universal solutions for every garden. Soil type is the most significant limitation. In extremely rocky or heavily compacted clay, a wooden dibber may struggle to penetrate without pre-moistening the soil [1.3, 1.14]. In these cases, a steel-tipped version or a specialized “bulb planter” might be necessary [1.14, 1.15].
Scale also plays a role in tool choice. For a small raised bed or a school garden, a hand dibber is perfect. However, if you are planting a quarter-acre field, the manual nature of the tool becomes a bottleneck. In those scenarios, mechanical seeders or “jab planters” become more efficient choices for the serious practitioner [1.3, 1.25].
Environmental conditions can also affect performance. Using a dibber in bone-dry soil may cause the walls of the hole to collapse immediately after the tool is withdrawn. Successful dibbing usually requires soil that is “friable”—moist enough to hold its shape but not so wet that it sticks to the tool [1.24].
HAND DIGGING vs THE DIBBER: A Master Class in Efficiency
Choosing the right method can drastically change your garden’s output. While hand digging is a timeless skill that connects you directly to the soil, it lacks the consistency required for high-stakes germination [1.24].
| Factor | Hand Digging | The Dibber |
|---|---|---|
| Depth Control | Estimated; varies by hole | Precise; measured by tool marks |
| Soil Disturbance | High; disrupts soil structure | Minimal; targeted penetration |
| Seed-to-Soil Contact | Moderate; prone to air pockets | Excellent; firm seed bed |
| Efficiency | Slower for large quantities | Rapid; repeatable movement |
| Educational Value | Sensory “play” focus | Scientific “precision” focus |
Hand digging is excellent for developing a “feel” for the soil’s moisture and texture [1.24]. However, the dibber is the superior choice for anyone looking to maximize their harvest and teach the value of precision engineering in horticulture [1.3].
Mastering the Craft: Pro Tips for Success
Applying a few advanced techniques can elevate your outdoor learning experience. When working with very small seeds, use the dibber to create a shallow indent rather than a deep hole. This prevents the seeds from being buried too deep during the first watering.
Use a string grid or a “seed ruler” alongside your dibber to ensure perfect spacing [1.3, 1.15]. This visual guide helps children understand the concept of “resource competition”—explaining that plants need their own space to access sunlight, water, and nutrients [1.24, 1.25].
Marking your tool with “color-coded” bands can help younger children who may not yet be comfortable with numbers. A green band might indicate the depth for peas, while a yellow band shows the depth for radishes [1.2, 1.13]. This sensory-based system makes the tool accessible to all ages.
The Science of the Seed Bed
Serious practitioners know that the “seed bed” is the most important part of the garden. The goal is to create a nursery that is safe, nurturing, and physically supportive from day one [1.24]. A dibber achieves this by slightly compressing the soil at the base of the hole, which facilitates capillary action [1.25].
Capillary action is the process by which water moves upward through small spaces in the soil to reach the seed. By creating a firm contact point, you ensure that the seed stays hydrated even as the top layer of soil dries out in the sun [1.3]. This is a critical concept for advanced beginners to grasp: you aren’t just making a hole; you are building a hydraulic pump for the seed.
Furthermore, the narrow profile of the dibber hole helps prevent “surface crusting.” When large areas of soil are disturbed and then watered, they can form a hard, baked crust that sprouts cannot break through. The small, focused opening of a dibber hole remains more resilient to this effect, allowing for easier emergence [1.3].
Classroom Case Study: The Germination Race
Imagine a classroom where two groups of students are given identical trays of soil and carrot seeds. Group A uses their fingers and trowels to plant their seeds, while Group B uses a measured DIY dibber to ensure every seed is exactly 1/4 inch deep and has firm soil contact.
Within seven to ten days, the results are usually clear. Group B’s tray will show uniform, straight rows of sprouts with nearly 100% emergence [1.3]. Group A’s tray often features sporadic growth, with some seeds failing to sprout and others emerging weeks later.
This experiment teaches children the “law of cause and effect” [1.2, 1.5, 1.11]. They see firsthand that the care and precision they put into the planting process directly dictate the success of their harvest. It transforms the garden from a place of chance into a place of predictable, scientific success.
Final Thoughts
Gardening with precision tools like the dibber changes the fundamental relationship between a child and the earth. It shifts the focus from simple destruction and digging to careful engineering and stewardship. By providing tools that demand measurement and accuracy, we empower the next generation of gardeners to think like scientists.
Building these tools is just the beginning. The real magic happens when a child realizes that their hand-turned piece of wood is the reason a tiny seed survived and thrived. This sense of accomplishment builds resilience, patience, and a deep, lasting respect for the complexities of nature.
Experiment with your own DIY tool designs and watch how the psychology of your garden space evolves. Whether you are a parent, an educator, or a beginner gardener, moving toward purposeful stewardship will always yield a more bountiful harvest than messy play ever could.
Sources
1 homegrown-garden.com | 2 turningforprofit.com | 3 aliexpress.com | 4 meaningfulmama.com | 5 growinghealthykids.co.uk | 6 house-of-hacks.com | 7 thecelticfarm.com | 8 msu.edu | 9 jardineer.com | 10 kidsgrowingcity.ca | 11 thekidcollective.co.uk | 12 theycallmeblessed.org