Natural Dyeing With Kitchen Scraps
Your compost bin is currently holding the secret colors of the earth—why are you buying bottled chemicals? The most beautiful pigments don’t come from a factory; they come from your vegetable drawer. This summer, transform old t-shirts using nothing but avocados, onion skins, and the power of chemistry.

You have likely looked at a pile of onion skins or a handful of avocado pits and seen nothing but waste. In reality, these kitchen scraps are packed with complex organic compounds just waiting to bind with fiber. Natural dyeing is the ancient art of extracting these pigments to create wearable art that is as sustainable as it is stunning.
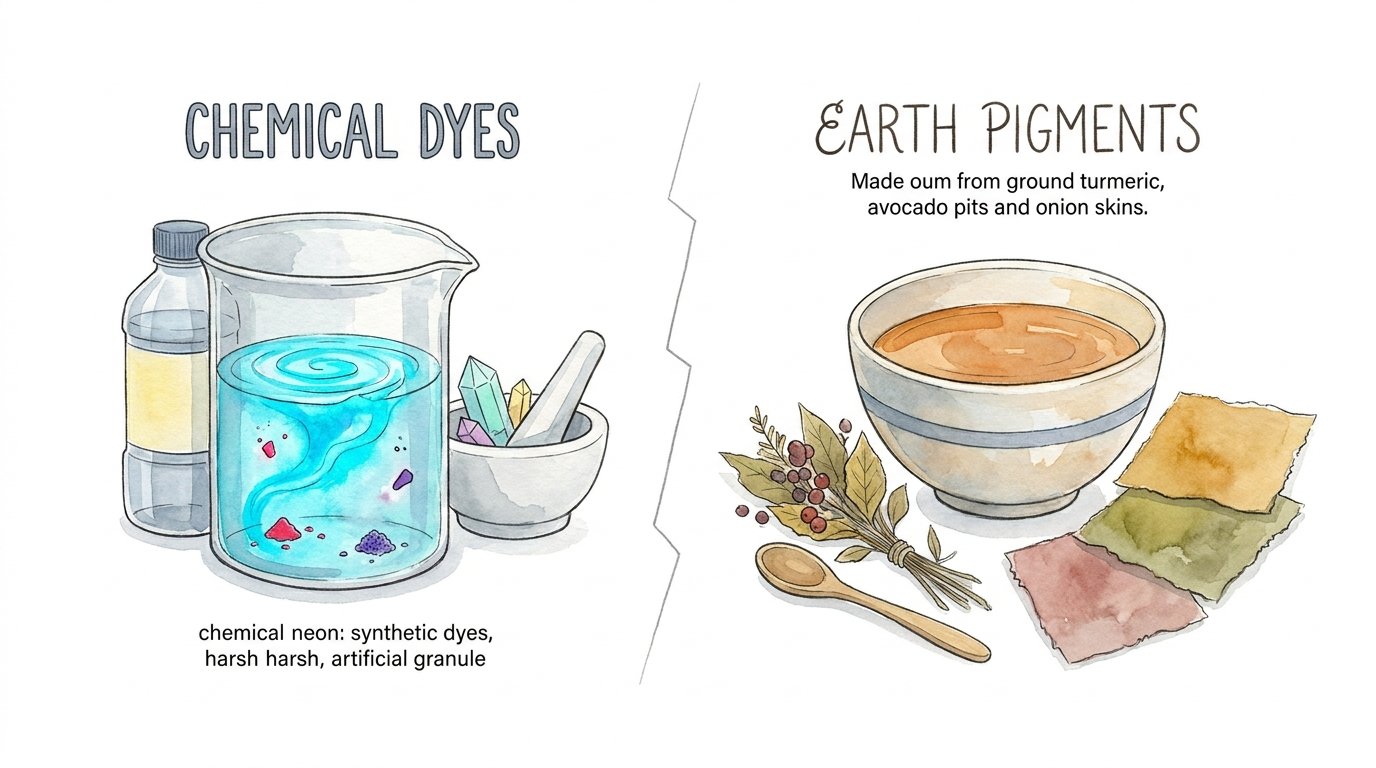
Whether you are a seasoned textile artist or a curious beginner, the transition from synthetic store-bought dyes to earth pigments is a revelation. It is a slow, intentional process that rewards patience with colors that feel alive. Forget the flat, neon hues of the grocery store aisle; we are talking about dusty roses, golden ambers, and deep forest greens.
Natural Dyeing With Kitchen Scraps
Natural dyeing with kitchen scraps is the process of using organic waste materials to create pigment-rich baths for textiles. It turns the “circular economy” into a hands-on craft. Instead of sending peels and pits to the landfill, you are extracting their molecular beauty and fixing it onto natural fibers like cotton, linen, silk, or wool.
This practice exists at the intersection of history and science. Humans have used plants to color their world for millennia, from the royal purples of crushed snails to the deep blues of indigo. Using kitchen waste is simply the modern, accessible version of this legacy. It allows us to reclaim a lost connection to our clothing and the environment.
In the real world, this technique is used by boutique fashion designers, eco-conscious quilters, and home hobbyists looking to upcycle tired garments. It provides a way to refresh a wardrobe without consuming new resources. It is also an incredible chemistry lesson, demonstrating how tannins and pH levels can completely shift a color’s identity.
The Essential Chemistry: Scouring and Mordanting
If you want color that lasts longer than a single wash, you cannot just throw a shirt into a pot of cabbage water. Successful dyeing requires two critical preparation steps: scouring and mordanting. Think of these as the “primer” for your fabric.
1. Scouring (The Deep Clean)
New fabrics often come coated in “sizing” or industrial waxes, while old clothes carry body oils and detergent residue. These barriers block the dye from reaching the fiber. Scouring is a specialized deep wash that strips these away. For cotton and linen (cellulose fibers), you simmer the fabric with soda ash and a neutral detergent for about two hours. For wool and silk (protein fibers), a gentler wash with a pH-neutral soap is used to avoid damaging the delicate structure.
2. Mordanting (The Chemical Bridge)
Most natural dyes are “adjective” dyes, meaning they need a middleman to help them stick to the fiber. This middleman is called a mordant—from the Latin mordere, meaning “to bite.” A mordant, such as Alum (potassium aluminum sulfate), creates a chemical bond between the dye molecule and the fabric. Without it, your beautiful colors will likely wash away or fade rapidly in the sun.
Avocados and onion skins are unique because they are high in tannins. Tannins act as a “substantive” dye or a natural mordant, meaning they can sometimes bond to the fiber without extra help. However, even with these scraps, using a mineral mordant like Alum will almost always result in deeper, more lightfast colors.
The Scraps Library: Colors from Your Kitchen
Every vegetable has a secret identity. Some produce exactly the color you’d expect, while others are master of disguise. Here is what you can find in your pantry right now:
- Avocados (Pits and Skins): Surprisingly, these produce shades of blush, dusty rose, and even deep coral. The pits are particularly concentrated.
- Yellow Onion Skins: These are the gold standard for beginners. They produce vibrant oranges, burnt yellows, and rich ambers.
- Red Onion Skins: Unlike the yellow variety, these can lean toward earthy greens or deep maroons depending on the water’s pH.
- Black Beans: If you soak dried black beans and use the soaking water (keep the beans for tacos!), you can achieve ethereal blues and soft purples.
- Pomegranate Rinds: These are high in tannin and produce beautiful, buttery yellows and tans.
- Red Cabbage: A classic pH indicator. It can produce everything from purple to bright blue or even green, though it is prone to fading without careful fixing.
How to Dye Your Fabric: A Step-by-Step Guide
Ready to start? The process is simple but requires a bit of time. Do not rush the extraction; the best colors come to those who wait.
Step 1: Collect and Store Your Scraps. You don’t need to eat ten avocados in one day. Save skins and pits in the freezer until you have enough to equal the weight of the fabric you want to dye. For onion skins, a large paper bag in the pantry works perfectly.
Step 2: Prepare the Fiber. Scour your fabric as described above. If using a mordant like Alum, dissolve it in hot water (about 10-15% of the weight of the dry fabric) and simmer your wet fabric in it for an hour. Let it cool in the pot for the best absorption.
Step 3: Extract the Dye. Place your kitchen scraps in a large stainless steel pot and cover with plenty of water. Bring to a low simmer—do not boil aggressively, as high heat can “brown” or dull some delicate colors like avocado pink. Simmer for at least an hour until the water is dark and saturated. For the deepest color, let the scraps soak in the water overnight.
Step 4: Strain the Bath. Use a fine mesh strainer or cheesecloth to remove all solid pieces of food. If bits of skin or pit stay in the bath, they can cause uneven spotting on your fabric.
Step 5: The Dyeing Phase. Submerge your wet, mordanted fabric into the dye bath. Make sure there is enough water for the fabric to move freely; crowding leads to splotchy results. Simmer gently for 45 to 60 minutes. Again, leaving the fabric to cool in the pot overnight will yield the most vibrant results.
Step 6: Rinse and Dry. Rinse the fabric in lukewarm water until the water runs clear. Hang to dry in the shade, as direct sunlight can cause premature fading of fresh natural dyes.
Benefits of Choosing Earth Pigments
Choosing kitchen scraps over synthetic dyes is a powerful statement for both your health and the planet. Synthetic dyes are often derived from petrochemicals and can contain heavy metals or toxic “azo” compounds that are harmful to waterways and the people working in textile factories.
Earth pigments are biodegradable and generally non-toxic. When you are finished with your dye bath, the “exhaust” water can often be poured onto your garden (depending on the mordants used) or down the drain without guilt. This approach also reduces food waste by giving a second life to materials that would otherwise be discarded.
There is also an aesthetic advantage. Natural dyes produce “living” colors. Because they are made of multiple complex molecules rather than a single synthetic one, they have a depth and harmony that chemical dyes cannot replicate. Two naturally dyed pieces will almost always look beautiful next to each other because they share the same organic base.
Challenges and Common Mistakes
The most common pitfall for beginners is rushing the process. If you skip the scouring step, your dye may look great at first but will wash out unevenly within weeks. The oils on the fabric act as a shield, preventing the pigment from truly “biting” into the fibers.
Another error is boiling the dye bath. While you want heat to extract the color, boiling can break down the sensitive pigment molecules. For example, avocado pits contain both pink and brown tannins. Excessive heat brings out the muddy browns, while a gentle simmer preserves the clear, bright pinks.
Finally, many new dyers are surprised by unexpected color shifts. The minerals in your tap water can drastically change your results. Iron-heavy water will “sadden” colors, turning bright yellows into olive greens or pinks into greys. If your results aren’t what you expected, the secret often lies in your water chemistry.
Limitations and Reality Checks
Natural dyeing is an exercise in letting go of perfection. Unlike synthetic dyes, which are formulated for perfect consistency, kitchen scrap dyes are variable. The onion skins you use in July might produce a different shade than the ones you use in December because of the soil they grew in.
Lightfastness is another realistic constraint. Colors like turmeric and red cabbage are notoriously “fugitive,” meaning they fade quickly when exposed to sunlight. While they are fun for experimentation, they are not ideal for heirloom pieces or garments you plan to wear daily in the sun. Stick to avocados, onion skins, and pomegranate for more durable results.
Be aware of fiber content as well. Natural dyes generally only work on natural fibers. If you dye a “cotton” t-shirt that was sewn with polyester thread, the fabric will change color but the stitching will remain white. This can create a cool “heritage” look, but it is often a surprise to the unprepared.
Comparison: Earth Pigments vs. Chemical Dyes
Understanding the trade-offs between natural and synthetic options helps you choose the right tool for your project. This table breaks down the key differences based on common practitioner experiences.
| Feature | Earth Pigments (Kitchen Scraps) | Chemical Dyes (Synthetic) |
|---|---|---|
| Cost | Nearly zero; uses waste. | Moderate; requires purchase. |
| Safety | Generally non-toxic and food-safe. | Requires gloves/ventilation; can be toxic. |
| Complexity | Higher; requires scouring and mordanting. | Lower; often “one-step” processes. |
| Consistency | Unpredictable; varies by batch. | Highly predictable and repeatable. |
| Eco-Impact | Low; biodegradable and upcycled. | High; petrochemical-based, water pollutant. |
| Vibrancy | Soft, earthy, complex tones. | Bright, neon, and high-saturation. |
Practical Tips for Success
To take your dyeing to the next level, start thinking like a chemist. Small adjustments to your environment can lead to massive shifts in your color palette.
- Use Non-Reactive Pots: Stainless steel or unchipped enamel are the best choices. Avoid aluminum or iron pots unless you want those metals to act as a mordant and shift your colors.
- pH Shifting: This is where the magic happens. After dyeing, dip your fabric into a “modifier” bath. Adding vinegar (acid) can turn red cabbage dye pink, while adding baking soda (base) can turn it blue or green.
- Freeze Your Scraps: Freezing actually helps break down the cell walls of pits and skins, making it easier for the dye to escape during the extraction phase.
- The “WOF” Rule: Use the “Weight of Fabric” (WOF) to calculate your ratios. For deep colors, aim for a 1:1 ratio—one pound of scraps for every one pound of dry fabric.
Advanced Considerations: Expanding the Palette
Once you have mastered the basic dye bath, you can explore “bundle dyeing” or “eco-printing.” This involves laying your kitchen scraps directly onto the fabric, rolling it up tightly, and steaming it. This creates localized “explosions” of color and prints of the actual shapes of the onion skins or herbs.
You should also consider the “exhaust bath.” After you remove your fabric from the dye, there is often still pigment left in the water. Instead of dumping it, throw in a second, lighter piece of fabric. This “second exhaust” will produce a softer, pastel version of the original color, ensuring no molecule of pigment goes to waste.
For those looking for permanent dark tones, look into an “iron liquor.” You can make this at home by soaking rusty nails in a jar of water and vinegar for a few weeks. Adding a small splash of this to an avocado or onion skin bath will “sadden” the color, shifting pinks into sophisticated greys and yellows into deep olives.
Example Scenario: The White T-Shirt Revival
Imagine you have a favorite white cotton t-shirt that has developed a faint yellow stain near the collar. Instead of tossing it, you decide to upcycle it using onion skins. You weigh the shirt and find it is roughly 200 grams. You gather about 200 grams of yellow onion skins from your pantry and local grocer.
First, you scour the shirt in a pot with a teaspoon of soda ash for an hour. The water turns murky grey—that is the industrial residue leaving the fiber. You then mordant the shirt with Alum. Meanwhile, you simmer the onion skins in a separate pot. Within 20 minutes, the water is a deep, glowing orange.
After straining the skins, you submerge the shirt. You decide to stir it every fifteen minutes to ensure an even “solid” dye. After an hour of simmering and an overnight soak, the shirt emerges as a brilliant, sun-kissed gold. The original stain is completely masked by the rich, organic pigment. You have just created a custom designer garment for the cost of a few onions.
Final Thoughts
Natural dyeing with kitchen scraps is more than just a craft; it is a mindset shift. It encourages us to look at our “waste” as a resource and our clothing as a canvas for the natural world. The colors you create will have a story—they are the literal essence of the food that nourished you.
Experimentation is the heart of this process. Do not be afraid to fail or to end up with a color you didn’t expect. Every “mistake” is a data point in your journey as a natural dyer. Start with those onion skins tonight and see where the chemistry takes you. You might just find that the most vibrant parts of your wardrobe have been hiding in your compost all along.
If you find yourself hooked, consider exploring other natural pigments found in your backyard, like walnut hulls or oak galls. The world is full of color; you just need to know how to bite into it.
Sources
1 lacreativemama.com | 2 georgeweil.com | 3 pacificsciencecenter.org | 4 wildcolours.co.uk | 5 nolliebean.com | 6 berbostudio.com | 7 motherearthnews.com | 8 youtube.com | 9 saturday-club.org | 10 naturaldyes.ca | 11 youtube.com | 12 researchgate.net | 13 goodancestor.co | 14 nih.gov | 15 liberty.edu | 16 tift-admin.com | 17 marylandnature.org | 18 threadcollective.com.au | 19 sustainability-directory.com | 20 fabrics-store.com